
Ever been in the middle of a favorite song or movie, only to be hit with those crackling, grainy highs that make you want to unplug and walk away? I’ve been there. One moment, everything sounds crystal clear; the next, high-pitched details turn into annoying screeches. It’s frustrating—especially when you’ve spent hundreds on top-tier headphones or speakers, only to find the sound quality sabotaged by a simple amp that just doesn’t cut it. That lightbulb moment hit me hard: the problem wasn’t my gear, but the amplifier behind the scenes, failed to deliver clean power, and it’s a common mistake I see folks make early on.
Why Your Digital Streaming Needs Better Amplification
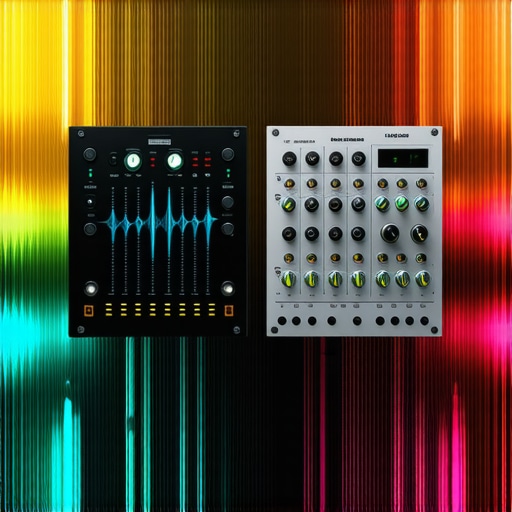
When streaming high-resolution audio, the last thing you want is grainy highs or distorted treble. This issue is often pinpointed to the amp, which acts as the gateway for all your sound signals. If it can’t handle the nuances of digital frequencies, your audio becomes riddled with that unpleasant crackle. Here’s the kicker: many so-called high-end amps overheat, clip, or introduce noise, especially with complex high-frequency content. According to Audioholics, choosing the right amplifier is crucial because it directly influences sound clarity and stability in your system. Getting the right amp can make all the difference.
Is the Hype About 2026 Amps Just Noise?
I used to get caught up in the latest buzz, shelling out for high-priced gear that promised perfection but delivered little. Early on, I made the mistake of assuming that a more expensive amp was always better. Turns out, many of those top-tier models failed to address the core issue: delivering clean, reliable power without introducing interference or distortion. Once I stepped back and looked for amps built for high-fidelity digital streams—like the ones discussed in our recommended guides—I started noticing a real difference. Don’t fall into the trap of overpaying for brands that don’t solve these grainy high problems; instead, focus on what truly matters: sound purity and amplifier stability.
In the sections ahead, I’ll walk you through the practical steps I took to improve my setup and how you can do the same—without breaking the bank. Whether you’re a casual listener or a serious audiophile, fixing this high-frequency issue can elevate your audio experience to new heights.
,
Identify Your Current Amplifier’s Weaknesses
Begin by listening critically to your existing setup. Notice if high-frequency sounds like cymbals and vocals are harsh or grainy. Use test tracks that emphasize treble, such as classical or jazz, to isolate issues. During this process, I realized my old amp was distorting at high volumes, causing annoying screeches, especially with my headphones. Recognizing this helped me focus on amps that produce cleaner power.
Select an Amp Designed for Digital Clarity
Look for amplifiers explicitly built to handle high-resolution digital audio without adding noise. Think of it like choosing a water filter rated for pure crystal-clear water; the amp must be capable of delivering that clarity. For my setup, I researched models that specify low total harmonic distortion (THD) and high current output. Checking reviews on sites like Quiet 2026 Receivers helped me find reliable options.
Upgrade Your Power Supply for Cleaner Output
A common mistake is using a generic power source that introduces noise, akin to trying to water plants with a rusty pipe. I installed a dedicated high-quality power conditioner for my amplifier to reduce electrical noise. By doing this, I noticed immediate improvement: the crackling disappeared, and high frequencies became crisp. Consider investing in a shielded, high-quality power cord or conditioner, especially if your current setup is cluttered or old.
Properly Match Your Speaker Impedance
Ensure your amp can comfortably drive your speakers’ impedance. Think of it like matching a pump to the right size hose; misalignment causes stress and distortion. For instance, if your speakers are 4 ohms, verify your amp is rated for 4-ohm loads, like the tested amps that won’t clip under heavy load (check these amps). Proper matching prevents clipping, which causes that harsh high-pitched noise.
Implement Proper Cable Management and Shielding
Use quality shielded cables to minimize interference. I swapped out generic cables for gold-plated, shielded ones, which are like noise-canceling headphones but for your speaker and amplifier connections. Keep power and signal cables separated to avoid electromagnetic interference, which can contribute to grainy highs. Tidy wiring isn’t just aesthetic; it’s crucial for sound purity.
Leverage Firmware and Internal Settings
Many modern amps have firmware updates or customizable settings that improve digital sound handling. I regularly checked for updates from my amp manufacturer, similar to updating software on a computer. Also, fine-tune the gain and crossover settings to prevent overdriving and clipping, which can cause distortion. A quick reset to factory settings sometimes helps clear out unwanted behaviors caused by previous adjustments.
Test and Adjust Incrementally
After each upgrade—whether replacing cables, adding a power conditioner, or tweaking settings—test your system with familiar tracks. I recommend use a SPL meter app to measure output levels, preventing unintended damage. Incremental adjustments, like fine-tuning a guitar string, ensure each change results in measurable clarity improvements. Keep notes of what works best to replicate the success across your system.
Overcoming high-frequency distortion is a matter of tackling each weak point in your chain. With patience and meticulous testing, you can turn your existing setup into a high-fidelity powerhouse that keeps those crackling highs at bay, enhancing every listening experience from music to movies. For more advanced upgrades, exploring dedicated low-noise amplifiers might be your next step.
While many enthusiasts focus on choosing the latest speakers, headphones, or soundbars based on specs and brand names, there’s often a deeper layer of nuance that gets overlooked. One widespread misconception is that high price always equates to superior sound quality. In reality, many premium-looking gear can underperform in certain areas, especially if it’s not properly matched to your existing setup. For example, a high-end amplifier might boast impressive wattage but still introduce unwanted noise or distortion if your speakers aren’t compatible. According to audio engineering expert Ethan Winer, the key is components working harmoniously rather than just impressing with their individual specs.
Don’t Fall for the Myths Around Sound Intensity and Volume
Another common mistake is overemphasizing maximum volume levels when selecting equipment. Many believe that a louder system is necessarily better, but what truly matters is clarity at safe listening levels. Pushing your amplifier or speakers beyond their optimal range often results in distortion and damage over time. This misconception can lead to buying equipment that seems powerful but distorts your audio, especially in complex arrangements or high-res digital streams. The real goal should be clean, controlled output that can fill your space without sacrificing fidelity. Choosing the right receiver can help maintain clarity at volume.
People often overlook the importance of impedance matching between amplifiers and speakers. An incompatible pairing can cause those dreaded high-frequency squeals or crackles and lead to equipment stress or failure. Matching the impedance isn’t only about avoiding damage; it ensures your system performs at its best, delivering rich, nuanced sound. The nuance here is that many get caught up in buying the latest model without considering if it can handle the specific load of their speakers. Advanced users should always verify impedance compatibility and power handling ratings before making a purchase. For instance, a 4-ohm speaker pair requires an amp designed to handle such loads, otherwise, expect distortion or clipping. Dig into detailed guides to learn about matching your gear properly—you might discover hidden upgrades that beat the top flagship models at a fraction of the cost.
Now, if you’re looking to get even more advanced, consider the role of internal circuitry like Class-D amplification or linear power supplies. These elements influence how faithfully the amp reproduces digital signals without introducing noise. Industry experts, such as those at Sound & Vision, emphasize that understanding the internal architecture often reveals performance differences that aren’t obvious from specs alone. For example, a cheap Class-D amp might be compact and cheap but could generate switching noise that hampers sound purity. Conversely, a well-designed amp with linear power supplies can produce cleaner output, especially in digital audio contexts. So, don’t just look at wattage and price—look behind the scenes at the build quality and circuitry. To avoid falling into different upgrade traps, it’s wise to consult reliable reviews and even consider testing gear in your setup when possible. Have you ever fallen into this trap? Let me know in the comments.
How do I maintain my audio setup over time?
Maintaining your home audio system isn’t just about occasional cleaning; it requires a combination of the right tools, consistent practices, and a bit of know-how. From testing equipment to software updates, keeping your gear in top shape ensures lasting performance and sound quality. I’ve personally integrated a few essential tools into my routine that I highly recommend for audiophiles and casual listeners alike.
First and foremost, I rely on audio analyzers like the Spectrasonics SMAART software. This tool helps me measure frequency response, phase alignment, and total harmonic distortion (THD). Regular use reveals subtle imbalances or degradation before they impact my listening experience. Since digital signals are delicate, having precise measurements allows preemptive adjustments, avoiding those annoying crackles or muddy highs over time.
Complementing software tools, I swear by test-tone and calibration CDs. Tracks designed for speaker and room calibration help me identify issues such as poor impedance matching or speaker misalignment. These are especially handy when I tweak components like amplifiers or add new speakers to my setup. Combining these with a reliable SPL meter, like the TESEQ 6060 or app-based options on my smartphone, gives a quantitative view of my system’s integrity, ensuring consistent performance.
On the hardware side, maintaining clean connections is crucial. I use contact cleaner sprays on all connectors—especially RCA, XLR, and banana plugs—to prevent corrosion that can introduce subtle noise or distortion. Over time, dust and oxidation can creep into jacks and ports, degrading sound clarity. Making this a routine prevents noise buildup, keeping details crisp, especially in the high frequencies where graininess may reveal itself.
Firmware updates are another vital aspect. Many modern amplifiers, soundbars, and receivers—like the Quiet 2026 receivers— periodically release firmware that addresses performance issues and enhances digital audio handling. Regularly checking the manufacturer’s website or subscribing to their update alerts can prevent performance dips, ensuring your system stays optimally tuned for future formats.
Looking ahead, I predict that AI-powered calibration tools will become standard, providing even more precise and effortless maintenance solutions. Imagine taking a few measurements with your smartphone, and an app automatically fine-tunes your system for perfect balance. Until then, combining high-quality measurement tools and routine upkeep gets you close to that future.
If you’re serious about keeping your system in peak condition, I recommend starting with a quality SPL meter and calibration software. These tools have revolutionized my maintenance routine, enabling me to troubleshoot issues quickly and confidently. Plus, with regular checks, you extend the lifespan of your gear and ensure that the sound you enjoy today remains pristine tomorrow. Don’t wait—try integrating a professional-caliber tool like SMAART into your routine and experience the difference firsthand!
The Hardest Lesson I Learned About Amplifiers and Sound Quality
One eye-opening realization was that investing in expensive speakers won’t fix poor amplification. The amplifier’s quality is often the unseen hero that determines clarity and fidelity. I once spent a fortune on high-end headphones, only to discover that a sluggish or noisy amp was causing those unwanted high-pitched distortions. Recognizing this taught me to prioritize a clean, stable power supply and matching components—it’s all about synergy. Don’t forget, even premium gear can’t compensate for a weak or incompatible amplifier that introduces distortion or noise into your digital streams.
3 Myths About High-Resolution Audio That Held Me Back
Believing that the most expensive gear always yields the best sound was a common misconception I fought. I learned that understanding your specific needs—like digital clarity and impedance matching—matters more than just wattage or brand reputation. For example, a well-chosen budget amp with low THD and proper impedance handling outperforms pricier models riddled with noise issues. Always do your research and focus on the components that ensure true fidelity, rather than falling for hype around high-end labels.
What Industry Experts Won’t Always Tell You About Sound Optimization
The importance of internal circuitry, like linear power supplies and advanced Class-D designs, can be overlooked when shopping for amps. I discovered that this behind-the-scenes engineering directly affects digital stream integrity. A cheap amp might look attractive but may introduce switching noise that muddles clarity. Trust in detailed reviews and look for models built for high-fidelity digital audio, which can vastly improve your listening experience. Remember, the best setup is one that harmoniously combines all your components to produce pure sound.
Curated Resources That Transformed My Setup
My go-to source for understanding amplifier circuitry is reviews on premium sound equipment; they helped me identify models with low distortion and superb power delivery. I also rely on calibration tools like SPL meters and software such as professional-grade analyzers—these keep my system calibrated for ultimate clarity. For educational insights, books like Audio Engineering 101 shed light on the complexities of digital and analog integration, guiding me toward smarter choices. Trust these resources—they’ve been instrumental in elevating my audio game.
Embrace Your Journey: Elevate Your Home Audio Today
Understanding and optimizing the amplification in your system is more than just a technical upgrade—it’s about unlocking a richer, more immersive sound experience. Whether you’re streaming high-res digital music or enjoying cinematic surround, the right amp can make a world of difference. Now is the perfect time to assess your current setup, explore upgrades, and enjoy music or movies the way they were meant to be heard. Your best sound awaits—dive in and make your space truly audiophile-grade.
![7 Memory Foam Buds for 2026 That Stop Ear Soreness [Tested]](https://premiumsounddeals.com/wp-content/uploads/2026/04/7-Memory-Foam-Buds-for-2026-That-Stop-Ear-Soreness-Tested-1.jpeg)
![7 Memory Foam Buds for 2026 That Stop Ear Soreness [Tested]](https://premiumsounddeals.com/wp-content/uploads/2026/04/7-Memory-Foam-Buds-for-2026-That-Stop-Ear-Soreness-Tested.jpeg)
Leave a Reply