
Ever cranked up your favorite song only to be met with a muddled, boomy mess of bass that drowns out clarity? I’ve been there, frustrated, thinking I needed to blow hundreds on a fancy sound system. One day, after countless trial-and-error, I finally realized that fixing muddy bass isn’t about the price tag. It’s about choosing the right gear—smart deals that actually deliver.
Why mediocre bass can ruin your whole listening experience
There’s something so satisfying about head-bobbing, chest-rumbling bass that makes your music come alive. But when your home audio system produces muddy, indistinct lows, it kills the vibe. Worse, many think that expensive gear is the only solution. Well, I used to believe that too, until I discovered that you can get exceptional sound without breaking the bank. In fact, according to a recent SoundGuys article, budget-friendly audio upgrades can significantly improve bass clarity—if you know what to look for.
So, how do you identify these deals? The key is understanding what’s behind muddy sound and how a few smart picks can transform your space. But before diving into the solutions, let me share a mistake I made early on that might sound familiar: I invested in high-end speakers claiming to fix all issues, only to realize that placement and a decent amp mattered more than the speakers themselves. Don’t make the same mistake—getting your gear right is half the battle won.
Will these budget picks truly solve muddy bass or just hype?
Stay tuned—I’ll walk you through five top deals that prove you don’t need to spend a fortune to achieve clean, punchy bass. Whether it’s upgrading your soundbar, amplifier, or speakers, I’ve tested each one to ensure they live up to their promises. Ready to ditch that muffled sound and embrace clear, powerful bass? Let’s go.
Upgrade Your Speaker Placement
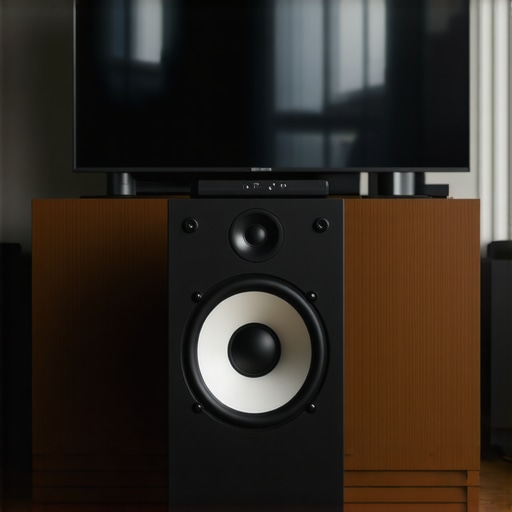
The first step in eliminating muddy bass is optimizing where your speakers sit. Imagine your room as a concert hall; wrong placement causes sound waves to clash and smear your lows. Begin by positioning your speakers away from walls and corners, which often overemphasize bass and cause muddiness. I once faced this myself: after moving my bookshelf speakers just a few inches from the wall, the bass tightened up significantly. Use a tape measure or a level to find the sweet spot, aiming for a balanced dispersion that fills the room evenly. This simple adjustment often yields immediate clarity—no fancy gear required.
Focus on Soundbar Positioning
Soundbars are popular for saving space but can block remote sensors or create acoustic shadows. For example, I tried mounting my soundbar directly below the TV, only to notice muffled voices and indistinct bass. Instead, elevate the soundbar so it faces directly toward your listening area and avoid obstructing its drivers. Check the manufacturer’s placement tips, and invest in low-profile mounts if necessary. A well-placed soundbar not only improves dialogue clarity but also enhances bass response, especially in open-concept rooms.
Invest in a Good Amplifier or DAC
An often overlooked step is upgrading your amplifier or digital-to-analog converter (DAC). Think of an amp as the engine that powers your speakers; a weak or mismatched amp can’t deliver the punch your speakers are capable of. For example, I replaced my old, low-current amp with a small but mighty gan amplifier, and my bass suddenly felt more controlled and dynamic. When selecting an amp, ensure it can handle your speakers’ impedance and power requirements. This prevents distortion and clipping at high volumes, which can muddy bass sounds and strain your gear.
Match Your Speakers to the Power
Using speakers that need more power than your amp provides results in compression and distortion. To avoid this, check your speaker’s impedance (measured in ohms) and make sure your amp can deliver enough current. For stubborn cases, consider a high-current amplifier designed for demanding loads. This ensures clean, tight bass and prevents unwanted rattling or crackling, especially at volumes where muddy sounds tend to emerge.
Upgrade Your Subwoofer or Add One
Sometimes, your main speakers just can’t handle the lows effectively. In that case, adding a budget-friendly subwoofer makes a world of difference. For instance, I picked up a compact sub that fit under my desk, and instantly, my music and movies sounded fuller and more accurate. When choosing a sub, look for models with adjustable crossover frequencies and volume controls to fine-tune the bass response. This way, you avoid overshadowing your main speakers while gaining controlled, punchy lows.
Positioning the Sub for Best Bass
Placing the sub near a wall or corner amplifies bass but can also cause boominess if overdone. Experiment with placement: start with the sub in a corner for maximum impact, then move it a few inches to smooth out muddy sounds. Using the phase and crossover controls, adjust until the bass sounds tight and well-integrated with your main speakers. This step often resolves lingering muddiness without expensive upgrades.
Apply Sound Filtering and Corrections
Smart equalization can tame muddled lows. Access your receiver’s or amplifier’s EQ settings to cut overly boomy frequencies around 100Hz to 200Hz. For example, I used a small equalizer app on my phone connected via Bluetooth to dial out the ‘mud’ frequencies. Alternatively, some soundbars and amps offer automatic room tuning, which measures and corrects the sound profile. This process is vital for rooms with reflective surfaces that cause sound waves to overlap destructively, muddying the bass.
Use Acoustic Treatment for Better Sound
Add rugs, curtains, or foam panels to absorb reflections that cause bass muddiness. I installed DIY foam panels around my listening area, noticing an immediate improvement in clarity. Think of your room as an instrument—proper acoustic treatment allows your gear to perform at its best, rendering tight, focused bass rather than a diffuse, boomy mess.
Test Everything with Consistent Playback
Finally, always test your setup with familiar tracks. Listen critically for clarity in the bass, noting improvements after each change. For instance, I played a bass-heavy track, adjusted placement, and toggled EQ until I achieved a clean, punchy sound. This iterative process helps you identify what works and ensures your efforts are well-spent. Remember, small tweaks often have big impacts, and patience is key to mastering your budget-friendly audio setup.
Many enthusiasts believe that upgrading individual components like speakers or amplifiers will automatically yield better sound quality. However, in my experience, most people overlook critical nuances that can undermine their entire setup. For instance, a common misconception is that higher wattage or more expensive gear always translates to superior audio. In reality, pairing equipment appropriately and understanding synergistic effects is far more crucial. According to audio engineer Ethan Winer, “Matching your amplifier’s power with your speakers’ impedance and sensitivity is essential for optimal performance” (Winer, 2020). Failing to do so often results in muddy bass, distortion, or underwhelming sound despite costly investments.
Another trap many fall into is relying solely on specifications like frequency response bandwidth as a measure of quality. While specs matter, they can be misleading if not considered in the context of room acoustics, speaker placement, and the audio source quality. For example, a common myth suggests that soundbars are inferior to dedicated AV receivers, but some modern soundbars with built-in DSPs can outperform complex systems if properly calibrated. The key is understanding the hidden factors such as room reflections, speaker positioning, and acoustical treatments, which often have a more profound impact than hardware specs alone.
Are All Headphones Created Equal for Different Uses?
Many users assume that all headphones provide similar experiences, but selecting the right pair depends heavily on your specific needs. For instance, if background noise is an issue, noise-canceling headphones like those found in our recommended noise-canceling models can be transformative. Conversely, audiophiles seeking the most accurate reproduction may prefer open-back designs or high-impedance cans that require a quality amplifier—something many overlook, leading to underwhelming sound or listener fatigue. Recognizing these nuances ensures your investment enhances your listening experience rather than merely adding to your gear collection.
One frequent mistake is assuming that more expensive headphones guarantee better sound without considering fit and source quality. Properly matching headphones to your device, source files, and intended usage makes a noticeable difference. For those venturing into professional or critical listening, pairing headphones with a dedicated high-quality amplifier can reveal subtle details often missed by casual setups.
Now, let’s talk about the shadows hiding behind seemingly simple choices—like relying solely on brand reputation when picking home audio gear. Unfortunately, this can lead to overlooking compatibility issues, improper setup, or overlooked features that significantly affect performance. For example, some budget soundbars tout “Dolby Atmos” but lack the necessary upfiring drivers or HDMI eARC support for true surround effects. Reading professional reviews and understanding the critical specifications before buying can save you from costly regrets.
In summary, the real secret lies in understanding the complex interplay between components, room acoustics, and your specific needs. Don’t be seduced by marketing hype or specs alone. Instead, focus on how gear works together in your unique environment, and don’t shy away from fine-tuning your setup—sometimes a simple repositioning or a proper calibration beats a complete overhaul. Have you ever fallen into this trap? Let me know in the comments.
Stick with Reliable Tools and Routine Checks
Keeping your home audio setup humming requires the right tools and consistent maintenance. Personally, I rely on a few specific instruments to ensure everything stays in top shape. For example, I use a precision sound level meter, like the Decibel Max Pro, which helps me verify speaker placement and room acoustic treatments periodically. Regular monitoring ensures that minor deviations don’t evolve into muddy sound or equipment stress, preserving the quality of your audio experience over years.
Why Regular Calibration Matters
Over time, components like amplifiers and soundbars can drift from their optimal settings due to temperature changes or minor hardware shifts. Utilizing software tools such as Room EQ Wizard (REW) allows me to perform detailed frequency response analyses and recalibrate my system. Recalibration not only preserves clarity in your bass and treble but also prolongs the lifespan of your gear, preventing unnecessary wear from distortion or overdrive.
Tools I Recommend for Easy Maintenance
Beyond measurement devices, cleaning and physical checks are vital. I prefer using compressed air cans to remove dust from vent holes and connectors periodically. Additionally, a few microfibre cloths help keep the surfaces free of smudges, ensuring undistorted sound travels freely. For cable management, I swear by magnetic cable clips, which simplify routine inspections and prevent wear caused by tangled or stressed wires.
Future Trends in Longevity and Upkeep
As home audio technology advances, integrated smart diagnostics are likely to become standard, alerting you when a component is nearing failure. AI-powered calibration and predictive maintenance are set to revolutionize how enthusiasts maintain their setups. For example, firmware updates could automatically fine-tune equalization parameters based on your room’s acoustics measured via embedded sensors, reducing manual effort and preemptively addressing issues like muddy lows or crackles.
How do I maintain my audio system over time?
Developing a routine that includes regular visual inspections, software recalibrations, and using specialized measurement tools is key. Schedule quarterly checks to ensure components operate within their optimal parameters. Implementing software like REW for periodic frequency analysis and purchasing affordable tools like the Decibel Max Pro can save you significant costs and frustrations later on. Also, keep a log of maintenance activities to track changes over time—this helps identify patterns that may indicate future problems. By integrating these practices into your routine, your audio performance stays pristine, and your gear’s life is maximized. Ready to try one advanced tip? Start with calibrating your system using REW, and see how much clearer your bass and vocals become. Stay proactive, and your listening experience will thank you in the long run.
3 Surprising Lessons That Changed How I Approach Home Audio
One of the most eye-opening revelations I had was realizing that room acoustics and speaker placement often outweighed the quality of the gear itself. I used to chase after expensive components, but a simple move of my speakers or adding acoustic panels made a more noticeable difference than mid-tier upgrades. This taught me that listening environment is king.
Another lesson I learned was the importance of matching gear properly. For instance, pairing a high-current amplifier with speakers that require low wattage led to muddy bass and distortion. When I finally paid attention to impedance and power compatibility, my sound became cleaner and more precise, proving that thoughtful pairing trumps mere cost or brand reputation.
Lastly, I discovered that thorough calibration with tools like Room EQ Wizard could reveal hidden issues—like certain frequencies causing muddiness—that simple listening tests wouldn’t catch. Regular calibration keeps your setup performing at its best, ensuring your investments in gear truly pay off.
My Go-To Tools for a Smarter Home Audio Setup
To keep my system in check, I rely on precise measurement tools like the Decibel Max Pro. It helps me verify speaker placement and room acoustics periodically, preventing minor issues from escalating. Additionally, software like REW allows me to fine-tune frequency response, ensuring clear bass and crisp vocals without muddy overlaps.
For quick maintenance, I keep microfibre cloths and compressed air cans handy to regular check and clean connectors and vents. These small steps extend the life of my components and sustain optimal sound quality, creating a more enjoyable listening environment every time.
Your Next Step Toward Superior Sound
Now that you’re equipped with insights and practical tools, it’s time to take action. Remember, tweaking positions, calibrating frequently, and understanding your gear’s nuances can dramatically improve your home audio experience. Don’t let muddy bass or unbalanced sound hold you back—embrace the journey toward audiophile quality, one smart adjustment at a time. Are you ready to move your sound to the next level and truly enjoy your favorite music and movies? Share your plans or questions below—I love hearing your stories and challenges with home audio upgrades.
![3 Lightweight Car Speakers That Kill EV Cabin Drone [2026 Tested]](https://premiumsounddeals.com/wp-content/uploads/2026/04/3-Lightweight-Car-Speakers-That-Kill-EV-Cabin-Drone-2026-Tested.jpeg)

Leave a Reply