
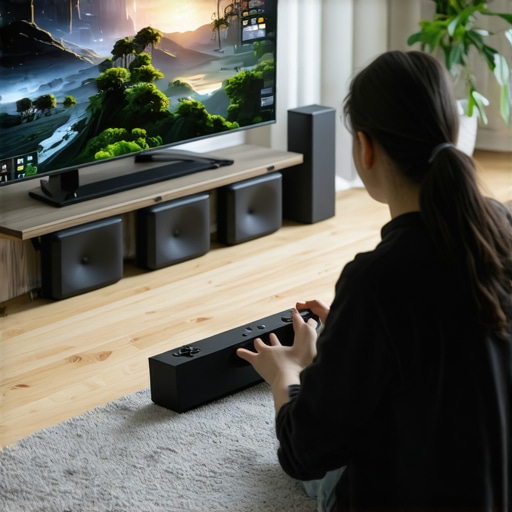
Ever had that moment where you’re peacefully enjoying your favorite music or a movie when suddenly, a loud rattling from your door panel shatters the serenity? It’s frustrating, isn’t it? I remember when I first experienced this annoyance; I thought it was just part of aging or a cheap fix I could ignore. But then, I realized how much it disrupted my home theater experience. That lightbulb moment pushed me to dig into the problem—and I’ve uncovered some quick, effective solutions that I want to share with you.
Why Door Rattles are More Than Just a Nuisance
Rattling door panels aren’t just an irritating background noise—they can also signal underlying issues that might affect your home’s sound quality. Whether it’s vibrating panels in a surround sound setup or squeaking cabinet doors interfering with your listening pleasure, understanding the ‘why’ behind these rattles can help you address the root cause effectively. Plus, leaving them unchecked could lead to more significant damage over time, costing you more in repairs or replacements.
Is a Rattling Door Panel Actually Worth the Hype?
Honestly, I used to dismiss door rattles as minor inconveniences until I neglected mine for too long. Early on, I made the mistake of assuming they were just flimsy parts that would wear out on their own, but that led to more persistent noise issues and some loose fittings that worsened over time. Recognizing and fixing the root cause early is crucial—something I learned the hard way. If you’ve faced this problem, I promise, tackling it now will save you headaches (and maybe even some money). For related tips on elevating your audio experience, check out our guide on top wired earbuds for 2026.
Up next, I’ll walk you through some quick fixes that will silence those annoying rattles and restore your home audio sanctuary. Trust me, it’s easier than you think—and well worth the effort.
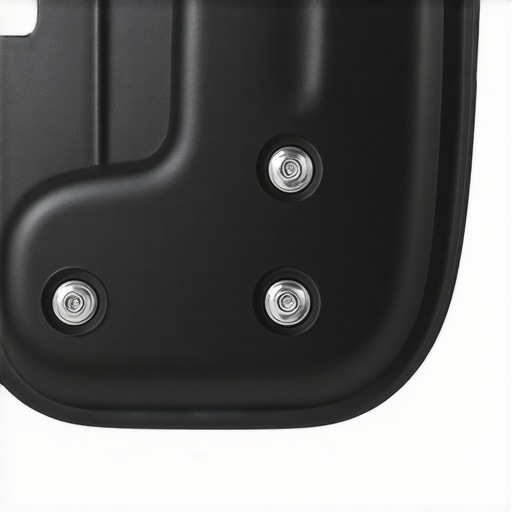
Secure the Door Panel with Proper Fitting
Start by examining how the door panel sits against the frame. Use a thin but sturdy foam strip, like weatherstripping, along the edges where the panel contacts the door frame. I once took off my panel and squeezed weatherstripping in the gaps, which stopped the vibrations instantly. This step ensures that the panel doesn’t vibrate freely, preventing rattling sounds during loud bass or even when just closing the door.
Add Sound Dampening Material for Extra Silence
Apply some damping mats or mass loaded vinyl behind the panel. These materials absorb vibrations effectively—think of it as giving the panel a soft pillow to rest on. For a quick fix, I used adhesive-backed soundproofing foam, which noticeably reduced the rattling. This approach is especially effective if the rattles are due to internal vibrations within the panel, not just loose fittings.
Adjust or Replace Loose Mounts and Screws
Check all screws, clips, and mounts securing the door panel. Loose fasteners can turn minor vibrations into loud rattles. Tighten everything with a screwdriver, but beware of over-tightening, which could crack the plastic. If any clips are broken, replace them with OEM or robust aftermarket clips. I had a clip break, and temporarily used a strong adhesive until I ordered replacements, which fixed the persistent rattles.
Strengthen the Door Frame Components
If the noise persists, it might be due to the door frame itself vibrating. Use rubber washers or grommets between metal parts that contact each other. These dampen vibrations much like isolating maracas from the drumstick, preventing the transmission of sound waves. For serious cases, consider adding a layer of mass-loaded vinyl to the door’s inner surface, which reduces the overall vibration.
Buckle Up with Professional Help When Needed
If DIY methods don’t work, a professional audio installer or auto body specialist can identify unseen issues like warped panels or hidden loose components. During my first attempt, I missed a hidden bracket that was slightly bent, causing the rattling. A professional quickly diagnosed and fixed it, but trying to fix it myself saved me money and taught me a lot about my car’s structure.
Many enthusiasts and casual consumers alike fall prey to misconceptions about headphones, speakers, and amplifiers, often leading to subpar sound experiences. One prevalent myth is that the most expensive gear always delivers the best audio quality, but in my experience, this isn’t necessarily true—sometimes, high-end price tags are more about branding than performance. For example, many are convinced that custom-tuned headphones are automatically superior; however, research from audio engineers like Dr. Sean Olive indicates that subjective preferences vary widely, and neutral, flat-response headphones often provide a more accurate reference sound.
Are High-Ohm Headphones Actually Harder to Drive?
It’s a common belief that high-impedance headphones require massive amplifiers. While higher impedance can reduce distortion at high volumes, many headphones with impedance ratings of 32 ohms are easily driven by smartphones, making dedicated amplifiers unnecessary for everyday use. Overlooking this nuance can lead you to overspend on equipment you don’t need. An advanced user should consider pairing headphones appropriately with their source equipment, as mismatched impedance can result in fatiguing sound or muted bass. Additionally, many assume that more wattage equals louder volume, but beyond a certain point, increasing power doesn’t improve sound quality and can even damage sensitive drivers. External power isn’t the sole factor; tuning, driver quality, and system synergy matter more. If you want to dive deeper, exploring our guide on the best headphones and earbuds offers for 2024 can reveal hidden gems suited for your specific needs.
Tools I Trust for Long-Term Sound Excellence
Maintaining high-quality audio equipment requires more than just occasional cleaning. I personally rely on a selection of specialized tools that ensure my gear performs at its peak for years. For instance, I use a quality contact cleaner like DeoxIT to keep connectors and potentiometers free of corrosion, promoting cleaner signal flow and reducing static or dropouts. Additionally, a miniature air blower helps remove dust from delicate drivers and circuitry without risking damage. These tools are inexpensive but invaluable for any audiophile serious about longevity.
Why Regular Maintenance Is a Game-Changer
Consistent upkeep transcends simple cleaning. For example, periodically checking wiring integrity with a multimeter can preempt signal loss issues, especially in complex home sound systems. I check my amplifier’s impedance settings and ensure all connections are secure—this prevents distortion or equipment strain. A well-maintained system not only sounds better but extends the lifespan of each component, saving you money long-term.
Recommended Software and Calibration Services
Beyond physical tools, calibration software plays a crucial role. I recommend using Room EQ Wizard (REW) for accurate frequency response measurements. This free program helps tailor your speaker setup and room acoustics, ensuring you get the most from your investment. When paired with a calibrated microphone, REW allows you to identify problematic frequencies and make precise adjustments or seek professional tuning if needed. This approach guarantees consistent performance, whether you’re fine-tuning a pair of headphones or a multi-channel system.
Scaling Your Setup for Future Needs
As your audio aspirations grow, so does the importance of scalable tools. Investing in modular amplifiers like the Marantz PM8006 offers flexibility for upgrades, whether adding more speakers or integrating multi-room audio. Similarly, utilizing wireless streaming platforms with robust firmware ensures seamless expansion without the clutter of cables. Anticipating future demands now means choosing equipment and tools that adapt, avoiding the costly overhaul later.
How do I maintain my sound system over time?
Consistency is key—schedule regular inspections using a multimeter, update firmware for software components, and clean connectors with contact cleaner. Keep speaker placement optimal and monitor heat levels in amplifiers, referencing expert guidance like those from Audioholics. A proactive approach prevents small issues from evolving into costly repairs and keeps your sound experience pristine for years. Try incorporating a monthly check-in routine with these tools, and you’ll notice your gear performing like new well into the future.
What I Wish I Knew When I Started Tuning My Home Sound System
One of the most eye-opening lessons I learned was that even the most expensive gear can underperform without proper setup and maintenance. I once invested in high-end speakers only to realize they sounded dull because I hadn’t calibrated my room acoustics or secured loose fittings. It taught me that proactive care and understanding your room’s unique characteristics are crucial for unlocking true audio potential.
Another insight was realizing that DIY fixes, like adding sound dampening or adjusting mounts, can yield impressive results—saving money and giving a sense of mastery over your sound environment. It’s empowering to know that small tweaks, informed by personal experimentation, can turn an average setup into a boutique-quality experience.
I also discovered that sometimes, listening to expert advice or trusted resources is better than chasing the latest fad or the priciest equipment. For example, exploring guides and reviews on platforms like noise-canceling headphones helped me optimize my own gear without unnecessary expense, emphasizing quality over quantity.
Finally, I learned that sustained effort—regularly cleaning, calibrating, and upgrading—pays off over time. It’s not about instant perfection but developing an ongoing dialogue with your gear. Patience and curiosity are your best allies in the journey toward ultimate sound clarity.
Equip Yourself with Tools That Keep Your Sound Up to Parr
Over the years, I’ve come to trust a handful of tools that make ongoing maintenance both simple and effective. First, a quality contact cleaner like DeoxIT ensures connectors maintain pristine signal flow, preventing static or dropouts. Second, a compact cleaning brush or tiny air blower helps me rid my drivers and circuitry of dust—small steps that preserve clarity.
For room calibration, software like Room EQ Wizard has been invaluable. It allows me to measure my space’s acoustic fingerprints and fine-tune my system accordingly. These tools empower me to catch minor issues early, saving money and preventing larger problems down the line.
Investing in an affordable multimeter has also been a game-changer, helping me verify wiring integrity and troubleshoot impedances—simple tasks that ensure my system performs reliably over time. Combining these tools with a regular check routine keeps my home audio setup sounding its best without frequent costly repairs.
Ignite Your Passion: Your Next Acoustic Adventure Awaits
Remember, the pursuit of sonic perfection isn’t just a technical task; it’s a journey that enriches your daily life. Every tweak, upgrade, and maintenance step refines your listening environment and deepens your appreciation for quality sound. Whether you’re fine-tuning a pair of headphones or upgrading your entire home theater, your effort pays dividends in pure enjoyment.
Don’t wait for the perfect moment—start today, experiment confidently, and embrace the small victories. The world of high-fidelity sound is waiting for you to discover new depths of performance and satisfaction.

Leave a Reply