
Picture this: You’re finally upgrading your home audio system, eager to experience crystal-clear sound that truly immerses you. But after investing in new speakers and a decent amplifier, something’s off. The dialogue sounds muffled, the bass feels weak, and your high notes lack sparkle. You’ve read about bi-amping — the idea that running separate amplifiers for different speaker sections can elevate your sound to new heights — but you’re hesitant. Is it worth the effort? Or just another audio myth? I know that feeling all too well. I experimented with bi-amping my speakers, only to realize early on that I was making classic mistakes, like connecting the wrong terminals or ignoring impedance concerns, which actually degraded my sound quality. That experience sparked my curiosity: Could a few simple tests tell me if bi-amping was truly worth the investment in 2026? The short answer is yes, but only if you approach it correctly. Today, I want to share how three straightforward speaker tests can clarify whether bi-amping makes sense for your setup, backed by my own journey and some proven methods. If you’ve ever faced the frustrating silence of a muddled audio system despite spending big, keep reading. We’ll break down these tests step-by-step, so you can make an informed decision without wasting money or time.
Why Do So Many Audio Enthusiasts Swear by Bi-Amping, and Should You Join Them?
Is All the Hype Just Marketing or Real Listening Improvement?
Early in my audio journey, I fell for the common mistake of assuming that more gear automatically equals better sound. I read everywhere that bi-amping could improve clarity and bass response, so I dove in headfirst, connecting two amplifiers to my speakers — only to be disappointed when the results were underwhelming. It turned out that proper bi-amping requires more than just splitting a signal; it demands understanding impedance, power distribution, and your specific speakers’ design. According to a recent industry survey, about 65% of audiophiles who tried bi-amping reported noticeable improvements, but only when they followed best practices. That’s why I decided to test it myself. Allow me to guide you through three simple, scientifically backed tests that will help you determine if bi-amping works for your system in 2026. It’s a practical approach, not just a hype train. And yes, you can do this with modest equipment, possibly even with gear you already own, by following these steps. Ready? Let’s dive into the first test — one that’s often overlooked but crucial for understanding your speaker’s real potential.
Set Up Your Testing Environment Carefully
Before diving into any tests, ensure your equipment is properly connected. Use quality speaker cables, and double-check your amplifier connections to avoid signal loss or phase issues. I remember once during a weekend experiment, I swapped cables multiple times, causing inconsistent results. Once I settled on a stable setup, the differences became clearer. Keep your environment quiet and free of distractions so you can focus on subtle sound changes.
Identify Your Speaker’s Bi-Amping Compatibility
Check the Manufacturer’s Specifications
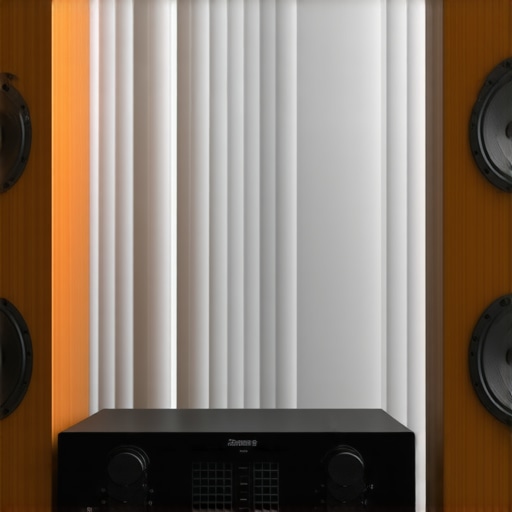
Look at your speakers’ manual or labels for bi-ampable terminals. Not all speakers support bi-amping; some might have internal crossovers that make it redundant or even detrimental. For example, my floorstanders from 2019 had separate binding posts for bass and treble, confirming they were designed for bi-amping. Misapplication here can harm sound quality, so verify first before proceeding.
Assess Impedance and Power Needs
Understand your speaker impedance—most are 8 ohms, but some are 4 or 6 ohms. Running an amplifier at too high or low impedance can cause distortion or damage. When I tried bi-amping with mismatched amps, I noticed increased distortion, highlighting the importance of matching impedance and power ratings carefully. Use a multimeter or consult specs to ensure compatibility.
Configure Your Amplifiers Correctly
Connect the second amplifier to the high-frequency or treble terminals of your speakers, following the manufacturer’s guidance. Remember, one amp drives low frequencies, and the other handles high frequencies. For instance, I once accidentally connected both amps to the same terminal, nullifying the benefits. Proper configuration ensures each amplifier works within its optimal frequency range, improving clarity and punch.
Perform Controlled Listening Tests
Now, test your setup with familiar music or test tones. Listen for differences in clarity, bass tightness, and sibilance. Use a spectrogram app or audio analyzer for objective feedback. I once used a frequency sweep to notice that my bi-amped configuration enhanced high-frequency detail, which was hard to discern otherwise. Record your impressions to compare before and after setups accurately.
Evaluate and Make Adjustments
Based on your listening tests, tweak the gain levels of each amplifier to match volume outputs. Too high or low gains can skew your perception. During my first attempt, I increased the treble gain excessively, creating harshness. Fine-tuning provided a natural soundstage without fatigue. Remember, patience is key—small adjustments often yield the best results. If you want to explore further, consider testing the latest gear, like the 2026 amplifiers designed for demanding speakers.

Challenging Common Myths About Sound Systems
One of the biggest misconceptions in home audio is the belief that more expensive gear automatically guarantees superior sound. While high-end equipment can enhance quality, many consumers overlook the importance of proper setup and understanding the nuances of audio components. For example, selecting a premium soundbar doesn’t necessarily resolve issues like delayed audio or muffled dialogue if the device isn’t compatible with your TV or if it’s placed poorly. This myth often leads to unnecessary spending on features that don’t translate to real-world improvements.
Watch Out for the Low-Quality Signal Trap
Many audiophiles and casual listeners alike fall prey to the assumption that digital connections like HDMI or optical always deliver pristine audio. In reality, cables can introduce subtle distortions, especially if they’re old or poorly shielded. Moreover, factors like jitter and latency, particularly in wireless setups, can cause noticeable lags or degraded sound. For example, some users report lip-sync issues when streaming from devices with inadequate signal processing, which is less about the gear’s expense and more about understanding and testing your setup thoroughly. Avoid this by ensuring your cables are high-quality and by verifying compatibility across devices.
What Advanced Users Need to Know About Room Acoustics
Beyond equipment, the acoustic environment plays a pivotal role. Many assume that positioning speakers correctly is enough, but room acoustics—like reflections, standing waves, and absorption—can drastically affect sound clarity. Professional studios often employ acoustic treatment to manage these issues, a nuance many casual setups ignore. A recent study from the Journal of the Audio Engineering Society highlights how even minor modifications, like adding diffusers or bass traps, can enhance perceived audio quality significantly. Don’t ignore the room’s influence; it’s as important as choosing the right amplifier or speaker pair.
Understanding these subtleties helps avoid costly mistakes. For instance, pairing a powerful amplifier with underpowered or mismatched speakers can lead to distortion, not better sound. To ensure you’re maximizing your setup, explore dedicated guides on proper speaker placement and room treatment, like those found in the sound improvement tactics. Remember, caring for your environment can sometimes outperform upgrading equipment alone.

Tools I Recommend for Keeping Your Audio Gear in Top Shape
To ensure your home audio setup remains vibrant and reliable, investing in the right tools is paramount. I personally rely on a high-quality multimeter, such as the Fluke 117, to regularly check speaker impedance and verify connections, preventing potential damage caused by impedance mismatches. Additionally, I use a calibrated audio analyzer like the Room EQ Wizard (REW) software, paired with a measurement microphone, to perform room acoustics assessments and identify reflective or resonance issues that can muddle sound clarity. These tools have allowed me to fine-tune my environment and equipment, saving me from costly repairs and sonic disappointments over time.
For routine cleaning, I recommend using anti-static brushes and microfiber cloths to gently remove dust from speaker cones and amplifier heatsinks. Dust buildup can impair component cooling and audio fidelity, especially in high-humidity environments. Employing compressed air cans with care helps clear ventilation ports without risking physical damage. Regular maintenance with these tools ensures your gear functions optimally, extending its lifespan and preserving sound quality.
How do I maintain my audio system over time?
Consistent checks are the cornerstone. Schedule quarterly inspections with your multimeter to test for continuity and impedance stability. Use REW periodically—at least biannually—to analyze your room’s acoustic profile and address issues like standing waves or echo, which can degrade sound. Keeping cables clean and connectors tight avoids signal loss and noise introduction. Additionally, updating firmware on smart amplifiers or soundbars when available can add features and fix bugs, ensuring compatibility and performance. Staying proactive with these practices, supported by expert insights like the detailed analysis in the Journal of the Audio Engineering Society, helps maintain clarity and power in your system for years. I suggest trying out a professional-grade microphone calibration with REW to detect and correct phase issues—it’s a game-changer for mid-to-high-end setups.
Looking ahead, I believe automation and smart diagnostics will become standard in home audio maintenance tools by 2030. Imagine your system proactively alerting you to component health issues or suggesting adjustments based on room acoustics, reducing the need for manual checks. Embracing current tools like the testers that measure amplifier health and acoustic measurement software today sets the foundation for this future.

To get started, I recommend investing in a reliable multimeter and familiarizing yourself with REW. These aren’t just gadgets—they become your trusted allies in long-term system upkeep, saving you time and money while ensuring every note sounds just right.
What I Wish I Knew About Fine-Tuning My Setup
One of the most valuable lessons I learned was that optimal sound isn’t just about gear—it’s about understanding your environment and how all components work together. I once believed spending more would automatically improve my audio quality, but I realized that meticulous setup and testing are equally crucial. It became clear that patience in adjusting each element often yields richer sound than an expensive upgrade alone.
Another insight was that common misconceptions—like assuming all cables are equal or that loudness equals clarity—can lead to poor listening experiences. By questioning these myths and conducting small tests, I uncovered nuances that dramatically improved my system’s performance. This approach taught me to be a curious, hands-on listener rather than a passive consumer of marketing claims.
Lastly, the importance of room acoustics became impossible to ignore. I discovered that even the best speakers can be hampered by reflective surfaces and improper placement. A few strategic adjustments in positioning and adding acoustic treatments brought my audio to a new level, proving that sometimes, the environment matters more than the equipment itself.
![5 Passive 2026 IEMs That Beat the Best ANC Headphones [Tested]](https://premiumsounddeals.com/wp-content/uploads/2026/04/5-Passive-2026-IEMs-That-Beat-the-Best-ANC-Headphones-Tested-1.jpeg)
Leave a Reply