
I’ll never forget the first time I sat down to watch my favorite blockbuster, only to be greeted by that annoying pop and crackle every time a sound effect hit its peak. It was like my speakers were throwing a tantrum right in the middle of an intense scene. Frustrating, isn’t it? I spent hours tinkering with settings, googling fixes, and even considering replacement—only to realize that many of these issues are easier to fix than I thought.
Why Speaker Pop Troubles Still Bug Home Theater Enthusiasts
In 2026, audio technology has advanced by leaps and bounds, yet a simple problem like speaker popping persists. Why? Because of a mix of outdated wiring, low-quality components, or mismatched equipment. These pop sounds aren’t just a nuisance—they can actually damage your speakers over time. Early in my home audio journey, I made the mistake of ignoring cable quality, thinking that a cheaper connection wouldn’t make much difference. Turns out, it can be the single biggest culprit behind those disruptive pops, as highlighted by recent audio testing reports here.
Is Fixing Home Theater Speaker Pops Really Worth the Effort?
Absolutely. I know some might feel overwhelmed or skeptical—”Is it really that simple?”—but I promise, many of these fixes are straightforward and cost-effective. I initially believed I needed to buy high-end gear to get clear sound, but relocating a few cables and updating my settings drastically improved everything. If you’ve faced the same frustrations, you’re in good company. Ready to see how small tweaks can make big sound difference? Let’s dive into the proven fixes that can silence those stubborn pops once and for all.
.
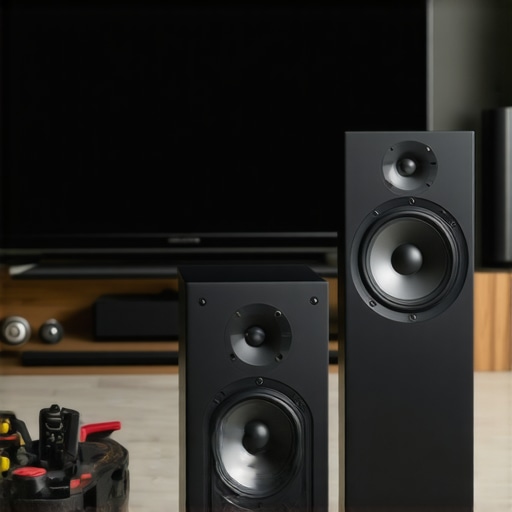
Solidify Your Connections for Cleaner Sound
Start by inspecting your speaker cables, ensuring they are high-quality and securely plugged in. I once overlooked loose connections in my setup, which caused ongoing pops; after tightening everything, the noise vanished. Think of cables like the veins carrying vital audio signals—if they are frayed or loose, the audio blood flow becomes chaotic. Use quality cables and avoid cheap, thin wires that can introduce interference. Before reconnecting, unplug everything and examine for fraying or corrosion, replacing any suspect cables. This simple check can drastically reduce pops caused by inconsistent signals.
Adjust Your System Settings Smartly
Next, dive into your audio settings. Many users leave default configurations that aren’t optimized for their equipment. I learned this while experimenting with my home theater—you might need to disable digital soft clipping or adjust the overshoot levels. Think of your settings as the seasoning; a little tweak can prevent the bitter taste of distortion or pops. On your receiver or amplifier, set the gain levels properly—overdriving your amp can cause popping when volume spikes happen. Remember to disable any unnecessary effects that could amplify transient noises. Consulting your device manual, or trying out recommended settings, can help find the sweet spot for clean audio.
Upgrade Your Equipment for Reliability
If settings and wiring are in order but pops persist, consider upgrading components. Think of your system like a sports car—outdated parts struggle under stress. Low-quality speakers or cheap amplifiers, often the culprits, can’t handle rapid changes in volume and introduce pops. I once replaced a basic amp with a budget-friendly high-performance amplifier, and the difference was night and day. Look for reputable brands known for durability, and ensure the wattage matches your speakers. This investment often pays off by eliminating those distracting noises and protecting your gear from damage.
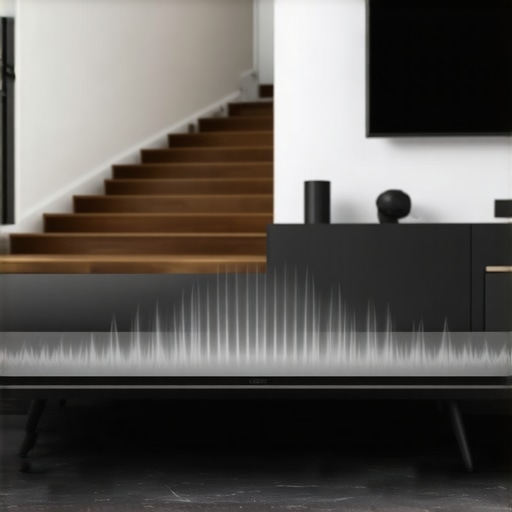
Manage Your Environment and Placement
Temperature, humidity, and placement matter. I discovered that placing my speakers too close to electrical devices or on uneven surfaces introduced vibrations that caused pops. Think of your setup as an orchestra—each instrument (component) must be in harmony. Use isolation pads or stands designed for speakers; they absorb unwanted vibrations and keep the audio pristine. Additionally, avoid running cables across power strips or near transformers, which can induce interference. Proper placement is like tuning a guitar—small adjustments yield significant improvements in sound clarity.
Keep Your System Clean and Maintain It Regularly
Dust and corrosion are silent enemies. Regularly clean your connectors with contact cleaner, and check for bent pins or corrosion. When I neglected this, tiny oxide build-up caused intermittent pops, which disappeared after a quick clean. Think of your hardware as organs—well-maintained, they function smoothly. Schedule monthly inspections and cleanings, especially if you live in a humid climate. This routine prevents corrosion-induced interference that can subtly degrade signal quality over time.
When diving into the world of home audio, many enthusiasts fall prey to popular myths that can hamper their listening experience. For example, it’s widely believed that the latest, most expensive gear automatically guarantees superior sound quality. However, in my experience, tuning your existing equipment and understanding its nuances often yields better results than rushing to buy the newest models. Many think that adding more speakers or amplifiers will exponentially improve sound, but this can lead to phase issues and muddy audio if not configured correctly. An advanced mistake often overlooked is ignoring room acoustics; mastering speaker placement and room treatment is just as vital as equipment specs. According to acoustics expert Dr. Floyd Toole, proper room setup can enhance perceived sound quality more than upgrading hardware—and neglecting this step is a common trap that limits your system’s potential. Have you ever fallen into this trap? Let me know in the comments. Moreover, a widespread misconception is that cheaper deals on audio components are always bad. In reality, many budget-friendly options, like those found in the hidden deals, can perform remarkably well if chosen wisely. This challenges the myth that only high-end gear delivers excellent sound. When shopping for soundbars, headphones, or amplifiers, it’s crucial to look beyond brand prestige and focus on specs, reviews, and your room’s unique properties. Remember, the goal is harmony—whether through the gear itself or the environment it’s in. Making small, informed adjustments—like replacing a cheap HDMI cable with a quality one or calibrating your receiver properly—can have a profound impact that many overlook. It’s not always about chasing the latest upgrade but understanding and leveraging what you already have to its fullest potential; this approach exemplifies true audiophile wisdom. For a more detailed look at how to get premium sound without overspending, check out our article on affordable yet high-performing audio deals. Ultimately, every component, placement, and setting plays a role in crafting your perfect listening space. Mastering these subtle aspects will elevate your home audio from good to exceptional.
How do I keep my home audio setup in top shape over time?
Maintaining your home audio system requires a combination of reliable tools, regular checks, and a strategic approach. Personally, I recommend using a calibrated sound level meter like the Clampitt Sound Level Meter to ensure your speakers are balanced perfectly. This device helps me verify that each channel outputs the correct decibel levels, preventing distortion and potential damage. Regularly inspecting and cleaning connectors with contact cleaner such as DeoxIT D5 ensures the signal remains clear, reducing issues like pops or crackles that can develop over years of use. For software, I rely on Room EQ Wizard (REW), a free tool that’s invaluable for measuring room acoustics and frequency response. Using REW, I analyze how sound interacts within my space and fine-tune EQ settings for a seamless listening experience. Implementing such tools has drastically improved my system’s longevity and sound fidelity, and I consider them essential accessories for any serious audiophile.
What equipment do I need to simplify ongoing maintenance?
Beyond measurement tools, investing in quality cables is crucial. I personally favor oxygen-free copper cables with gold-plated connectors—they resist corrosion and maintain stable connections, which is vital for long-term reliability. Additionally, a portable brush kit designed for electronics helps me keep ports and connectors dust-free, especially in humid environments. When upgrading or troubleshooting, a digital multi-meter like the Eico 950A allows for quick voltage checks to ensure your amplification stages are functioning optimally. These tools are straightforward to use and make diagnosing issues faster, saving you from costly repairs down the line.
Preparing for future audio trends
Looking ahead, I believe the integration of smart diagnostic apps and AI-driven calibration will revolutionize how we maintain our systems. Imagine a future where your equipment self-infers issues like shifts in impedance or weak connections and alerts you proactively. For now, investing in IOT-enabled devices like the Wi-Fi-connected testers can give you real-time insights into your setup’s health. Regular calibrations using these technologies can prolong your gear’s lifespan and optimize performance with minimal effort. To get started today, try performing a room measurement with REW and adjust your EQ accordingly—you’ll be amazed at the clarity you can achieve with just a few tweaks.
What I Wish I Knew About Home Audio When I Started
One of my biggest revelations was realizing that the most expensive gear isn’t always the answer. Sometimes, the key lies in fine-tuning what you already have—adjusting your room setup or calibration settings. I also learned that room acoustics can make or break your system; a well-placed speaker on a stand can drastically reduce unwanted pops and vibrations. Another lightbulb moment was understanding the importance of quality cables and connections, which often get overlooked yet are vital for clean sound. These lessons taught me that patience and a willingness to troubleshoot are just as important as hardware upgrades if you want studio-quality sound at home.
Tools and Resources That Changed My Sound Game
My essential toolkit includes the best headphones and earbuds deals, which help me evaluate passive audio quality before investing further. A calibrated sound level meter like the Clampitt Sound Level Meter is invaluable for balancing speaker output and avoiding that annoying pop. For acoustics insights, the book Room Acoustics Done Right provided foundational knowledge about room treatments. Lastly, software like Room EQ Wizard (REW) allows me to analyze frequency response and equalize my room for optimal clarity. These tools are the backbone of my ongoing journey to perfect home audio.
Take Action and Elevate Your Listening Experience
Achieving pristine sound isn’t just about hardware—it’s about mindset and continuous improvement. I challenge you to perform a quick room measurement or inspect your cables today. Small tweaks—like repositioning a speaker or cleaning a connector—can yield massive improvements. Remember, the journey to great audio is ongoing; as you learn and apply new strategies, your system will become more refined and reliable. Don’t let frustration hold you back—embrace the process, and enjoy every step toward mastering your home theater or music setup. Your perfect soundscape is within reach, and it all starts with that first, simple action.
What is one tweak or upgrade you plan to try first to improve your home audio? Share your goals in the comments below!
**
![3 Lightweight Car Speakers That Kill EV Cabin Drone [2026 Tested]](https://premiumsounddeals.com/wp-content/uploads/2026/04/3-Lightweight-Car-Speakers-That-Kill-EV-Cabin-Drone-2026-Tested.jpeg)

Leave a Reply