
It was late at night, and I was sitting in my living room, trying to wind down after a long day. I turned on my usual sound system, expecting decent audio. But as music played, I was struck by how flat, lifeless, and uninspiring it sounded. I realized I was using a pair of cheap bookshelf speakers that felt like they were holding back, drowning in their own limitations. That lightbulb moment hit me—why settle for speakers that don’t deliver when there are affordable options that can punch well above their weight? If you’ve ever faced the frustration of spending good money on audio gear only to be disappointed, you’re not alone. Many out there are stuck with gear that sounds mediocre but think high-end is the only way. Well, I’m here to tell you there’s hope. Today, I’ll share my personal journey and uncover three incredible budget bookshelf speakers that truly punch above their price. They deliver rich sound, clarity, and punch—without making your wallet cry. Understanding how to get great sound on a budget makes a world of difference. Believe me, it transformed my listening experience and can do the same for you. But before diving into the specific models, I want to share a little mistake I made early on in my audio journey. I once bought a pair of speakers just because they looked fancy, ignoring reviews or speaker specs. That wasn’t just a waste of money, but it also kept me from enjoying the music I loved. It’s a common pitfall—focusing on looks or brand instead of sound quality. So, if you’re skeptical about whether budget speakers can really pack a punch, stay tuned. We’re going to break down exactly why these three models stand out and how you can get more bang for your buck. Ready to discover speakers that make every note count? Let’s dive into what makes these budget heroes so impressive and how you can choose wisely for your space.
Connect Your Speakers Correctly
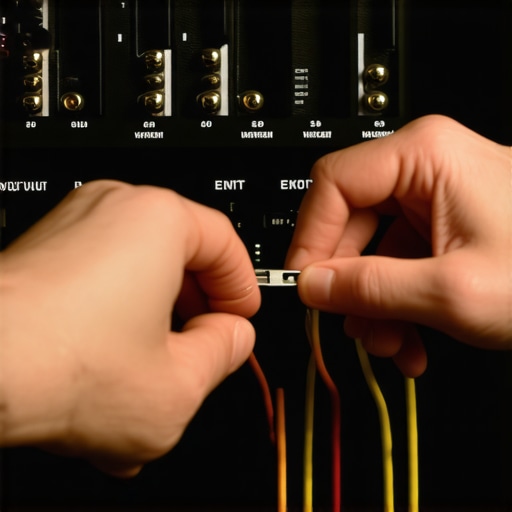
Begin by choosing the right cables—preferably high-quality speaker wires that match the impedance of your speakers. For passive models, ensure you connect positive to positive and negative to negative terminals on both the amp and speaker to prevent phase issues, which can muddle your sound and reduce clarity. I once rushed this step and ended up with hollow, disconnected audio; repositioning and re-wiring fixed the problem instantly.
Position Them for Optimal Sound
Place your bookshelf speakers at ear level, angled slightly inward to form an equilateral triangle with your listening position. Experiment with distance from walls—keep them at least a foot away to avoid bass booms or reflections. I remember stacking books to elevate my speakers temporarily, which significantly improved clarity until I got proper stands.
Adjust Your Amp Settings Strategically
Set the gain levels on your amplifier to ensure you’re not clipping the sound—usually, a modest increase works best. Refer to your specific amp model’s manual or consider a test tone generator to calibrate accurately. For high-powered speakers, selecting the correct impedance matching is crucial; check this info and set your amp accordingly. To avoid distortion, never push the volume past 75% during initial setup.
Check and Fine-Tune the Crossover
Use your amp’s crossover controls to direct bass frequencies to your subwoofer, sparing the bookshelf speakers from strain. Properly tuning this prevents muddiness and makes your bass punchier. I once ignored this step, leading to a boomy, overwhelming bass that drowned out vocals. A quick adjustment made the music clearer and more balanced.
Tweak the Room Acoustics
Introduce some soft furnishings or acoustic panels to absorb reflections that cause echo or muddiness. Position furniture strategically to reduce sound bounce and position your speakers away from corners for cleaner highs. In my first apartment, adding curtains and rugs transformed my soundstage from flat to immersive, proving how room treatment impacts audio quality.
Use Guides to Enhance Your Setup
Leverage available resources to avoid common pitfalls. For instance, learn about the differences between bi-wiring and bi-amping to optimize speaker performance here. Proper setup ensures every dollar spent translates into exceptional sound quality, making your budget system sound like a much pricier one.
 While it’s tempting to believe that purchasing high-end audio gear guarantees perfect sound, the truth is more nuanced. Many enthusiasts fall into the trap of assuming that more expensive equipment always translates to better performance, but in reality, understanding the specific nuances can make a significant difference. For example, one common misconception is that you should always buy the latest model or the most popular brand, but this overlooks the importance of compatibility and room acoustics.
Are All Amplifiers Created Equal for Your Setup?
Not necessarily. The choice of amplifier can dramatically impact sound quality, especially if mismatched with your speakers’ impedance or power needs. Many overlook the significance of matching components correctly, which can lead to distortion or inefficient performance. For instance, using an underpowered amp with high-impedance speakers can cause clipping and damage over time. To avoid this, I recommend researching your specific equipment’s specifications and considering experts’ advice, like detailed in this guide on selecting the right amp. This subtle detail often goes unnoticed by beginners but can be the key to unlocking true audio clarity.
Another prevalent myth is that expensive speaker cables produce vastly superior sound. In reality, most high-end cables offer diminishing returns, and their impact on sound quality is often minimal compared to proper setup and room treatment. This misconception can lead to overspending on perceived Maintaining your home audio setup requires more than just initial setup; it’s about preserving sound quality and ensuring longevity over the years. I personally rely on specialized tools and disciplined routines to keep my speakers, amplifiers, and headphones functioning optimally, and I recommend the same for serious enthusiasts. One of my go-to instruments is a digital multimeter, which I use regularly to check speaker impedance and prevent issues like static or imbalance, especially if you notice inconsistencies in sound or unexplained volume drops. Additionally, a microfiber cloth and a gentle, electronics-safe cleaner are invaluable for cleaning connections and removing dust from ports and cables, reducing corrosion and ensuring perfect contact.
For software management, I swear by room correction software like Dirac Live, especially if you upgrade your speakers or rearrange your listening space. It calibrates your system precisely by analyzing the room’s acoustics and automatically adjusting EQ settings, which I’ve found dramatically improves clarity and bass response—turning a decent setup into a great one. This is particularly useful when scaling up your system or experimenting with new components.
When it comes to cables, I’ve learned that investing in well-shielded, oxygen-free copper cables prevents signal degradation over time. But more than brand, I pay attention to proper cable management and labeling. Tangles and knotted wires often cause subtle static, which can be misdiagnosed as equipment failure. I recommend organizing cables with reusable zip ties, and routinely inspecting connectors for signs of wear or corrosion. Learn more about optimizing wiring with bi-wiring or bi-amping techniques here.
Long-term, I schedule quarterly check-ups of all connections and cleaning, having learned the hard way how dust and grime can diminish sound quality. Also, small upgrades like replacing foam surrounds on vintage speakers prolong their life and restore bass response. Many audiophiles overlook this simple maintenance, but it can be done easily with kits available online.
Looking ahead, the trend is moving toward smarter audio systems that self-calibrate and notify you when maintenance is due. With advancements in IoT, expect your receivers and speakers to alert you about cable wear or component aging, proactively avoiding sound issues.
**How do I maintain my home audio components over time?** Regular cleaning, using calibrated measurement tools like multimeters, and employing room correction software are key. Incorporate routine checks for dust buildup and cable wear, replacing parts as needed. One tip I highly recommend trying is setting up a dedicated calibration process with software like Dirac Live—it’s a game-changer for achieving precise sound and avoiding costly upgrades prematurely. Starting with this advanced step can significantly extend the lifespan of your gear and enhance every listening session.
Lessons That Changed My Whole Approach to Home Audio
One of the most valuable lessons I learned was never to underestimate the power of proper speaker placement. Moving my bookshelf speakers just a few inches and angling them correctly instantly improved clarity and bass response. Another insight was how room acoustics dramatically influence sound quality. Adding soft furnishings and acoustic panels transformed the listening experience from dull and echoey to warm and immersive. I also discovered that investing in the right cables and cleaning connections regularly can make a surprising difference in avoiding static and maintaining sound integrity. Most importantly, I realized that understanding the specifications and how components interact prevents costly mistakes and ensures you get the most out of your budget setup.
Tools and Resources That Elevate My Sound Setup
My go-to resource is this guide on bi-wiring and bi-amping, which helped me optimize speaker performance. I also rely on a digital multimeter to regularly check impedance and detect connection issues early. To calibrate my system perfectly, I use calibration tools and expert advice. For improving room acoustics, I recommend experimenting with affordable soundproofing tips. These tools and guides have helped me sustain high-quality sound over time without breaking the bank.
Your Next Audio Step Starts Now
Achieving excellent sound in your home audio setup isn’t just about the gear—it’s about applying these lessons and continuously fine-tuning your environment. Don’t wait for perfect conditions; start small, make adjustments, and enjoy rediscovering your favorite music and movies. Remember, the journey to great sound is ongoing, and every step you take increases your enjoyment and confidence. Dive into these insights, personalize your setup, and experience how truly affordable quality can be.
What’s the biggest challenge you’ve faced in optimizing your home audio system? Share your story below—I’d love to hear your experiences!
,