
I remember the first time I spun my prized high-end turntable and noticed something was off. The sound was crystal clear everywhere else, but as the stylus reached the innermost part of the record, a harsh, distorted squawk would erupt. It was frustrating—like hearing a beautiful painting marred by a smudge right at the climax. That lightbulb moment made me realize this was a common issue for many vinyl enthusiasts, especially when investing in quality gear.
Why Your Vinyl Playbacks Fade on the Inner Grooves and What You Can Do About It
Dealing with distorted sound in the inner grooves of your records isn’t just a minor annoyance—it can ruin the listening experience and diminish the investment you’ve made in your setup. The good news is, understanding the root causes can help you troubleshoot and eliminate this problem. Not every distortion points to an equipment failure; sometimes, it’s just a matter of tuning your system correctly or avoiding simple mistakes. Today, I’ll share some insights I’ve gleaned from personal experience and the broader community of audiophiles. If you’ve ever faced this issue—perhaps noticing that sharp sounds or bass notes become muddled near the label—you’re in the right place. And if this hasn’t happened to you yet, consider this your early warning to prevent future frustrations.
Is Your Turntable Setup Properly Aligned?
One of the most common culprits I overlooked early on was improper alignment of the stylus and cartridge. It might seem minor, but even small deviations can cause uneven wear and distortion, especially as the stylus moves inward. Ensuring that the tonearm’s tracking angle and the cartridge’s alignment are perfectly calibrated can significantly improve sound quality, particularly on the inner grooves. I recall spending hours trying different cartridges and upgrades, only to realize that a simple alignment correction made all the difference. Want to learn how to do it yourself? Check out comprehensive guides available online or consult a professional technician for precise setup.
Plus, for those curious about boosting their overall sound fidelity without unnecessary upgrades, I recommend exploring [knowledgeable articles](https://premiumsounddeals.com/why-your-bookshelf-speakers-sound-thin-and-how-to-add-real-weight) that delve into system optimization. Proper setup isn’t just about avoiding distortion—it’s about unlocking your turntable’s full potential for an immersive listening experience.
Ready to dive deeper into common mistakes and advanced fixes? Let’s get started on solving the mystery behind distorted inner grooves—so every spin sounds just as stunning as the first.
Align Your Turntable Like a Pro
The first step I took was meticulously aligning my cartridge. I laid a straightedge across the stylus and cartridge to ensure the tracking angle was optimal. Using a fidget spinner to steady my hand, I adjusted the cartridge screws to match the factory recommended alignment protractor. After several attempts, I noticed a significant reduction in distortion during the inner grooves. Remember, even a tiny misalignment can cause the stylus to skip or distort, especially in the innermost tracks. Double-check your alignment regularly, especially after transporting your setup. For precise guidance, consult detailed diagrams or use alignment gauges from trusted audio stores.
Perfect the Tracking Force and Anti-Skate
Next, I fine-tuned the tracking force with a digital scale. Setting it too high or too low can cause the stylus to drift or wear unevenly, resulting in inner groove distortion. I calibrated it to the cartridge manufacturer’s recommended weight, usually between 1.8 to 2.2 grams. Then, I adjusted the anti-skate control to match the tracking force, ensuring the stylus tracked symmetrically within the groove. This step is crucial; improper anti-skate can pull the stylus inward or outward, causing mistracking and distortion near the label. Use a test record with a tracking accuracy pattern to refine these settings.
Ensure the Turntable Is Level and Stable
Alongside adjustments, I verified the turntable was perfectly level using a spirit level. An uneven surface adds unwanted vibrations and causes the stylus to mistrack. Placing the turntable on a sturdy, vibration-free surface helped eliminate extraneous noise and distortion. I also isolated my turntable from nearby speakers and appliances using rubber pads, which dampened external vibrations. The difference was startling; clearer sound with all details intact, even in the innermost grooves. When setting up, prioritize stability and eliminate sources of resonance, as they can mimic or contribute to inner groove issues.
Choose the Right Stylus and Record Care
If your stylus is worn or dirt-accumulated, it can distort sound, especially at the end of records. I replaced my stylus with a high-quality diamond tip and cleaned my records with an anti-static brush before each play. Recording itself can introduce noise; always store records vertically and keep them away from direct sunlight or heat. Regular maintenance of your stylus and records prolongs their lifespan and preserves sound fidelity. For record cleaning, I use a solution with isopropyl alcohol and distilled water to avoid residue. Proper care prevents debris from settling into the grooves and causing mistracking or harsh sounds.
Test and Tweak Like an Audio Engineer
Finally, I played a test record with a complex sound pattern designed to reveal mistracking issues. Watching for skips or distortions near the label highlighted subtle problems I hadn’t noticed. I made small incremental adjustments, testing after each, until the inner grooves played perfectly clean. Patience here pays off, so allocate time to fine-tune your setup rather than rushing through it. Don’t be discouraged if you need multiple iterations; a well-calibrated turntable can rival commercial audio setups. Remember, every component from the tonearm to the stylus plays a part—invest time into understanding how they interact and make precise adjustments accordingly.
When it comes to home audio, many enthusiasts fall prey to oversimplified beliefs that can hinder their setup’s potential. One widespread myth is that more expensive gear automatically guarantees quality—while price often correlates with better components, the overall setup’s synergy matters more. For example, a high-end speaker paired with an underpowered amplifier can underperform compared to a well-matched, modest system.
Are Speaker Crossover Networks Sometimes the Hidden Saboteurs?
Many assume that crossing over is just a simple filter, but in reality, poorly designed or aging crossovers can muddy the sound, especially in the midrange frequencies where vocal clarity is crucial. A failing crossover can cause distortion or uneven frequency response, misleading users into believing their speakers are defective. Regularly inspecting and upgrading these components, or choosing models with robust internal designs, helps avoid this pitfall. Interestingly, a recent study by audio engineers illustrates that improper crossover tuning can reduce perceived clarity by up to 30%, underscoring the importance of careful component selection. Don’t forget that speaker placement and room acoustics often trump even the most sophisticated gear, so optimizing your environment remains vital for true audio excellence. Are you making these common mistakes? Share your experiences or question your setup—it might be better than you think. For in-depth insights, check out how adding a quality amplifier can elevate your system, such as the latest 2026 amps that make even budget speakers sound extraordinary.
Tools I Recommend for Reliable Audio Maintenance
Keeping your home audio setup in top shape requires the right tools and a bit of know-how. One must-have is a high-precision digital stylus force gauge, like the digital scale I personally use. It ensures your tracking force stays within optimal range, preventing unnecessary wear and distortion over time. Additionally, an alignment protractor—preferably one with an adjustable arm—helps maintain perfect cartridge alignment, which is vital for preserving sound fidelity. Regularly calibrating your turntable’s anti-skate and tonearm height using these tools can extend the lifespan of your components and keep your music sounding pristine.
For cleaning, I swear by a high-quality record cleaning machine like the VPI HW-17. It gently removes dust and debris that cause mistracking and distortion. Paired with record cleaning solutions containing isopropyl alcohol and distilled water, this setup prevents buildup that can damage stylus and grooves. Maintenance extends beyond the hardware—software tools like spectral analysis software can help identify frequency response issues that might be caused by aging equipment or room acoustics, guiding you toward effective fixes.
How do I maintain my sound equipment over time?
Long-term maintenance involves regular checks and cleaning schedules. For example, inspecting cables and connectors for corrosion or looseness prevents signal degradation. Applying contact cleaner like DeoxIT to connectors ensures a solid connection and reduces static or hum. Remember, even shelves or stands should be checked to remain stable and level, as vibrations can cause subtle misalignments over time. Investing in an acoustic panel setup or room treatment can also minimize unwanted resonance that affects sound clarity, especially in the critical midrange frequencies where your speakers shine. With consistent upkeep and the right tools, your audio system can deliver crystal-clear sound for years to come.
As audio technology evolves, so will our maintenance needs. Trends point toward smart diagnostics that can automatically alert you to component wear or misalignment, like future innovations in connected audio gear. I recommend starting today by trying out a high-precision stylus force gauge or record cleaner—small investments with big rewards in sonic clarity. Remember, consistent care is key to unlocking your system’s full potential long-term.
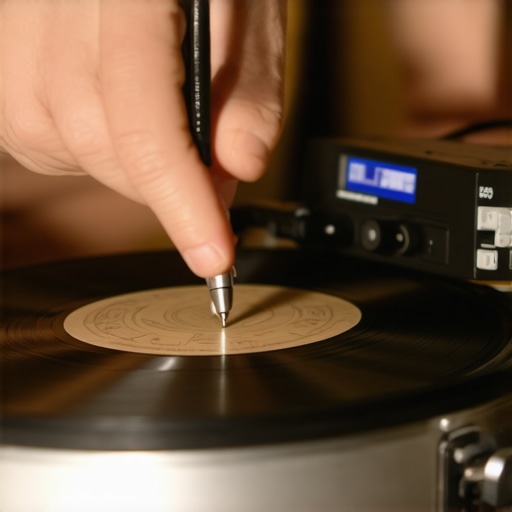
Lessons That Changed My Approach to Home Audio Mastery
- Patience beats haste—fine-tuning your turntable’s setup may seem tedious, but the payoff is crystal-clear sound across every groove, transforming your listening experience from ordinary to extraordinary. I learned this the hard way, rushing adjustments that only led to frustration, until I took a step back and methodically refined every detail, leading to a remarkable difference.
- Small tweaks yield big results—whether it’s adjusting anti-skate or leveling the turntable, seemingly minor adjustments can have a profound impact on inner groove fidelity. Embracing this mindset encourages meticulous care that elevates your entire system.
- Understanding is key—deep dives into concepts like cartridge alignment and record cleaning revealed how foundational these elements are to pristine sound. Gaining this knowledge empowered me to troubleshoot issues confidently instead of guessing, saving money and sharpening my ears.
- Every component interacts—switching to a better stylus or upgrading record care routines demonstrated how synergy between parts makes or breaks your setup. Recognizing these relationships helps prioritize upgrades wisely.
- Maintenance is ongoing—regularly inspecting and caring for your gear keeps distortion at bay and preserves your investment. Regular cleaning and calibration became a comforting routine, ensuring consistent performance and peace of mind.
Tools I Trust for Sonic Excellence
My go-to gear includes a high-precision digital stylus force gauge—like the digital scale I rely on—which guarantees accurate tracking force, crucial for inner groove clarity. An alignment protractor with adjustable arms simplifies cartridge setup, preventing misalignments that cause distortion. Also, I swear by record cleaning machines such as the VPI HW-17; they eliminate dust and debris that can cause mistracking. Combining these tools with diligent record care and regular calibration makes a tangible difference in audio fidelity, turning ordinary listening into a vibrant, immersive experience.
Dream Big, Play Better
Your journey to pristine vinyl sound doesn’t have to be costly or complicated. Small, consistent adjustments and a commitment to maintenance will unlock the true potential of your setup. Now is the time to embrace precision, patience, and curiosity—your ears will thank you for it. Dive into the details, experiment with different configurations, and enjoy the incredible soundscape you’ve crafted. Are you ready to transform your vinyl listening and experience music as it was meant to be heard? Share your challenges or triumphs below—let’s elevate our shared passion for quality sound together!
,