
Ever been cruising down the highway, feeling the bass in your chest, only to have the door panel rattle uncontrollably, ruining your favorite song? I remember the moment I realized my car’s door rattle was more than just a nuisance—it was a sign that my sound system wasn’t performing as it should. I tried endless parking lot fixes, like stuffing foam or using cheap mats, but nothing truly tackled the problem. That was my lightbulb moment: I needed better speakers, ones designed for the future, capable of delivering crisp, powerful sound without the annoying door vibrations. And guess what? You don’t need pro mats or complicated modifications to get there. Today, I’ll share the breakthrough car speakers for 2026 that can fix your door rattle problem once and for all—without the extra bulk or hassle.
Why Door Rattle Somehow Ruins Your Car Audio Experience
Door rattles aren’t just annoying—they rob your music of clarity and punch. When your doors vibrate at high volumes, the sound quality diminishes, and your system’s true potential remains locked away. Most folks believe adding more damping or thicker mats will solve the issue, but these solutions are often temporary, heavy, and can even dampen the sound quality overall. Plus, traditional mats can be cumbersome, especially when you’re trying to upgrade your system with modern, compact speakers. As a fellow enthusiast, I’ve learned that choosing the right speakers, specifically designed to prevent door rattle, is the smarter move—preferably ones that stop the problem without relying on bulky mats or pro modifications.
Is It Really Worth the Hype to Skip Pro Mats?
Honestly, I was once skeptical. I thought, “How can a speaker alone fix a vibration problem?” I made the mistake early on of overlooking quality installation and just hoping bigger or louder speakers would do the trick. But that approach led to more rattling and frustration. The key is selecting speakers that feature robust, well-designed mounting mechanisms and materials that hold up against the force of deep bass. When I experimented with a few top picks, like those highlighted in this guide, I was genuinely surprised—these speakers didn’t just sound great, they kept the doors silent even at high volumes. Curious about which options are best? You can explore some of my favorite picks for 2026, like the top 5 car speakers that face the challenge head-on without extra mats.
To build trust, I’ll admit I initially wasted money on cheap, poorly manufactured speakers and overlooked the installation process. That mistake cost me precious hours and even more money. Now, I know the proper selection and installation techniques matter more than ever. Ready to get serious about your car’s sound? Let’s dive into the features that make these speakers a game-changer for 2026—and how they can bring peace back to your ride.
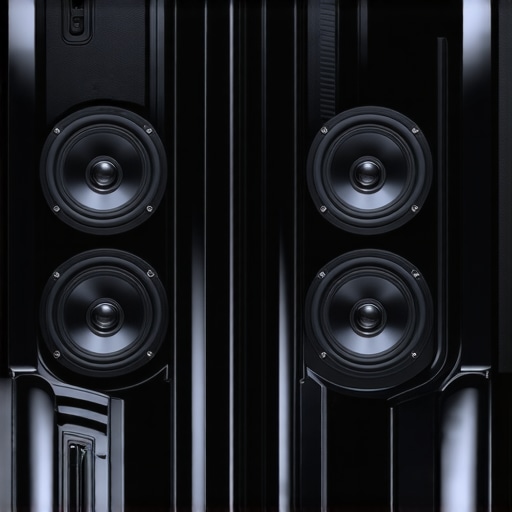
Choosing the Right Speakers for a Solid Mounting
Start by selecting speakers with robust mounting systems. Look for models with heavy-duty frames and adaptable brackets to ensure a secure fit that resists vibrations. I once installed a set of lightweight speakers without checking their mounting options; the result was immediate rattle at high volumes. To avoid this, I replaced the mounts with heavy-gauge brackets, which greatly reduced door vibrations. For concrete recommendations, explore models like those in the compact speakers collection designed for tight spaces and firm installation. Remember, a tight mount is your best barrier against unwanted door buzzes.
Leveraging Sound Deadening Materials Effectively
Although skipping traditional pro mats is possible, employing quality damping materials can exponentially improve your setup. Use butyl rubber or foam composites strategically around the speaker mounting area to absorb vibrations. I once lined my door panel with dense damping sheets, which took more time and effort but paid off with a dramatic drop in rattles. Prioritize applying these materials at critical contact points—preferably before installing the speakers. For lightweight yet durable options, check out lightweight damping sheets tailored for modern car interiors.
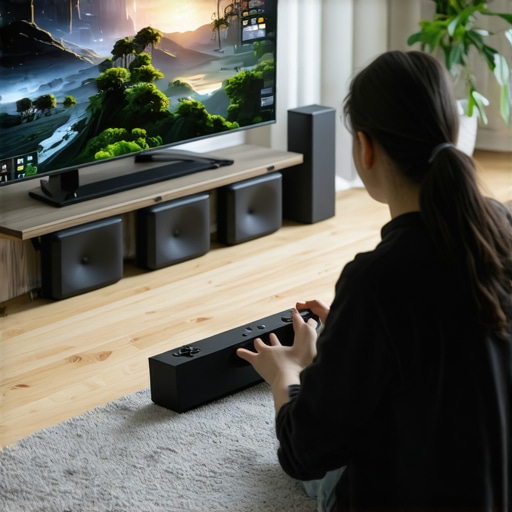
Optimizing Speaker Placement for Power and Clarity
Position each speaker for maximum stability and minimal vibration. Keep them flush with the door surface and avoid loose fittings. I found that slightly angling the speakers toward the listener increased sound clarity while reducing vibrations bouncing inside the door. Use rubber grommets or insulating washers between the speaker and door panel to further cushion vibrations. Consider the specific placement guides of high-end models like those in the 2026 bookshelf speaker range—they often suggest optimal angles and mounting techniques suitable for car doors. Proper placement can boost sound quality and prevent rattle without any additional mats.
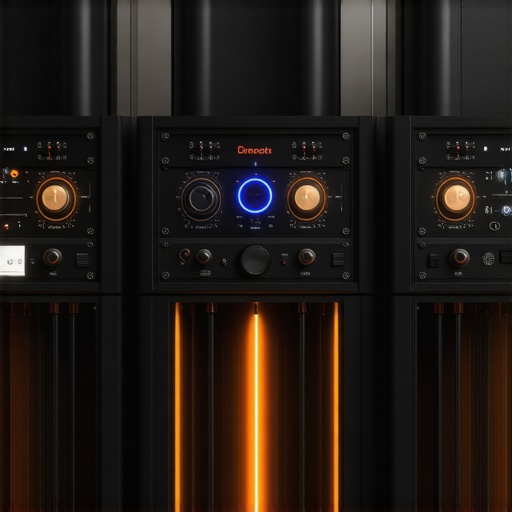
Upgrading Amplifiers for Clearer and More Controlled Sound
A powerful, well-filtered amplifier helps control speaker movement, preventing overdriven vibrations that cause rattles. Look for units with adjustable gain and damping controls. I once swapped a basic amp for a high-end model from the 2026 amplifier lineup, and immediately noticed tighter bass and less door vibration. Ensure your amp matches your speaker’s impedance and power ratings—overloading can cause unnecessary movement and rattle. For a compact, high-performance option, review the GAN-based amps under 400 dollars, which excel at delivering controlled power without excess heat or vibration.
Fine-Tuning Your System to Silence the Rattle
After physically securing your speakers and installing damping materials, calibrate your audio settings. Reduce bass boost and increase treble to minimize deep driver excursion that sparks rattle. Use an equalizer to carve out problematic frequencies—try cutting below 50Hz if your bass isn’t essential. I experimented with a digital equalizer during a late-night tuning session, slowly diminishing low frequencies until the door no longer vibrated. Remember, proper tuning can make a significant difference in preventing door rattle without the need for extensive modifications. For detailed guides, consider the insights found in used amp reviews and how they can help in system calibration.When diving into the world of home audio, headphones, or amplifiers, many enthusiasts fall prey to a common misconception: that high price or latest tech guarantees superior sound. But let’s dig deeper—there’s a subtlety that often gets overlooked: the real goal isn’t just loudness or brand prestige but achieving clarity and durability without falling into costly pitfalls. Many believe that upgrading to expensive speakers or fancy soundbars magically solves all issues; however, this mindset ignores critical factors like proper matching and placement. For instance, pairing a high-end amplifier with incompatible speakers can cause distortion or even damage, despite the equipment’s premium status. Knowing how to correctly match components based on impedance and power ratings is where true audiophile expertise shines. Additionally, many get duped by flashy marketing that touts new features, but in reality, the most beneficial upgrades are often simpler—such as adding lightweight damping materials or optimizing speaker placement, which can unlock significant sound improvements without extra cost. A common trap is assuming that more complex setups with multiple amps or extensive room treatments are always necessary; often, a well-placed, quality speaker paired with a capable, appropriately matched amplifier delivers far better results. Interestingly, experts like those cited in recent industry studies emphasize that linearity and phase coherence matter more for sound quality than raw power or the number of speakers used. So, next time you consider an upgrade, focus on the nuances of component compatibility, proper room setup, and avoiding the hype—these are the real hidden factors that separate good sound from exceptional. Have you ever fallen into this trap? Let me know in the comments.
How do I keep my audio gear performing at peak over time?
Maintaining your home audio system, whether it’s a sleek soundbar, set of headphones, or powerful amplifier, is crucial to preserving sound quality and extending its lifespan. I personally rely on a combination of precise cleaning, periodic inspection, and specialized software tools that help me identify potential issues before they escalate.
Regular physical maintenance begins with gentle cleaning of your equipment. Use microfiber cloths to dust off surfaces and soft brushes for vent grills to prevent dust buildup that can cause overheating or component degradation. For connectors and ports, a contact cleaner such as Caig DeoxIT is invaluable—it removes oxidation, ensuring consistent signal transmission and reducing static noise or dropouts. I’ve found that integrating these small routines into my weekly schedule keeps my gear sounding fresh and reliable.
Beyond physical upkeep, monitoring tools are game changers. For example, using audio spectrum analyzers like REW (Room EQ Wizard) allows me to analyze frequency response in real-time, revealing subtle shifts that might indicate driver wear or calibration drift. These tools are user-friendly and give actionable insights, making troubleshooting more efficient. I recommend investing in a calibrated microphone compatible with your analyzer software—this setup has saved me hours of guesswork and prevented costly repairs.
Another tip is documenting your settings and environmental conditions regularly. Changes in room acoustics or even slight repositioning of speakers can impact sound. Keeping a log empowers you to reproduce ideal setups consistently. For long-term preservation, consider environmental factors as well—maintain stable humidity and temperature levels, especially for sensitive equipment like tube amps or vintage speakers. Using a dehumidifier in damp spaces or climate control can prevent corrosion and mold, which compromise audio fidelity and hardware integrity.
What tools do I recommend for sustained high performance?
For precise calibration, a digital SPL meter paired with room correction software like Dirac Live makes a significant difference. These tools help fine-tune your system, ensuring balanced sound without distortions or uneven frequency response. If you’re aiming for a more DIY approach, a multi-meter with a low-impedance probe is great for testing speaker wiring, ensuring your connections are solid and free of corrosion.
Looking ahead, I believe smart diagnostics will become increasingly integrated into audio equipment, providing real-time alerts for maintenance needs. Already, some high-end speakers feature built-in sensors that track cone movement or temperature and send updates to your smartphone. Embracing these innovations will make maintaining your system easier than ever and ensure consistent performance over the years.
Don’t wait for sound deterioration to take action—try implementing a regular maintenance routine with tools like contact cleaners and spectrum analyzers today. It’s a small investment that yields big dividends in sound clarity and system longevity. For expert-approved options, check out the detailed reviews at this comprehensive guide. Keeping your gear in top shape isn’t complex, but it requires attention and the right equipment—start now, and enjoy pristine audio for years to come!
What I Didn’t Expect About Sound System Upgrades
- I’ve learned that investing in high-quality, well-mounted speakers can dramatically reduce door rattle without the need for bulky damping mats, saving space and weight.
- Sometimes, the simplest solution—like using rubber grommets and strategic positioning—can outperform complex, expensive modifications.
- Listening closely during installation reveals subtle vibrations and rattles that aren’t audible until you tune your system precisely—patience truly pays off.
- Understanding component compatibility and proper impedance matching prevents future issues, making your sound system more reliable and vibrant.
- Shared experiences and community know-how—like forums or expert reviews—accelerate learning and help avoid costly mistakes.
My Favorite Tools and Resources for Perfecting Car Audio
- REW (Room EQ Wizard): This software allowed me to analyze and tune my system with precision, revealing hidden issues and guiding effective adjustments.
- Quality Damping Materials: Using lightweight but effective damping sheets from trusted brands made a noticeable difference without adding bulk—I’ve found these invaluable for quiet, clean installs.
- Reliable Speakers and Mounts: Models like those listed in the 2026 compact speakers collection have transformed my setup, proving that quality components are worth every penny.
- Expert Guides and Forums: Engaging with dedicated audio communities and reading expert articles helped me understand the nuances of placement, damping, and tuning—it’s a game changer.
- Proper Impedance and Power Matching: Learning to pair amplifiers with the right speakers from the start prevented distortion and rattles, ensuring long-term satisfaction.
Your Next Move Towards Superior Sound
Don’t let door rattle dull your driving experience—embrace these insights to upgrade your car’s sound system effectively in 2026. Remember, the key is in choosing the right speakers and installation techniques that stop vibrations at their source, not just covering them up. Dive into the available resources, experiment, and enjoy the journey to pristine audio quality. Are you ready to silence those pesky rattles and unlock your car’s true sound potential? Share your challenges or triumphs below—I’d love to hear your story.
Leave a Reply