
I remember the first time I set up a home theater system, excitement bubbling over. I splurged on a big subwoofer, eager to feel the deep bass rumbling through my chest. But when I hit play, what I heard was a muddled, boomy mess instead of the earth-shaking thump I envisioned. Frustration set in. Was I doing something wrong? Turns out, even high-end subwoofers can sound muddy if not set up correctly. That lightbulb moment made me realize: many common issues sneak into our setups, muddying the sound and ruining the experience.
So, if you’re tired of your subwoofer sounding like it’s underwater, you’re not alone. Today, we’re going to uncover the three main reasons behind that muddy sound and, more importantly, how you can fix them. Imagine crisp, punchy bass that complements your music, movies, and gaming without turning your room into a bass-shaking mess. That’s exactly what I want for you.
Why Your Subwoofer Might Be Muddling Your Audio
Is Muddy Bass Really Worth the Hype?
Honestly, I’ve made plenty of mistakes early on—like relying on cheap cables or placing my subwoofer too close to walls. Early on, I believed that more bass was better. But in reality, bad placement and poor connections often turn that deep rumble into a distorted din. Did you know that using cheap RCA cables can significantly degrade sound quality? It’s a small detail with a big impact.
If you’ve faced this muddy bass problem, don’t worry. Recognizing the root causes is the first step toward turning your setup into the powerhouse it’s meant to be. We’ll explore practical fixes—no need for expensive upgrades or complicated DIY projects. Just honest, tested tips to clear up that muddiness and get your subwoofer playing nice.
Perfect Your Subwoofer Placement
Start by positioning your subwoofer away from walls and corners. I once placed mine directly against a wall, which caused excessive bass buildup and muddiness. Moving it just a foot away from the wall drastically improved clarity. Think of it like tuning a musical instrument—small adjustments make a big difference. Use the speaker placement guide to avoid common positioning mistakes that kill sound quality. Proper placement creates a balanced, punchy bass that fills the room without overwhelming it.
Calibrate Your System Accurately
Many people overlook calibration, resulting in mismatched bass levels. Invest in a calibration microphone or use room calibration software to optimize your setup. During my first calibration attempt, I neglected to set the crossover frequency correctly, which caused bass muddiness. Follow these calibration tips to tailor the sound to your space. Proper calibration ensures your subwoofer and speakers work harmoniously, delivering tight, well-defined bass.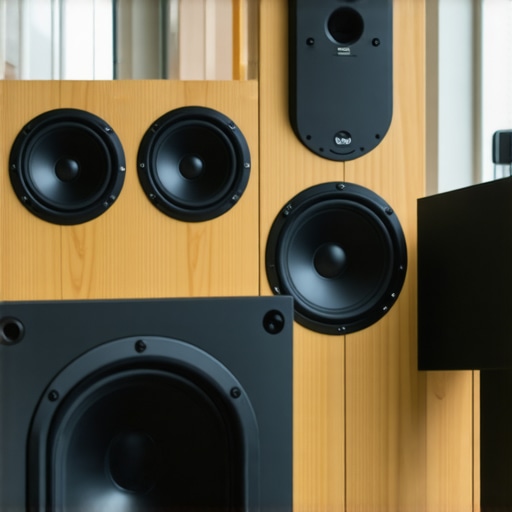
Adjust Subwoofer Settings
Access your subwoofer’s control panel or app and fine-tune the volume, crossover, and phase. I once kept the volume too high, which added distortion. Lower the volume to match your main speakers, and set the crossover to avoid overlapping frequencies—typically between 80-120Hz. Play test tones and listen critically. This simple step transforms boomy, muddy bass into sharp, impactful sound. Remember, small tweaks matter: even a 2Hz change in crossover can make a noticeable difference.
Upgrade Your Cables and Wiring
Cheap cables can introduce noise and degrade bass clarity. I once replaced my old RCA cables with high-quality shielded ones, instantly noticing cleaner, more defined bass. Use visually sturdy, well-shielded cables for connections. Also, ensure your subwoofer is connected to a dedicated power outlet to avoid ground loops that cause hum and muddiness. For a guaranteed upgrade, explore superior wiring options designed specifically for audio purity.
Reduce Room Acoustics Interference
Hard surfaces like bare walls and floors reflect sound waves, creating muddiness. Soft furnishings, rugs, and wall treatments absorb excess reflections. I added a thick rug and some wall-mounted acoustic panels, which cleared up lingering bass echo. For significant improvements, consider rearranging furniture or investing in room tuning accessories. The goal is to create a space where bass can develop fully without bouncing around and causing distortion.
Most audiophiles and home theater enthusiasts fall prey to common myths and oversimplifications when it comes to selecting and configuring sound equipment. While many believe that bigger speakers or more wattage automatically translate to better sound, the reality is far more nuanced. Understanding these subtle details is what separates seasoned listeners from newcomers. For instance, everyone praises high power ratings, but without proper impedance matching and room acoustics, increased wattage can lead to distortion rather than clarity. According to audio engineer Dr. Floyd Toole, [accurate speaker placement and room interaction] are often more critical than raw power in achieving optimal sound quality.
Another widespread misconception involves Bluetooth connections. Many assume that advanced codecs like aptX or LDAC guarantee flawless audio streaming. However, environmental interference, device compatibility issues, and even the positioning of your source device can cause dropouts or reduced quality. In fact, a study published in the Journal of Audio Engineering Society emphasizes that real-world factors often overshadow theoretical codec improvements. Do you know how to troubleshoot wireless glitches effectively? Checking your connection range and minimizing obstructions can make a huge difference. If you’re battling connectivity issues, I recommend reviewing tips on extending Bluetooth range.
What About Sound Quality? Can Equipment Alone Guarantee That?
It’s tempting to believe that purchasing high-end headphones or speakers automatically results in superior sound. While they do contribute, the actual listening environment, including acoustic treatments and speaker placement, plays an equally vital role. For example, placing bookshelf speakers too close to the wall can cause early reflections, muddying the soundstage—an issue I’ve repeatedly seen overlooked despite high-quality gear. An effective way to avoid this trap is to master proper placement, such as following the recommendations in speaker positioning guides. Moreover, calibration software can fine-tune your system, ensuring the equipment delivers its true potential.
Another advanced pitfall involves cable quality. Many assume all cables sound alike, but poorly shielded or cheap cables can introduce noise and reduce fidelity, especially at higher volumes. Upgrading to high-quality, shielded cables—even for subwoofers—can surprisingly enhance clarity and punch. Remember,
Keep Your Sound System Running Smoothly with Precision Tools
Maintaining excellence in your home audio setup requires the right tools and a disciplined approach. One of my favorite instruments for ensuring sound clarity over time is the calibrated acoustic analyzer, such as the Dayton Audio OM-5. This handheld device provides real-time frequency response data, helping me identify anomalies like unwanted resonances or driver imbalances. Regular calibration sessions, ideally every six months, keep your system aligned with optimal performance, especially before major listening periods or when relocating your equipment.
Another indispensable component is a spectrum analyzer software like REW (Room EQ Wizard). This program runs on your PC or Mac, utilizing a calibrated microphone – for instance, the miniDSP UMIK-1 – to graph your room’s acoustic profile. I personally use REW before long-term projects or critical listening sessions to spot problematic peaks and valleys, then adjust filters or speaker placement accordingly. Investing in solid measurement tools guarantees your system stays in top shape, saving money on unnecessary upgrades and preventing sound degradation.
Establish a Routine for Consistent System Care
Just like any high-precision tool, your home audio gear benefits from routine checks. I recommend a simple weekly practice: inspect connections for corrosion or loose contacts, clean speaker cabinets with a microfiber cloth, and verify that cables remain firmly seated. Over time, dust build-up can cause subtle signal issues. For instance, I use a compressed air duster to blow out vent areas and prevent overheating in active subwoofers or amplifiers. Developing this habit prevents minor issues from snowballing into major distortions or failures, thus extending component longevity.
Utilize Smart Monitoring Devices for Ongoing Health Checks
Emerging technology offers smart plugs and energy meters that monitor power consumption and detect irregularities. I deploy the TP-Link Kasa HS110 to track my amplifier’s draw, which alerts me if it begins to consume more power than usual—a potential sign of internal component stress or impending failure. Coupling these devices with routine manual inspections creates a comprehensive maintenance schema. Data-driven insights allow proactive repairs, ensuring your system remains reliable for years to come.
What about long-term care — How do I maintain my audio gear over time?
Consistency is key. Regularly updating your firmware—particularly for networked amplifiers and streaming hubs—ensures compatibility with new codecs and reduces bugs. Also, periodic alignment checks, using tools like REW, can catch drifting speaker characteristics. Future trends indicate a move toward cloud-managed calibration, where AI algorithms dynamically optimize settings based on environmental changes. For now, investing in professional-grade measurement tools and adhering to a scheduled maintenance routine shields your system against deterioration and keeps your sound pristine.
Try integrating a spectrum analyzer into your routine, and notice how quickly issues become apparent before they affect your listening experience. Remember, good habits today save costly repairs tomorrow and preserve the integrity of your beloved home audio system.
Lessons Only Insiders Know About Perfect Sound
- I realized that positioning my subwoofer at just the right angle wasn’t about aesthetics but about phase coherence—small tweaks can make your bass punchy instead of muddy.
- Using room calibration tools like REW transformed my setup, revealing that many issues stem from room acoustics rather than equipment quality alone.
- Cheap cables saved me a few bucks initially, but upgrading to shielded, quality cables was like adding clarity to a foggy window—it changes everything.
My Go-To Tools for Sound Mastery
- Room EQ Wizard (REW): This free software gives me detailed frequency response maps, helping me identify problematic peaks or dips in my room.
- Dayton Audio OM-5 Microphone: Paired with REW, it ensures measurements are accurate, enabling precise adjustments.
- High-Quality Cables from MonoPrice: Investing in well-shielded cables prevents noise and signal loss, which are sneaky culprits of muddiness.
- Acoustic Panels: Treating reflections with absorbent materials made my soundstage more precise and natural.
Your Next Chapter Begins With Action
Great audio doesn’t have to be elusive. Embracing these insights and tools will elevate your home sound experience, turning a muddy mess into a concert-quality masterpiece. Remember, the path to impeccable sound starts with a single smart step—trust your ears, fine-tune with knowledge, and enjoy every note with clarity and punch.
Which aspect of your home audio setup are you eager to perfect first? Drop your thoughts below—I love hearing your journey to better sound!