
I’ll never forget the moment I cranked up my vintage stereo, expecting that warm, rich sound, only to be greeted by a stubborn crackle every time I touched the volume knob. It was maddening! That irritating noise not only ruined the experience but also made me wonder if I was about to break something. Sound familiar? If you’ve been battling that persistent crackling in your old audio gear, you’re not alone. Many audiophiles and casual listeners face this nagging issue, often feeling helpless because they assume it’s beyond repair or too technical to fix themselves.
Why Ignoring the Crackle Means Missing Out on Pure, Clear Sound
The truth is, that crackle isn’t just a minor annoyance—it’s a sign that your equipment might need some love. Over time, dust, dirt, and oxidation can accumulate inside the potentiometers—the parts that control volume—and cause that scratchy noise. Left untreated, these issues can lead to worse problems like distorted sound or even damage to your device. According to repair experts, simple maintenance can restore your gear’s original clarity, saving you money and prolonging its life.
Are You Wasting Money on New Equipment When a Quick Fix Could Do?
Early in my journey, I made the costly mistake of rushing to buy a new amplifier, thinking my current setup was hopeless. It turned out that just a bit of cleaning and tightening could have saved me hundreds. It’s easy to believe that replacing gear is the only solution, but often, proper care and maintenance are all that’s needed to breathe new life into your old favorites. Curious about whether your speakers or audio controls are dying? Check out this guide to spot telltale signs of wear and tear.
In the upcoming sections, I’ll share straightforward methods to fix that crackle—without needing to be an electronics wizard. Whether you’re a seasoned audiophile or just want your old gear to sound decent again, these tips are practical and effective. Let’s dive in and get your sound crisp, clean, and crackle-free once more!
,
Start with a Careful Inspection of Your Components
Before diving into cleaning, power off your device and unplug it. Use a flashlight to examine internal parts, especially potentiometers or switches where the crackle originates. Look for dust, corrosion, or visible dirt. I remember opening my vintage amplifier and noticing a thin layer of dust coating the circuit board, which was a good indicator that cleaning might help. Always handle delicate parts gently to avoid damage.
Remove Dust and Dirt Using Proper Cleaning Techniques
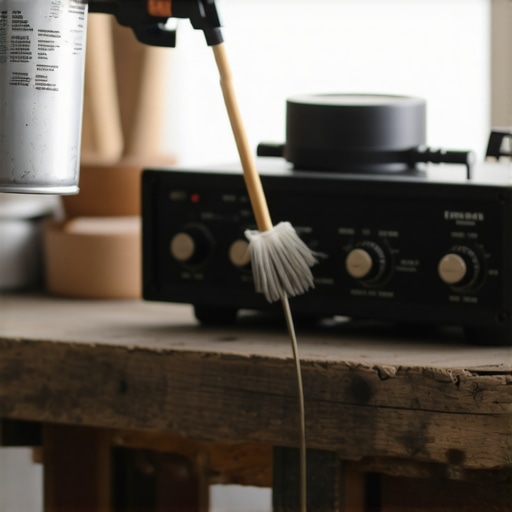
Use a soft brush or compressed air to gently remove dust from internal components. For potentiometers and switches, contact cleaner sprays designed for electronics are ideal. Spray a small amount into the control and turn it back and forth to distribute the cleaner evenly. When I cleaned my old stereo, applying a few sprays and turning the volume knob repeatedly eliminated most crackling issues. Note: Avoid using harsh chemicals or water, which can damage sensitive parts. For a visual guide, see this tutorial.
Tighten Connections and Replace Worn Parts
Loose connections can introduce noise. Check all screws, wiring, and solder joints, ensuring they’re secure. Sometimes, simply tightening a loose terminal fixes the crackle. If you notice corroded or broken wires, replace them. My first try involved re-soldering a worn joint, which immediately improved the sound clarity. For better results, consider replacing aging potentiometers with new ones, especially if cleaning alone doesn’t suffice.
Use a Grounding Method to Eliminate Hum and Crackle
Ground loops or improper grounding often cause noise. Connect a grounding wire from the chassis to a known grounding point, such as a metal water pipe or ground terminal. I added a grounding wire to my amp, and the crackling disappeared, replaced by pure sound. This technique is especially effective if the crackle intensifies when touching certain parts, signaling ground issues.
Upgrade or Replace Faulty Components
If cleaning and tightening don’t resolve the crackle, consider installing replacement parts. Premium components like high-end tweeters or upgraded capacitors can dramatically improve sound quality. For example, upgrading a cheap speaker’s crossover network often results in clearer high frequencies. Be sure to match replacement parts to your device’s specifications for optimal results.
Test the Fix in Real-World Listening
Reconnect your gear and play familiar tracks at various volumes. Listen for residual crackle or hum. Adjust controls as needed. I once thought my amp was dead after persistent crackling, but after cleaning and re-soldering connections, I was surprised to hear pristine sound again. Remember, patience and methodical troubleshooting often lead to success without expensive repairs.
Prevent Future Crackling with Regular Maintenance
Schedule periodic cleaning sessions and keep your gear in a dust-free environment. Cover your equipment when not in use to prevent oxidation and dust buildup. Proper care can extend your gear’s lifespan and keep that rich, warm sound alive for years. For essentials on maintaining your setup, check out this guide.
 When diving into the world of home audio, many enthusiasts focus solely on specifications like wattage or driver size, but there’s a subtlety that often gets ignored: the importance of understanding the acoustic environment and how gear interacts within it. Contrary to popular belief, more expensive or larger equipment doesn’t automatically guarantee superior sound quality in every setting. In fact, a well-chosen, properly calibrated system can outperform high-end gear if the nuances of room acoustics are neglected. This is where common myths about speakers and amplifiers can lead even seasoned audiophiles astray—believing that the equipment alone defines quality, rather than the synergy between gear and environment.
Why Is the Room’s Acoustics More Critical Than You Think?
Research from the Audio Engineering Society highlights that room treatment and speaker placement can have a more profound impact on perceived sound quality than the equipment itself. Small adjustments, like positioning speakers away from walls or adding diffusers, can dramatically enhance clarity and soundstage. Many assume that expensive gear bypasses the need for room considerations, but in reality, neglecting acoustics can turn high-end equipment into a muddled, less engaging experience. Incorporating acoustic panels or experimenting with speaker placement using the principles found in articles like this guide can unlock the true potential of your setup.
Another misconception is that amplifiers should always be powered at maximum capacity. Overdriving an amplifier doesn’t equate to better sound; it often results in distortion and damage. Instead, understanding the amplifier’s headroom and matching it appropriately to your speakers ensures clean, dynamic audio. This advanced nuance is sometimes overlooked, leading to common mistakes like assuming that higher wattage always means louder or better.
Furthermore, many audiophiles don’t recognize the crucial role of tonal balance and speaker crossover design. For instance, a poorly designed crossover can cause phase issues, muddiness, or uneven frequency response, which impacts clarity and imaging. Regularly inspecting the crossover components in your speaker system and ensuring they’re functioning properly is essential, as discussed in this article.
By mastering these subtle aspects—room acoustics, power matching, and crossover quality—you elevate your listening experience beyond the basics. Remember, a nuanced understanding of how gear interacts with its environment leads to richer sound and more rewarding listening sessions. Have you ever fallen into this trap of focusing only on gear specs? Let me know in the comments.
Maintaining your audio equipment over time ensures it continues to deliver exceptional sound quality and reliability. From simple cleaning routines to specialized tools, there are specific strategies I personally recommend to keep your gear performing at its best. Investing in the right tools not only saves money in repairs but also prolongs the lifespan of your beloved audio components.
Prioritize Precision When Testing Your Equipment
One of the first steps I take is using a calibrated test tone generator like the [AudioTest Driver](https://audiosoft.com/downloads/audiotestdriver/)—a software I swear by. It allows me to verify frequency response, detect distortions, and identify asymmetries between left and right channels. This is especially critical when diagnosing issues with speakers or headphones; a precise measurement helps determine whether the problem is due to component aging or setup misalignment. The use of a real-time spectrum analyzer, such as Room EQ Wizard, provides visual feedback that helps me fine-tune my system for optimal clarity.
Keep Your Connectors and Contacts Clean with Specialized Tools
Over time, oxidation and dirt build upon terminals and connectors, leading to signal degradation. I keep an assortment of contact cleaner sprays—like the DeoxIT contact cleaner—which I apply with a fine brush to connectors and solder joints. This prevents subtle-noise issues, hum, or crackle, and ensures stable connections. Regularly inspecting and cleaning these contact points is crucial; it’s a small effort that produces big gains in sound transparency.
Use Proper Calibration Equipment for Long-Term Performance
For maintaining accurate speaker balance and response, I rely on a calibrated measurement microphone paired with software like REW (Room EQ Wizard). Setting aside some time to run frequency sweeps and adjust EQ settings ensures consistency over months and even years. This approach is especially important if you routinely upgrade components or relocate your system—small tweaks here can restore tracking and imaging that might diminish with informal setups.
Adopt Regular Inspection Routines to Prevent Major Failures
Schedule semi-annual checks of your gear. Visually examine drivers and enclosures for signs of damage or dust accumulation. For vintage amplifiers or tube amps, I examine tube condition and replace any that show signs of wear, following expert guidelines like those found in this article. When in doubt, replacing aging parts preemptively can prevent more costly repairs later on.
The Future of Equipment Maintenance: Smart Monitoring
Looking ahead, the trend points toward smart, connected devices that monitor your system’s health continuously. Imagine real-time alerts for temperature spikes, voltage irregularities, or component degradation—much like the advanced diagnostics used in professional studios. Such innovations could soon become accessible for home enthusiasts, making maintenance proactive rather than reactive.
One tip I recommend trying today is using a reliable calibration microphone with REW to periodically verify your speaker response. It’s straightforward, surprisingly affordable, and provides a clear picture of your system’s health. By incorporating these tools and routines, you’ll enjoy consistent, pristine sound performance for years to come. Have you adopted any specific tools or methods for maintaining your gear? Share your experience in the comments!
What I Didn’t Expect About Fixing Old Audio Gear
- Discovering that simple cleaning can often revive vintage equipment more effectively than costly replacements was a game-changer for me. Sometimes, the most effective solution is the least complicated.
- Realizing how room acoustics influence even the most expensive speakers shifted my perspective—it’s not just the gear but how you position and treat your space that matters.
- Learned that regular maintenance, like inspecting solder joints or replacing aging components, can prevent major failures and save you money in the long run, turning troubleshooting into an opportunity rather than a chore.
- Understanding that patience and a methodical approach trump quick fixes, helping me enjoy music with clarity and confidence once again.
My Go-To Resources for Audio Enthusiasts
- REW (Room EQ Wizard): This free software has become my standard for calibration and analyzing sound response, revealing issues that my ears can’t detect alone.
- DeoxIT contact cleaner: An invaluable tool for maintaining pristine connections; I trust it to prevent crackles and hum in my equipment.
- Books like "The Complete Guide to Vintage Audio Restoration": These texts expanded my knowledge, offering step-by-step instructions and troubleshooting tips from seasoned experts.
- Online communities and forums: Sharing experiences and gaining advice from fellow enthusiasts kept me motivated and informed; they provided solutions I hadn’t considered.
Take Action and Rediscover the Joy of Pure Sound
Remember, every crackle or hum is an opportunity to learn and improve. With a bit of patience and the right tools, you can restore your vintage audio gear to its former glory and experience music like never before. Don’t let misconceptions hold you back—step into the world of DIY repairs and enjoy the authentic, warm sound that only well-maintained equipment can deliver. Have you ever fixed a piece of gear that seemed beyond hope? Share your story below and inspire others to keep their audio traditions alive!
,