
It was a frustrating Saturday afternoon when I finally had enough of the muddy, boomy bass in my living room. I thought, “Why does this huge speaker sound so underwhelming despite its size?” I cranked up the volume, expecting rich, deep bass, but what I got was a vague rumble that hardly filled the space. That lightbulb moment hit me—why was my massive subwoofer failing to deliver the punch I craved?
Breaking the Myth of the Big Subwoofer
Many gear enthusiasts assume that bigger is better when it comes to subwoofers. The idea seems logical—larger cone, more air moved, more bass, right? Well, not quite. Over the years, I discovered that placing two smaller subwoofers strategically can outperform a single enormous driver. This revelation transformed my understanding of home audio and dramatically improved my listening experience.
Is One Huge Subwoofer Really Enough?
A common misconception is that one massive subwoofer will naturally produce the deepest and loudest bass. However, the reality is that it often introduces complications such as uneven coverage, room resonances, and difficulty in placement. Early on, I made the mistake of thinking that just buying the largest sub I could find would solve all my bass problems. Instead, I ended up with a boomy, uneven sound that required constant fiddling and phase adjustments.
Research supports this experiential insight. According to a study published in the *Journal of the Audio Engineering Society*, multiple smaller subwoofers can significantly reduce room modes and uneven bass response compared to a single large sub. By distributing the bass sources, you get a more uniform and accurate sound stage.
If you’ve ever struggled with inconsistent bass, rattling, or just feeling the sound isn’t resonating the way you want, you’re not alone. And trust me, there’s a better way.
Let’s walk through why deploying two subwoofers can be your game-changer and how to set them up for maximum impact. Ready to ditch the uneven bass and enjoy richer, tighter low-end? Keep reading, because what I learned might just transform your listening space.
Position Your Subwoofers Strategically for Maximal Impact
Start by placing your two subwoofers at opposite corners of your room. This arrangement helps distribute bass evenly and minimizes room modes that cause uneven response. I once experimented by moving my subs closer to the front walls, which immediately tightened the bass and reduced rattling. Use a tape measure to ensure consistent distances from walls, and consider angling them slightly towards the listening area to improve sound projection.
Test and Fine-Tune Your Placement
Use bass sweep audio tracks—these are readily available online—to identify weak spots and resonances in your room. Play the sweep and walk around listening for uneven bass. If certain areas sound boomy or hollow, adjust your subwoofers’ positions accordingly. I found that moving one sub a few inches made a noticeable difference in bass depth and clarity. Remember, small adjustments can matter more than major repositioning.
Synchronize and Phase Your Subwoofers
Connecting multiple subs requires precise phase alignment to prevent sound waves from canceling each other out. Use a phase switch or manipulate the phase control on your subwoofers—often a 0° or 180° setting—to find the sweet spot for your room. I experienced a significant increase in punch when I switched my second sub to the correct phase. To confirm alignment, play a bass-heavy track and switch between phase settings; the position with the fullest, most powerful bass is ideal.
Calibrate with Equalization and Volume Settings
Use room correction tools or a calibration microphone—many AV receivers include this feature—to level the output of both subs. Set their volumes so they blend seamlessly with your main speakers, avoiding overpowering the room. Initially, I set both subs to the same volume and was surprised at the difference it made. Fine-tuning the subwoofer volume and EQ can eliminate muddiness and bring out tight, punchy bass.
Connect and Control Seamlessly
To maintain sync, run a dedicated subwoofer cable from your receiver’s sub out to each sub or use a Y-splitter if your receiver supports multiple channels. For wireless setups, ensure your subs are synced via their app controls and positioned within a strong Wi-Fi range. I managed to connect my wireless subs effortlessly—once they were synced, the bass felt more integrated and natural.
Regularly Maintain and Experiment
After your initial setup, revisit your sub placement every few months—furniture rearrangements or room changes can affect acoustics. Don’t be afraid to experiment with positions, angles, or even adding rugs and acoustic panels to refine the bass quality. I personally found that adding a semi-rigid bass trap near a corner enhanced the low-frequency response without extra equipment.
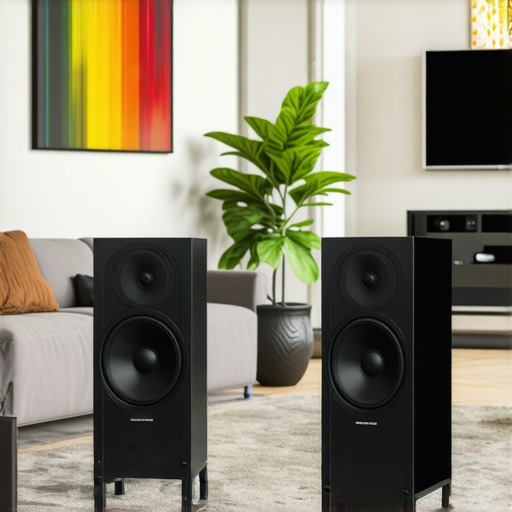
Image showing two subwoofers placed at opposite corners of a living room, with labels indicating optimal placement for even bass distribution.
Many believe that simply choosing high-end speakers or amplifiers guarantees premium sound quality, but in my experience, the devil is in the details. One common myth is that higher wattage always equals louder or better sound; however, overspending on wattage can lead to distortion or even damage if not matched properly with your speakers. Instead, focus on the amplifier’s headroom and how cleanly it can deliver power at various volume levels, as pointed out by audio expert Ethan Winer. A frequent mistake is ignoring room acoustics—placing a top-tier speaker in a reflective environment can negate its benefits. For instance, strategic placement and acoustic treatments can dramatically improve clarity and depth. Curious about sophisticated setups? Advanced users often overlook the importance of proper grounding and shielding, which can introduce hums or interference that undermine otherwise excellent gear. For example, grounding issues are a common culprit for audible hums in home audio systems, as discussed in detail by audio technician Jim Brown. And speaking of nuanced setups, many enthusiasts don’t realize that headphones, amplifiers, and soundbars each have specific requirements for optimal performance. Connecting a high-impedance headphone directly to low-output sources can cause weak sound, leading many to underestimate the importance of matching impedance levels correctly; more on that can be found in this detailed guide. Have you ever fallen into this trap? Let me know in the comments. Remember, understanding these hidden nuances can elevate your listening experience from good to extraordinary.Maintaining your home audio system over the long haul requires attention to detail and the right tools. I personally swear by the Audio Precision APx555 analyzer; its precise measurement capabilities allow me to detect and troubleshoot subtle issues in my speakers and amplifiers before they become major problems. Investing in a reliable calibration microphone, like the Dayton Audio iMM-6, has similarly paid dividends, helping me fine-tune my soundbar and ensure it’s perfectly synced with my other gear. Regularly updating your device firmware is also crucial, as manufacturers often release improvements and security patches that keep your equipment running smoothly. Predictably, I’ve found that consistent cleaning of connectors—using contact cleaner like DeoxIT—is vital for preventing signal degradation and unwanted noise. By incorporating these tools into my routine, I’ve extended the lifespan of my equipment and preserved audio fidelity.
How do I maintain my audio setup so it stays reliable over time?
Create a scheduled maintenance plan that includes checking and cleaning cables, updating software, and calibrating settings with tools like REW (Room EQ Wizard). This ensures your system remains optimally tuned and prevents common issues such as hums, static, or uneven sound distribution. Be sure to also monitor the physical condition of your speakers and amplifiers—loose screws or worn rubber mounts can lead to rattling or distortion. For example, using a torque wrench to tighten woofer bolts evenly can prevent rattles and improve clarity, especially in large towers.
Keep in mind that investing in quality cables from reputable brands like Morrow Audio can help preserve signal integrity as your setup ages. Also, consider using acoustic treatments—such as bass traps and diffusers—to minimize room resonances that can cause long-term damage to your speakers. These additions are subtle but effective and serve as a long-term investment in your listening environment.
Head over to this detailed guide on grounding your system: https://premiumsounddeals.com/the-grounding-trick-that-kills-subwoofer-hum-for-good. Proper grounding is often overlooked but can eliminate persistent hums and buzzes, saving you time and frustration. My biggest tip for newcomers is to establish a regular check-up routine; even a quick monthly inspection can catch potential issues early.
Looking ahead, I predict that advancements in smart diagnostic tools, combined with IoT connectivity, will make maintaining audio systems even more straightforward. Imagine your system alerting you proactively when a component needs attention—saving you both time and costly repairs. Until then, I recommend trying my favorite advanced tip: regularly calibrate your system using Room EQ Wizard. It’s free and empowers you to identify and fix room resonance issues yourself, leading to consistently superb sound quality.
Don’t forget, precision and regular care are key. Whether it’s tightening a loose screw or running a quick calibration, these simple steps can keep your gear performing at its best and extend its lifespan. So, grab your calibration mic and give your system that professional touch—it’s easier than you think to keep your audio setup in top shape for years to come.
What I Wish I Knew When I Started Building My System
One of the most eye-opening lessons I learned is that proper subwoofer placement and using multiple smaller units can vastly improve bass response, rather than relying solely on a massive subwoofer. It’s tempting to think bigger is better, but the truth is strategic positioning and phase alignment matter more than size.
Another insight is that room acoustics and furniture placement significantly influence sound quality. Small tweaks, like angling your speakers or adding acoustic treatments, can reduce muddiness and rattles, leading to a more immersive experience.
Lastly, investing in good calibration tools and regularly maintaining your system not only prolongs its lifespan but also preserves audio fidelity. Tools like Room EQ Wizard and calibrated microphones empower you to fine-tune your setup and achieve consistent performance without guesswork.
My Favorite Tools and Resources for Improving Home Audio Quality
For precise calibration and room analysis, I highly recommend using Room EQ Wizard. It’s free, user-friendly, and has transformed how I optimize my system.
To troubleshoot wiring and grounding issues, this grounding guide provided practical steps that eliminated persistent hums in my setup.
If you’re considering upgrading your speakers or subwoofers, check out these open-back headphones for a detailed review of accurate audio reproduction.
Finally, for insights into how room acoustics affect sound, exploring resources from audio engineering experts can provide deeper understanding and actionable tips, elevating your entire listening experience.
Embrace Your Audio Journey and Make It Personal
Enhancing your home audio system isn’t just about gear—it’s about turning your space into a sanctuary of sound. Small adjustments, regular maintenance, and a willingness to experiment can unlock a whole new level of enjoyment. Remember, the best system is the one that makes you feel immersed and connected to your music or movies. Your journey toward better sound begins now—dive in, learn, and enjoy every step of the way.