
It was a lazy Sunday afternoon when I finally decided to turn up the volume on my cherished floorstanding speakers. Suddenly, a piercing crackle interrupted the music—my old amplifier couldn’t quite handle the power anymore. That lightbulb moment hit me hard: the gear we rely on for immersive sound isn’t supposed to be a weak link, yet too often, it becomes the bottleneck, especially when you’re looking to fill a room with big, bold sound without blowing your budget. If you’ve ever faced similar frustration—turning dials, only to hear distortion or minimal volume—you know how discouraging it can be.
Finding the Right Boost Without Overstocking
When I first embarked on my journey to upgrade my home audio setup, I quickly learned a harsh reality: high-quality power isn’t necessarily expensive. In fact, many affordable amplifiers can deliver the wattage and clarity needed to drive large floorstanding speakers effectively. The key is understanding what to look for and where to find these hidden gems. I promise, there’s a sweet spot between price and performance that, once found, transforms your listening experience without draining your wallet.
Is the Hype Over Affordable Amplifiers Just Marketing?
I remember making a mistake early on—believing that only the priciest models could truly push my speakers to their full potential. It turned out, I was throwing money at brands rather than specs. A quick visit to some trusted guides revealed that many budget-friendly amps offered features and wattage levels perfectly suited for large speakers. Don’t fall into the trap of equating cost with quality—sometimes, a well-chosen entry-level amplifier outperforms expensive models in real-world scenarios. To avoid common pitfalls, I recommend checking out [this handy checklist](https://premiumsounddeals.com/the-essential-checklist-for-buying-used-audio-gear-online) before making your purchase.
Choose the Right Amplifier for Your Speakers
Start by matching your speakers’ power requirements with an appropriate amplifier. Check the recommended wattage and impedance; for instance, if your floorstanders need 100 watts at 8 ohms, select an amp that can deliver at least that without distortion. I once paired a high-wattage amplifier with low-power speakers, which resulted in excessive distortion—so always verify compatibility before buying or plugging in. Look for amplifiers supporting modern features like tone controls and multiple inputs, which can simplify your setup. For budget options, consider entry-level stereo amps that support your speaker specs; often, these deliver sufficient power without breaking the bank.
Decode Power Ratings and Impedance
Understanding wattage and impedance is crucial—wattage tells you how loud your system can go without clipping, while impedance affects how much load your amp can handle. High-impedance speakers (like 16 ohms) are easier on amplifiers, whereas low-impedance models (4-8 ohms) demand more power. When I upgraded my speakers, I focused on amps capable of handling 8-ohm loads comfortably, preventing overheating and distortion. Always check your speakers’ impedance and select an amp that can accommodate it, avoiding damage and ensuring smooth operation. It’s like matching the right gear ratio in a bike—hassle-free and efficient. For precise recommendations, see [this checklist](https://premiumsounddeals.com/the-essential-checklist-for-buying-used-audio-gear-online).
Establish Optimal Speaker Placement
Placement dramatically influences sound quality. Position your speakers so that they form an equilateral triangle with your listening spot at the apex. Keep them roughly 2-3 feet away from walls and corners to prevent bass muddiness. I once placed my speakers flush against the walls, which caused boomy bass and uneven imaging; pulling them out a few inches made a noticeable difference. Use spacers or stands if necessary to achieve the right distance from surfaces. Additionally, align the tweeters at ear level for the best clarity and focus. Experimenting with placement might be messy—moving speakers around and testing different positions until you hit that sweet spot. For more placement tips, check [this article](https://premiumsounddeals.com/5-speaker-placement-mistakes-that-ruin-your-stereo-image).
Adjust and Fine-Tune Your System
Once set up, fine-tune your system for optimal sound. Use a sound level meter or smartphone app to calibrate volume levels; start with equal loudness on each speaker. Equalizing can be done via your amplifier’s tone controls or a dedicated equalizer—boosting or cutting frequencies to match your preferences. I once used a DIY pink noise test and adjusted each speaker’s volume until the sound matched perfectly at my listening position. Don’t forget to check for phase differences—if speakers are wired out of phase, stereo imaging collapses. Switch the polarity of one speaker cable if necessary; it’s a quick fix that can significantly improve sound clarity. Remember, small adjustments can make a huge impact. For more detailed calibration methods, see [this guide](https://premiumsounddeals.com/why-your-soundbar-dialogue-is-hard-to-hear-even-at-high-volume).
Simplify Connectivity With Proper Cables
Choose quality cables to prevent signal loss. For speakers, thick gauge speaker wire (around 14-16 AWG) ensures minimal resistance, especially over longer runs. Clipping or weak sound can be signs of poor wiring—replace thin or cheaply made cables with better ones. When connecting to modern AV receivers or amplifiers with HDMI or optical outputs, opt for high-quality digital cables; they transmit audio cleanly without interference. I learned the hard way that gold-plated connectors don’t necessarily improve sound—it’s more vital to have solid, well-soldered connections. Proper cable management reduces clutter and prevents accidental unplugging. If you’re connecting multiple speakers, consider bi-wiring or bi-amping—though opinions vary, it’s worth exploring if you’re chasing high-fidelity sound. For more on cables and their impact, visit [this article](https://premiumsounddeals.com/the-truth-about-gold-plated-cables-and-your-ear-ears).
Test and Iterate for Best Results
After setup, test with familiar tracks and different genres to identify shortcomings. Pay attention to bass response, clarity, and stereo imaging. If something sounds off, re-examine your placement, calibration, or wiring. Don’t hesitate to revisit your settings; often, slight tweaks yield substantial improvements. I once spent an entire afternoon adjusting my speaker distances and EQ, but finally achieved a balanced, immersive soundstage. Record your configurations so you can replicate perfect settings or troubleshoot when needed. Remember, audio setup isn’t a one-and-done task—continuous refinement ensures ongoing excellence. For common troubleshooting tips, see [this resource](https://premiumsounddeals.com/why-your-soundbar-dialogue-is-hard-to-hear-even-at-high-volume).Even seasoned audiophiles can fall prey to misconceptions when shopping for home audio gear. A common mistake is relying solely on wattage ratings to determine an amp’s power, but in reality, listening volume and distortion thresholds matter more. Many believe that expensive necessarily equals better quality; however, numerous budget amplifiers outperform pricier models in producing clean, powerful sound.
Do Higher Prices Guarantee Better Sound Quality or Just Brand Prestige?
Research from audio engineering experts shows that overpaying for brand names often leads to minimal improvements in sound performance, whereas focusing on specifications like total harmonic distortion (THD) and signal-to-noise ratio delivers real gains. Beware of discounts that seem “too good to be true,” which might hide compromised components or refurbished units lacking warranty. When selecting speakers, don’t underestimate the importance of proper impedance matching; pairing high-impedance speakers with underpowered amps can cause distortion or damage. Likewise, assuming that more expensive cables always improve sound is a myth—quality depends more on construction and shielding than price, as discussed in [this detailed article](https://premiumsounddeals.com/the-truth-about-gold-plated-cables-and-your-ear-ears). Many enthusiasts overlook the nuance of speaker placement, believing that equipment alone delivers optimal sound. Yet, even premium gear loses its magic if placed poorly. Proper positioning—avoiding close walls and ensuring symmetry—can drastically enhance clarity and imaging. Lastly, a frequent misconception is that bigger speakers mean better sound; however, listening environment and room acoustics significantly influence perceived audio quality. Smaller, well-placed speakers often outperform large, poorly sited ones. Remember, mastering home audio isn’t just about gear; it’s about understanding these subtle factors that truly elevate your listening experience. Have you ever fallen into this trap? Let me know in the comments and share your experience with home audio upgrades.
The Tools I Rely On to Keep My Audio Gear in Top Shape
Owning a high-quality home audio setup requires more than just selecting the right speakers and amplifiers; regular maintenance with the right tools ensures consistent performance and prolongs lifespan. One of my go-to essentials is a good microfiber cloth paired with a gentle electronics cleaner. I use this combination to clean my speaker grills and amplifier surfaces, preventing dust buildup that can affect sound quality. For delicate connections, I prefer a contact cleaner spray like deoxit, which I apply sparingly to switches and input jacks to prevent crackling and signal degradation. These simple tools are cost-effective yet vital—I’ve found that neglecting routine cleaning leads to subtle deterioration over time.
How do I maintain my audio components over time?
Implementing a regular calibration routine is crucial. I use a digital multimeter with a calibration function to verify speaker impedance periodically, ensuring that no wiring issues have emerged. Additionally, I rely on room acoustic measurement apps such as REW (Room EQ Wizard) to analyze my listening environment. This software helps me detect anomalies like standing waves or echoing, guiding me to reposition speakers or add acoustic treatment. Regular updates to firmware on modern AV equipment also keep my system running smoothly—most manufacturers release firmware patches that address bugs and improve compatibility. Making it a habit to check for updates quarterly is a proactive way to prevent unexpected technical issues.
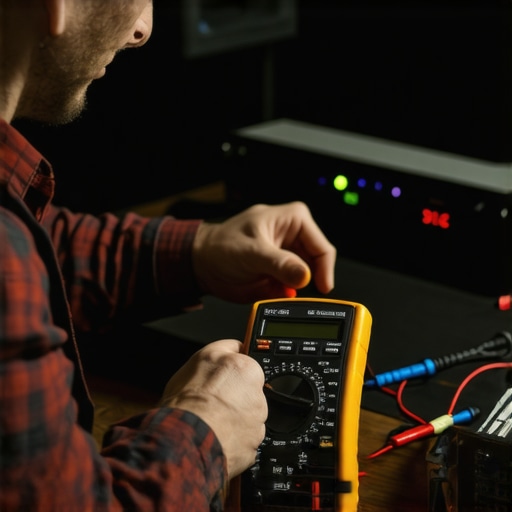
Regarding long-term performance, it’s important to invest in quality power conditioners or surge protectors to shield your gear from voltage spikes. I’ve personally used the Furman Power Conditioner, which not only protects my equipment but also filters noise that can interfere with audio clarity. This prevents gradual degradation of sensitive components and ensures clean power supply. For finer tuning, I occasionally inspect cables with a cable tester, such as the Klein Tools VDV Tester, to identify any internal wire breaks or insulation failures that might cause signal loss or distortion. Maintaining your cables and connectors prevents subtle sound quality issues that only become noticeable over time.
Looking ahead, the trend points toward smarter, self-diagnosing audio systems that can alert you to issues proactively. As technology advances, expect integrated systems with built-in diagnostic tools that reduce manual maintenance. For now, taking a hands-on approach with accessible tools like contact cleaners, calibration software, and quality power management remains the best way to keep your setup working flawlessly.
If you haven’t already, try calibrating your speakers using REW or similar software. It’s a game-changer for ensuring your room’s acoustics are optimized, making your listening sessions truly immersive. Regular maintenance, combined with these specialized tools, transforms your home audio into a reliable, high-performance system for years to come.
What I Wish I Knew Before Falling for the Big Names
One of my biggest surprises was realizing that brand prestige often masks subpar internals. Early on, I chased after high-end labels, only to find that some budget amplifiers outperformed their pricier counterparts in sheer clarity and power. It taught me that digging into specifications like THD and SNR matters more than the sticker on the front. This insight saved me hundreds and helped me make smarter choices.
The Truth About Cables and Signal Integrity
I used to believe that expensive cables instantly improve sound quality. Turns out, a well-shielded, appropriately gauged cable does the trick just fine—no need to splurge on gold-plated connectors or exotic materials. I learned that proper cable management and avoiding interference are key. A simple test with a cable tester revealed how many cheap cables were silently degrading my sound—so investing in quality often pays off in clarity.
Placement Is Still King, Even with the Fancy Gear
Despite upgrading my amplifier and speakers, I discovered that positioning made or broke my listening experience. Moving my speakers a few inches, angling tweeters toward my listening spot, or pulling them away from walls created a vast improvement. It reminded me that no amount of tech can compensate for proper placement — something I often overlooked in pursuit of the latest gear.
Fine-Tuning Brings Magic to Your Listening Space
Calibration tools like Room EQ Wizard opened my eyes to the subtle room resonances and frequency drops I never noticed before. Small adjustments in EQ and speaker alignment transformed my setup from decent to immersive. It’s a gratifying process that emphasizes patience and listening skills, proving that detailed calibration offers more reward than simply upgrading components in isolation.
What Hidden Lessons Have Transformed Your Audio Journey?
Sometimes, the most valuable lessons come from mistakes—like over-relying on wattage or ignoring room acoustics. Reflecting on my journey, I realize the importance of holistic thinking: gear, placement, and calibration work hand-in-hand. What personal revelations have changed how you approach your home audio setup? Share your story below!
Tools That Keep My Sound Sharp
I’ve come to rely on a few trusted tools to maintain my setup’s integrity. A microfiber cloth combined with gentle electronics cleaner keeps my gear dust-free and responsive. A contact cleaner spray like deoxit ensures switches and connectors stay noise-free. For calibration, I prefer the free software Room EQ Wizard, which guides me through measuring and adjusting my room acoustics. Investing in a quality power conditioner like Furman has also protected my components from voltage spikes and noise. These tools may seem simple, but they make a huge difference in sustaining and improving sound quality over time.
Harness Your Curiosity—Don’t Be Afraid to Experiment
Improving home audio isn’t about perfect setups; it’s about discovering what sounds best to you. Don’t hesitate to try different speaker placements, tweak your EQ settings, or experiment with new cables. Every room and listener is unique, so embrace the process as a personal adventure. Keep learning, stay curious, and your system will reward your effort with richer, more immersive sound. What small tweak has made the biggest difference in your setup? Let’s discuss below!