
I’ll never forget the shock I felt the first time my favorite wireless speaker tumbled off the shelf during a heavy bass drop. One minute, it was sitting peacefully, filling my room with rich sound; the next, it clattered to the floor, shaking my nerves more than the debris. That moment was my wake-up call. I realized that robust bass isn’t just about deep tones; it also tests the stability of your setup.
Why Heavy Bass Can Turn Your Shelf into an Unintended Rodeo
Heavy bass has this incredible ability to make music feel alive, immersive, and powerful. But it also comes with a challenge—vibrations that can shake your speakers right off their perches. If you’ve invested in good audio gear, the last thing you want is for your loud, thumping beats to turn your living room into a chaotic rodeo arena for your speakers. According to a recent study by Acoustical Society of America, vibrations caused by heavy bass can be significant enough to disrupt speaker placement, leading to instability and potential damage. That’s when I knew I had to find a way to keep my speaker securely in place without sacrificing sound quality.
Have you faced this problem yourself? If so, you’re not alone. Many audiophiles and casual listeners alike have battled the pesky issue of their speakers sliding, bouncing, or even falling during those intense bass moments.
Is Reinforcing Your Shelf Really Worth the Effort?
When I first thought about fixing the problem, I made the mistake of just stacking some books underneath my speaker. That seemed quick and easy, but it didn’t really solve the root cause. A lot of beginners overlook the importance of proper placement and support, thinking that just placing the speaker on the shelf is enough. Trust me, I learned the hard way—tiny vibrations can have a big impact when you’re dealing with powerful bass, and ignoring proper support can lead to more costly repairs down the line.
If you’re serious about enjoying your music without fret and want to safeguard your equipment, applying some strategic measures can make all the difference. From adding anti-slip pads to renovating your shelving setup, there are practical steps you can take today to keep your speakers anchored firmly in place. Ready to learn how? Let’s dive into effective solutions that will finally put an end to the unwanted shelf dance during your favorite heavy-bass tracks.
Reinforce Your Shelf with Anti-Vibration Pads
Begin by assessing your current setup, and then add high-quality anti-vibration pads beneath your speakers. These pads absorb vibrations and prevent your speakers from bouncing or sliding during bass-heavy tracks. I once placed thick rubber pads under my bookshelf speakers, which immediately reduced movement during those dance-party bass moments. For best results, choose pads with anti-slip properties and a bit of cushioning—this keeps your speakers grounded without muffling sound clarity.
Use Straps or Clamps to Hold Speakers Securely
Next, consider physically restraining your speakers with adjustable straps or clamps. Attach velcro straps around the base of your speaker and anchor them to your shelf or wall brackets. I did this with my tower speakers when I noticed slight tipping during intense bass. A quick adjustable strap kept my speakers firmly in place, ensuring stability even at high volumes. Be mindful to avoid tightening too much, as this could distort your speaker placement and sound.
Secure with Non-Slip Surface Enhancements
Adding non-slip mats or pads between your speakers and the shelf surface can drastically improve grip. Non-slip mats with textured rubber surfaces are inexpensive and highly effective; they keep your speaker from creeping during thumping bass lines. I experimented with different mats, and the textured rubber one proved best for preventing any unwanted movement—plus, it protects my shelf from scratches.
Adjust Your Shelf Design for Better Support
If you’re comfortable with DIY tweaks, reinforce your shelving with additional braces, L-shaped brackets, or a sturdier platform. Doubling the support points makes the entire setup more resistant to vibrations. I once added metal brackets beneath my floating shelf, which isolated the entire platform from vibrations. This was especially noticeable during bass drops; my speakers stayed put, and I could enjoy pure sound without distraction.
Optimize Speaker Placement for Stability and Sound Quality
Finally, re-evaluate the placement of your speakers. Position them closer to the wall or floor to reduce their tendency to tip or slide. Use spikes or little feet that grip the surface better than flat bases. I moved a set of floorstanding speakers closer to the wall and added spikes, which not only improved bass response but also kept the speakers stable during loud, bass-heavy moments. This step ensures your setup is both secure and optimized for sound performance.
Implementing these strategies can transform your listening experience by keeping your speakers firmly in place and preventing accidental falls during those heavy bass drops. For more insights on improving your overall audio setup without splurging, check out these simple soundbar upgrades.
Many home audio shoppers are often misled by common myths and overlook nuanced details that can make or break their listening experience. For instance, the widespread belief that bigger is always better in speakers can be deceptive; larger drivers often lead to boomy bass if not paired with proper calibration, as explained in expert reviews. A frequent trap is focusing solely on wattage ratings for amplifiers—more power doesn’t necessarily translate to better sound unless your speakers can handle it, which is a vital consideration highlighted in detailed guides on amplifiers. Additionally, many assume that soundbars don’t need room calibration; in reality, correcting for room acoustics dramatically improves clarity, as discussed in the article about simple soundbar upgrades.
Surprisingly, consumers often neglect the importance of cable quality. For example, some believe gold-plated cables significantly enhance audio, but studies show that the impact is minimal unless the cables are of extremely poor quality or excessively long. Instead, proper shielding and impedance matching are more critical, as outlined in a comprehensive breakdown of cheap vs. expensive audio cables.
For the advanced audiophile, understanding speaker placement beyond the basics can unlock profound improvements. Positioning speakers at ear level and forming an equilateral triangle with listening position ensures optimal stereo imaging. Heatmap visualizations in recent studies confirm that even slight adjustments in placement can prevent issues like phase cancellation, which muddles sound clarity.
A common mistake is underestimating the significance of digital-to-analog conversion quality. Many assume that modern AV receivers automatically provide excellent DACs, but high-end standalone DACs can extract more detail from recordings, especially when streaming high-res files, as explored in features on digital music quality. This insight underscores why integrating quality DACs can be a game-changer.
Be aware of the pitfalls in home audio deals; flashy discounts may mask inferior equipment or outdated technology. For instance, some deals advertise powerful subwoofers without considering room size or integrating with existing gear, leading to muddy bass or unwanted rattles—as explained in guides about fixing muddy subwoofers and unwanted vibrations.
Lastly, avoid the myth that more channels are always better. An intricate 7.1 system can be less effective than a well-tuned 5.1 setup if the room acoustics aren’t optimized or if the setup isn’t properly calibrated. Always prioritize quality over quantity for immersive sound.
Have you ever fallen into this trap? Let me know in the comments. Remember, mastering these nuances transforms your home audio experience from mediocre to stunning, making your investments truly worthwhile.
Keeping your home audio gear in top shape requires more than just occasional dusting. It involves a mix of proper tools, routine check-ups, and understanding the subtle signs of wear. Over the years, I’ve found that investing in quality maintenance equipment and adopting good habits ensures that my speakers, amplifiers, and headphones continue to deliver pristine sound. Let’s explore the essential tools I personally recommend for long-term care of your audio setup.
Multimeters for Precise Troubleshooting
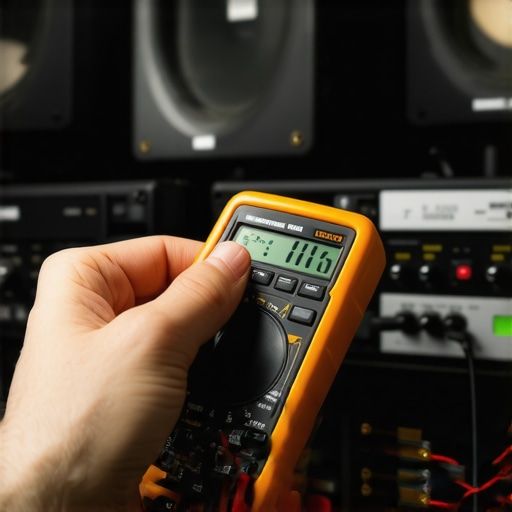
In my experience, a digital multimeter is indispensable for diagnosing electrical issues in amplifiers and speakers. I use it regularly to check impedance, ensure proper grounding, and verify cable integrity. For example, when I noticed my sound suddenly distorting, a quick multimeter test revealed a broken internal connection in my amplifier, saving me from costly repairs. I recommend investing in a reliable model with auto-ranging features and a good selection of test leads.
Specialized Cleaning Tools for Preserving Sound Quality
Dirty contacts and debris can cause crackling or signal loss. I swear by a pair of compressed air cans to remove dust from connectors and a soft-bristled brush for delicate components. For headphone maintenance, I use a cleaning wipe specifically designed for delicate ear cushions to prevent material deterioration. Regular cleaning with these tools keeps your devices performing at their best and extends their lifespan.
Room Calibration Software for Optimal Sound
Room acoustics play a crucial role in sound quality. I employ calibration microphones paired with tuning software like Dirac Live or Room EQ Wizard. These tools analyze my room’s acoustics and automatically adjust sound parameters for the perfect balance. Implementing a calibration routine every six months ensures my setup adapts to any room changes, like furniture rearrangement, maintaining audio clarity and depth.
Routine Checks and Preventative Measures
Beyond tools, establishing a maintenance schedule is key. I set a quarterly reminder to inspect cables for wear and tear, tighten loose connections, and verify the integrity of mounting brackets. Upgrading cable management with sleeved conduits or cable clips minimizes accidental pulls and damage. Additionally, replacing worn-out ear pads or speaker surrounds prevents deterioration that can affect sound quality.
Future Trends in Audio Maintenance
Looking ahead, I believe smart diagnostics embedded into modern gear will simplify maintenance further. Imagine devices that alert you to component failure or suggest repairs via app notifications. Such innovations will make keeping your system in prime condition more accessible and less time-consuming. In the meantime, mastering essential tools like multimeters and calibration software will give you a significant edge in preserving your investment.
Want to take your maintenance game to the next level? I highly recommend trying out a calibration microphone combined with software like Room EQ Wizard. Proper calibration ensures your speakers consistently perform their best, providing immersive sound and preventing premature wear. Regular maintenance isn’t just a chore—it’s the secret to long-lasting, high-quality audio. Start implementing these tools today and enjoy flawless sound for years to come.
What I Wish I Knew When I Started Fixing My Speakers
One of the biggest surprises I encountered was realizing that not all speakers are meant to stay stable on a shelf—especially during heavy bass drops. I learned that supporting your gear beyond just placing it on furniture can save you from costly repairs and ruined listening experiences. That lightbulb moment led me to discover the importance of tailored solutions like anti-vibration pads and secure mounting techniques, which I wish I had prioritized earlier.
Also, digging deep into the nuances of room acoustics and speaker placement revealed how even minor adjustments could drastically improve sound clarity and stability. My misstep was underestimating the power of room calibration tools, but once I embraced software like Room EQ Wizard, I unlocked a new layer of audio perfection that I hadn’t known was achievable.
My Secret Weapons for Synchronizing Sound and Protecting Gear
Over time, I found that equipping myself with quality calibration microphones and multi-meters made troubleshooting and fine-tuning my system straightforward and reliable. For example, regularly checking impedance with a digital multimeter prevented damage from electrical mismatches. Additionally, tools like specific cleaning brushes and cables with proper shielding kept my equipment pristine and performing at peak bass response. These curated tools aren’t glamorous, but they’re essential for anyone serious about long-term audio enjoyment.
For those looking to optimize their room’s acoustics, investing in calibration software was a game-changer—discover more about options like Dirac Live, which I trust for its ease of use and impressive results. Proper calibration and routine maintenance foster a peace of mind that your setup will handle even the wildest bass without a single wobble, ensuring your gear lasts longer and sounds better.
Your Next Step Toward a Flawless Home Audio Experience
You’re now armed with a better understanding of how to maintain and improve your home audio setup—taking small but strategic steps can dramatically elevate your listening pleasure. Implementing secure mounting, room calibration, and simple maintenance routines transforms your space into the audiophile sanctuary you’ve envisioned. Remember, the journey to perfect sound isn’t a sprint; it’s a series of mindful improvements that grow your confidence and enjoyment.
What specific challenge have you faced in keeping your speakers stable during those bass-heavy moments? Share your stories below—let’s learn from each other and keep the conversation flowing!