
I remember the moment like it was yesterday. I had just bought a sleek new soundbar, excited to upgrade my home theater experience. But no matter how much I fiddled with the settings, the dialogue sounded muffled, and the surround effects felt flat. After hours of frustration, I finally realized that I’d been missing a crucial detail about connecting my TV to my audio system. It wasn’t just about plugging in the latest gadgets; it was about understanding the difference between optical and HDMI ARC connections. This lightbulb moment not only improved my setup but also saved me from countless headaches down the line.
Deciphering the Audio Connection Puzzle: What’s the Real Difference?
Choosing between optical and HDMI ARC can feel like navigating a maze. On the surface, they both serve to carry audio signals, but the nuances make all the difference—especially if you’re aiming for the best sound quality or seamless functionality. Early on, I made the mistake of assuming they were interchangeable—an easy misconception, but one that can lead to sound issues or missed features. Understanding how they operate helps you make smarter choices, avoid common pitfalls, and get the most out of your audio gear.
Is All the Hype About HDMI ARC Just Overblown?
One of my biggest doubts was whether HDMI ARC really justified the extra complexity. I’d read that many folks swear by it, but I wondered if optical was enough—especially for simpler setups. Interestingly, a study from Sound & Vision highlights that HDMI ARC can support higher bandwidth and more features, but only if your TV and receiver support it fully. I learned that early on I overlooked compatibility issues, resulting in subpar sound or features I couldn’t access. So, in this post, I’m here to share practical insights from my experience and help you choose the right connection without the confusion or trial-and-error.
Identify Your Devices’ Compatibility First
Before diving into cable choices, check your TV and audio device manuals to see if they support HDMI ARC or optical connections. I once had a TV that supported HDMI ARC but not optical, leading me to focus solely on HDMI. To verify, locate the HDMI ports labeled “ARC”—this labeling is crucial to ensure seamless communication. I recommend testing your device’s support for each connection type by connecting a known compatible device, avoiding costly mistakes and incompatibilities.
Choose the Right Cable for Your Setup
Optical Cables
Optical cables are like high-end audio straws—they transmit digital audio signals using light, preserving quality. When setting up, use a premium optical cable—cheap ones may introduce interference or degrade audio. For instance, I initially used a budget optical cable that caused crackling; upgrading to a solid-core fiber optic cable fixed the issue. Remember, optical cables don’t carry control signals, so device syncing is limited, which might affect features like volume control.
HDMI ARC Cables
HDMI ARC (Audio Return Channel) uses the same cable to send high-definition audio and integer control signals, like power and volume, enabling simpler setups. When connecting, ensure both your TV and audio device support HDMI ARC; otherwise, you’ll need to revert to optical. I once had a scenario where my setup only worked after switching to an HDMI cable with the latest Ethernet-compatible standard, highlighting the importance of using high-quality, compatible cables for optimal performance.
Configure Your Devices Properly
Settings matter. For HDMI ARC, go into your TV’s audio settings and enable HDMI ARC or CEC (Consumer Electronics Control). For optical, set your TV’s audio output to “Digital Out” or “Optical.” I learned this the hard way, spending hours troubleshooting until I discovered I’d left the TV’s audio output set to internal speakers. Proper configuration ensures your audio signals are routed correctly and features like volume control work smoothly.
Test and Confirm the Connection
After connecting and configuring, play content to verify sound quality and responsiveness. Whistling or crackling signals a connection issue—try reseating cables or swapping to a different port. I once had to switch my HDMI cable to another port because one port was malfunctioning, which resolved the problem. Listening for sync issues or missing channels helps confirm that your setup is optimal.
Nurture Compatibility for Future Upgrades
When upgrading hardware, verify that new components support your established connection type. For instance, upgrading my soundbar to a model supporting Dolby Atmos required checking HDMI ARC capabilities to ensure full feature access. Keep firmware updated to prevent compatibility hiccups, and consider using high-bandwidth HDMI cables for future-proofing. This proactive approach saves you time and preserves sound fidelity over time.
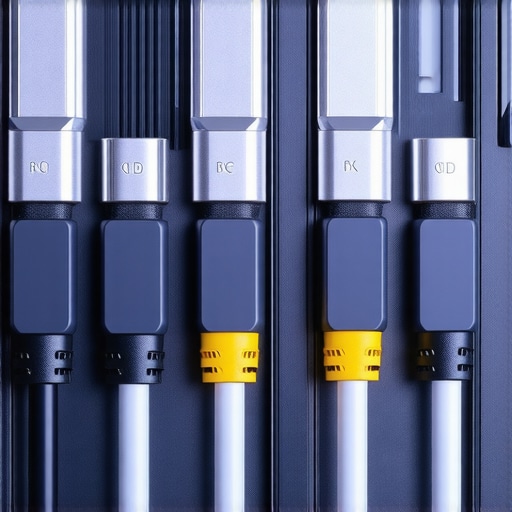 Many enthusiasts assume that amplifiers, speakers, and soundbars are straightforward investments—just pick a powerful one and enjoy. However, true audiophiles know there’s more beneath the surface. A common misconception is that wattage equals loudness; in reality, amplifier power needs to match speaker efficiency and room acoustics for optimal sound. Overlooking this can lead to underwhelming performance or even damage to your gear. Additionally, many believe that higher sensitivity speakers always produce louder sound; but sensitivity alone doesn’t account for tonal balance or clarity at specific volumes. For example, pairing a high-sensitivity speaker with a weak amplifier may result in faint sound, defeating the purpose of high efficiency. It’s also a mistake to think that all soundbars are created equal—many overlook the importance of proper placement and room compatibility, which are crucial for immersive audio. Advanced setups require nuanced understanding; for instance, bi-wiring or bi-amping might seem appealing, but unless your speakers are designed for it, it’s often a waste of effort and money. A common myth is that bi-wiring boosts sound quality significantly—research suggests the benefits are minimal unless specific conditions are met. Furthermore, misunderstood features like impedance matching can lead to distortion; pairing high-impedance speakers with low-powered amplifiers risks clipping and damage. Beware the trap of focusing solely on specifications; detailed measurements, such as frequency response and phase linearity, are vital for a balanced system. The advanced audiophile knows that room acoustics profoundly influence perceived sound—without proper treatment, even the most expensive gear can sound dull or boomy. Consider placement strategies or acoustic panels, which can make a world of difference. Also, many underestimate the importance of power conditioning and grounding to reduce hum and noise, ensuring clean audio signals. A hidden nuance is that perfect equipment setup doesn’t guarantee great sound; environmental factors often shape the listening experience more than gear quality alone. Remember, the devil’s in the details, and paying attention to these advanced aspects can elevate your home audio from good to extraordinary. Have you ever fallen into this trap? Let me know in the comments.Maintaining your home audio system is crucial to sustaining great sound quality over years of use. I rely on a combination of specialized tools and disciplined routines to ensure my gear operates smoothly and sounds its best. First and foremost, I recommend investing in a high-quality residual hum eliminator, such as the HumX Hum Eliminator. This device effectively removes ground loops and reduces static noise, which can degrade audio clarity. Regularly inspecting and cleaning your speaker terminals with contact cleaner ensures solid connections, preventing crackling or loss of signal. For that, I personally use the DeoxIT Gold Contact Cleaner, which is gentle yet effective at restoring conductivity without damaging sensitive components.• To monitor your system’s performance, I employ a professional-grade SPL meter like the X-Sense Sound Level Meter. Regular measurements help detect subtle changes in room acoustics or equipment efficiency, allowing you to tweak speaker placement or upgrade components proactively. When it comes to software, I use the free Ampache server for streaming my audio library seamlessly across devices, ensuring my setup adapts to modern needs.
Predicting the future of home audio suggests a shift towards smarter, self-maintaining ecosystems. Emerging technologies like AI-driven calibration tools will soon automate room equalization, making manual adjustments less necessary. Meanwhile, maintaining your current system involves periodic firmware updates. Manufacturers often release patches improving compatibility and noise reduction.
Wondering how to keep your system performing flawlessly over time? One essential step is to routinely check and replace aging cabling, especially if you notice increased interference or a drop in sound fidelity. Using quality cables, like the OFC audio-grade RCA cables, can make a noticeable difference.
Here’s a specific tip you might try today: perform a gentle re-seating of your speaker wires and connectors. Sometimes, simply unplugging and reconnecting them securely can eliminate subtle issues and restore optimal clarity. Regular preventive maintenance, combined with the right tools, can extend the life of your gear and ensure each listening session is as immersive as the first. Don’t forget to schedule quarterly checks of your cables and connections—they’re the backbone of your audio experience.
The Hidden Lessons That Changed How I Approach Home Audio
- One of my most surprising discoveries was realizing that not all HDMI cables are created equal. Upgrading to high-quality, certified HDMI cables made a noticeable difference in sound and picture clarity, which I hadn’t anticipated.
- Accepting that room acoustics play as vital a role as the equipment itself was a game-changer. Simple adjustments like strategic furniture placement and adding acoustic panels transformed my listening experience beyond the equipment specs.
- My biggest lightbulb moment came when I finally understood that consistent device firmware updates could unlock new features and fix nagging compatibility issues, ensuring my system stayed ahead of the curve without additional investments.
My Favorite Tools and Resources for Perfecting Your Home Audio System
- X-Sense Sound Level Meter: I trust this professional-grade SPL meter because it provides precise measurements, helping me optimize speaker placement and room calibration with confidence.
- HumX Hum Eliminator: Ground loop noise was a persistent annoyance until I started using this device, which effectively cleared static and hum, elevating audio clarity significantly.
- DeoxIT Gold Contact Cleaner: Regular maintenance of speaker and audio connections prevents crackling and ensures consistent sound quality, making this my go-to for cleaning contacts safely.
- Ampache: Streaming my audio library across devices became seamless with this open-source platform, helping me enjoy my collection without compatibility worries, and I recommend it to anyone building a multi-room setup.
Your Journey to Excellent Sound Starts Now
Playing with your home audio system can feel overwhelming at first, but every small improvement contributes to a richer, more immersive experience. Remember, the real magic happens when you combine the right connections, proper setup, and ongoing maintenance. Don’t hesitate to experiment—each tweak brings you closer to audiophile-quality sound, right in your own space. Your home theater deserves it, and so do you. What’s the next upgrade you’re excited to try? Share your plans below and let’s discuss how to make your audio dreams a reality!