
It was a quiet Sunday afternoon when I finally decided to crank up my favorite playlist. As the music filled the room, I suddenly noticed a strange, dull thud in the sound. That sinking feeling hit me—did I just blow a speaker driver? If you’ve ever experienced that moment of acoustic dread, you know how unsettling it can be. Those occasional crackles or muffled sounds can make even the most expensive setup feel disappointing, and before you know it, you’re questioning whether your beloved speakers are still salvageable.
Why Confirming a Blown Speaker Matters More Than You Think
Understanding whether your speaker drivers are actually blown isn’t just about avoiding unnecessary repairs or replacements. It’s about preserving your hard-earned audio experience and preventing further damage. A blown driver often leads to poorer sound quality, distortion, or complete silence, which is incredibly frustrating. Plus, if you jump into replacing parts without proper diagnosis, you might end up spending more than necessary—or worse, replacing perfectly fine components.
In my early days experimenting with home audio, I made the costly mistake of assuming that a hissing sound meant my speaker was blown, leading me to replace it unnecessarily. That experience taught me the importance of knowing how to accurately diagnose speaker health. Interestingly, research shows that many audio enthusiasts overlook simple test methods, risking further damage or missed opportunities for saving their gear. According to Audioholics, a clear understanding of speaker health can save you hundreds of dollars and restore your peace of mind.
Have You Faced This Problem?
If you’ve ever heard strange noises, diminished sound quality, or sudden silence from your speakers, you’re not alone. Let’s dive into how to tell if your speaker drivers are actually blown—so you can make informed decisions and keep your home audio sounding its best.
Perform the Basic Listening Test
Start by playing familiar music at a moderate volume and listen carefully for distortions, crackles, or a lack of bass. If the sound is muffled or missing in certain frequencies, your speaker might be damaged. Remember, a healthy speaker should handle volume without distortion. I once used my headphones to test my bookshelf speakers after noticing crackling sounds—this quick test revealed a torn cone, saving me from expensive replacements.
Conduct Visual Inspection
Carefully examine the speaker cone, surround, and grille. Look for tears, dents, or discoloration. In my case, a small tear in the cone was visible, which explained the distortion. Be cautious, as pressing directly on the cone can cause further damage. When in doubt, use a flashlight and magnifying glass for better visibility. Don’t forget to inspect the wiring connections; loose or frayed wires can mimic speaker issues.
Test with a Signal Generator or Tone Generator App
Use a tone generator app or signal tester to send test tones across different frequencies—especially lows and highs. Play a 1kHz tone and listen with a good pair of headphones. If you notice a missing frequency, rattling, or buzzing, it could indicate a blown driver. I used a free app on my phone and a simple amplifier to isolate each speaker, quickly identifying the faulty unit. This method is more precise than just listening alone.
Inspect the Internal Components
If you’re comfortable opening your speaker cabinet, unscrew the grille or cabinet cover to examine internal parts. Look for burnt coils, damaged spiders, or displaced voice coils. In one instance, I discovered a burned coil after disconnecting the driver, which explained the lack of sound. Ensure the speaker is unplugged and discharge any static before opening—safety first. If internal damage is present, the driver may need professional repair or replacement.
Test the Speaker with Different Equipment
Connect the speaker to a known-good amplifier or receiver. If the speaker still produces no sound or distorted output, it’s likely blown. Conversely, testing with a different amplifier can rule out issues with your audio source. I once swapped my speaker into a different setup and confirmed the problem wasn’t my amp, which saved unnecessary troubleshooting.
Compare Stereo Channel Performance
If you have a stereo setup, swap speakers between the left and right channels. If the problem moves with the speaker, it’s faulty; if not, your amp or wiring may be to blame. This quick swap helped me diagnose a blown driver in my left bookshelf speaker, saving money by avoiding unnecessary replacements.
When it comes to building an optimal home audio setup, many enthusiasts fall into common traps and misconceptions. One prevalent myth is that purchasing the most expensive gear guarantees the best sound. In reality, understanding the nuances of speaker efficiency and matching components is crucial. For instance, high-end amplifiers won’t perform at their best if connected to low-sensitivity speakers, leading to underwhelming volume and clarity. Instead, opting for high-efficiency speakers can maximize performance without overstressing your amplifier, saving you money and improving sound quality.
Another frequent mistake is oversimplifying multichannel configurations. Many assume that a larger surround sound system automatically enhances movie experiences. However, in compact spaces like studio apartments, a detailed understanding of speaker placement and room acoustics matters more. Installing multiple speakers in suboptimal positions can create a disjointed soundstage, diminishing immersion. Instead, a focused setup with well-placed high-quality speakers often produces a more coherent and satisfying experience. High-efficiency speakers are especially beneficial in small rooms, providing impactful sound at lower power levels, which means you can use more affordable amplifiers while still achieving impressive volume and clarity.
Now, let’s address a common misconception about soundbars and multi-room audio systems. Many believe that simply adding more speakers will automatically create a richer sound. But without proper calibration and understanding of room acoustics, you risk creating a chaotic soundscape. Investing in a good calibration process and understanding how to optimize speaker placement can lead to a significant leap in audio fidelity without extra hardware. For example, multi-room setups become much more effective when you consider their placement and room characteristics rather than just quantity.
Advanced-level listeners should consider how speaker sensitivity and impedance influence system dynamics. Matching these attributes correctly can prevent damage, distortion, and ensure efficient energy use. For example, pairing high-sensitivity speakers with a low-wattage tube amplifier can produce surprisingly loud and detailed sound, creating a satisfying balance. You might want to explore options like high-sensitivity speakers for such setups.
Keep in mind, many misconceptions can lead to costly mistakes and subpar audio performance. Selecting components based solely on brand reputation or wattage ratings often misses crucial nuances that determine real-world sound quality. Paying close attention to efficiency, matching component specifications, and room optimization are key to truly elevating your audio experience. Have you ever fallen into this trap? Let me know in the comments.
How do I maintain my audio equipment over time?
Maintaining your home audio setup isn’t a set-it-and-forget-it task. Investing in the right tools and establishing a routine can significantly extend the lifespan of your speakers, amplifiers, and related gear. I personally swear by using a calibrated measurement microphone like the Dayton Audio UMM-6, which I connect to Room EQ Wizard (REW) software. This combo helps me analyze frequency response and identify any deviations caused by component aging or room changes, enabling precise adjustments and repairs. Regularly checking connections with contact cleaner such as DeoxIT D5 ensures that corrosion or oxidation doesn’t impair sound quality.
Prediction: As digital calibration and smart diagnostics become more affordable and accessible, expect home audio maintenance to evolve towards fully automated, app-controlled health checks, making upkeep effortless for enthusiasts and professionals alike.
What are some professional-grade tools I recommend?
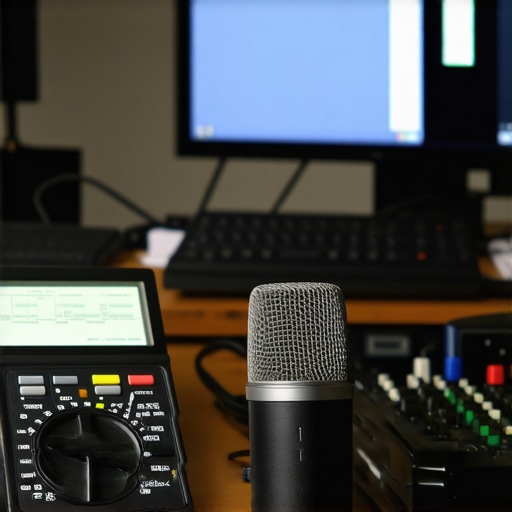
For serious maintenance, I rely on a few specialized tools. First, a multimeter capable of measuring impedance and continuity is essential for diagnosing circuit issues—my tool of choice is the Fluke 115, valued for its accuracy and reliability. For speaker cone inspection, I use a small LED penlight along with a magnifying lens, which helps spot tears or coil damage internally—something I learned the hard way when a tiny tear caused a noticeable dip in sound quality. When tackling complex setups, a signal generator app like AudioTool on my tablet offers clean tones for testing and calibration. Combining these tools allows me to prevent problems before they escalate, ensuring my system remains at peak performance.
Furthermore, consistent cleaning of contacts and connectors with isopropyl alcohol reduces oxidation-related noise, preserving clarity over the long term. The key is developing a routine, not just reacting when issues arise; periodic checks can catch subtle deterioration early, saving you money and frustration down the line.
Why should you incorporate routine checks into your maintenance?
Routine maintenance with these specialized tools uncovers issues before they manifest as audible problems, like dips in bass response or distorted highs. Over time, components such as internal wiring, solder joints, and driver surrounds degrade, especially in humid or dusty environments. By keeping a schedule—for example, inspecting connections monthly and testing frequency response biannually—you can proactively address wear and tear. This approach aligns with what expert audio technicians recommend in HiFi Engine’s technical guidelines: regular checks prevent costly repairs and keep the sound pristine. As the trend toward smart, network-connected audio gear grows, I predict future maintenance will involve integrated diagnostics and remote monitoring via dedicated apps, making upkeep even more straightforward.
Try implementing a simple monthly check using contact cleaner and visual inspections, combined with biannual calibration scans with a measurement microphone. You’ll be surprised at how much longer your gear lasts and how much better it performs when routinely cared for. Remember, consistent maintenance isn’t just about longevity; it’s about preserving the rich, immersive sound experience you love.
What I Wish I Knew Before Tearing Into My Speakers
One of my most eye-opening experiences was realizing that not every strange sound means instant disaster—sometimes, a little patience and the right tests can save you from costly replacements. I once thought a crackling noise just meant I needed a new driver, but a simple signal test revealed a loose connection instead. That taught me to trust my initial instincts but also to dig deeper before acting.
Another lesson was understanding the importance of room acoustics and speaker placement. Early on, I believed more expensive gear would automatically sound better, but it turns out placement and tuning matter just as much—sometimes even more. A little calibration with tools like Room EQ Wizard made a noticeable difference and saved me from needless upgrades.
Finally, I learned that consistent maintenance routines—cleaning contacts, inspecting wiring, and periodic calibration—are key to long-term sound quality. Neglecting these can subtly degrade audio over time, turning a vibrant setup into a dull one. Incorporating these habits transformed my listening experience and proved that caring for my gear pays off in clarity and durability.