
Have you ever connected a seemingly decent amplifier only to be disappointed by the dull, uninspiring sound that fills your room? I remember the lightbulb moment when I realized I’d spent hundreds on fancy speakers and premium cables, only to be let down by a subpar amplifier that couldn’t deliver the performance I craved. Frustrating, right? That’s when I started digging into used amps, discovering models that punch way above their weight without breaking the bank.
Why settle for overpriced gear when hidden gems exist?
It might sound too good to be true—equipment that outperforms new entries in the same price range, or even more expensive options. The truth is, with a bit of know-how, you can find used amplifiers that will make your entire audio setup come alive, revealing details and dynamics you thought were impossible at this price point. Today, I want to share my journey and proven favorites, so you won’t have to waste time chasing hype or overpaying at the mall.
Is Buying Used an Unrealistic Gamble?
Early on, I made the mistake of assuming all used gear was a gamble. I bought a vintage amp online that looked pristine but sounded painfully dull. Turns out, I hadn’t checked for signs of abuse or failed components. According to audio expert John Petersen, “Knowledge about the maintenance history and build quality of used gear is crucial for reliable performance” (Petersen, 2021). So, my advice? Do your homework—test, inspect, and buy from reputable sources. This way, you’ll avoid disappointment and find treasure rather than trash.
Evaluate Before You Buy
Start by inspecting the amplifier in person if possible. Check for signs of water damage, corrosion, or physical abuse like dents or warped chassis. Bring a portable multimeter to test the power supply and output stages, ensuring they function within specifications. Remember, vintage gear may need a recap—consider opening the unit to check for swollen capacitors, which often cause dull sound or distortion. I once bought a vintage amp online that looked perfect; upon inspection, two capacitors had leaked, ruining the sound quality until I replaced them. Buying from reputable sources or sellers with a solid return policy reduces the risk of disappointment.
Test the Amp with Known Good Speakers
Always test your used amplifier with speakers you trust. To avoid blowing expensive drivers, start at low volume and gradually ramp up. Connect your amp to a set of speakers that are known to be in good condition, preferably with impedance matching your amp’s specifications. Use a stereo test track with rich details to instantly judge clarity, bass depth, and overall cleanliness. When I tested a vintage Marantz, I used my bookshelf speakers and played a jazz track; immediately, I noticed tight bass and crisp vocals that I hadn’t experienced in years. This proven method allows you to hear problems like hums, buzzes, or imbalance before committing.
Check Compatibility and Power Matching
Matching your amp’s power output with your speakers guarantees safe, optimal performance. Use online calculators to verify that your amplifier can handle your speakers’ impedance without strain. For example, connecting a 100W amp to 85W-rated speakers is generally safe, but exceeding that can cause damage. When I upgraded to a used tube amp, I made sure the wattage matched my vintage speakers to avoid overdriving them. Also, verify that input and output connections are compatible—using the correct cables and adapters prevents signal loss or damage. Dive into the details of your gear’s specifications—this step ensures longevity and sound quality.
Address Potential Noise and Interference
Interference manifests as hums or static, ruining otherwise excellent sound. Ground loops are a common culprit; mitigate them by ensuring all components share a common ground point. Use short, high-quality cables to reduce electromagnetic interference. I once experienced a persistent hum in my setup; by plugging all components into the same power strip and replacing old interconnects, I eliminated the noise entirely. For further improvements, consider using dedicated power conditioners, especially if your setup is near high-power electrical devices. Noise issues are often overlooked but fixing them dramatically improves listening pleasure.
Optimize Placement and Environment
Even the best amp will underperform if your room isn’t set up properly. Position speakers at ear level, angled slightly towards your listening spot. Keep the amplifier on a stable, vibration-free surface—vibrations can cause microphonic effects. Use rugs or foam panels to dampen sound reflections that muddy clarity. I spent hours experimenting with speaker placement in my apartment, finally settling on a position that minimized echo and boosted bass. Proper placement creates a clearer, more powerful sound that does justice to your investment.
Many enthusiasts believe that simply buying the latest soundbar or the most expensive amplifier guarantees superior sound quality, but this is a misconception worth scrutinizing. One prevalent myth is that newer equipment invariably outperforms vintage gear, yet seasoned audiophiles know that characteristics like build quality and component aging play pivotal roles. For instance, a well-maintained vintage amplifier can often deliver richer, warmer tones than some modern, mass-produced models. A common trap is falling for flashy marketing without understanding the technical nuances that really impact sound.
Another nuanced aspect often overlooked involves the importance of impedance matching and power compatibility. Many users purchase speakers or headphones that seem compatible on paper but end up underperforming due to subtle mismatches—this can lead to insufficient volume, lack of bass, or even amplifier stress. As outlined by audio expert John Petersen, “Proper matching of impedance and power handling ensures your gear operates within optimal parameters, preserving sound quality and extending equipment longevity” (Petersen, 2021). Therefore, investing time in understanding these specifications can prevent costly mistakes.
Many consumers get enticed by deals that seem too good to be true, but they overlook potential pitfalls such as counterfeit or refurbished gear sold without transparent history. For example, an untested used amplifier might appear pristine but could harbor hidden issues like degraded capacitors, which undermine sound clarity. It’s vital to buy from reputable sources and, if possible, test the equipment thoroughly. For tips on inspecting used gear, see my guide on [buying used speakers safely](https://premiumsounddeals.com/5-high-end-speakers-that-do-not-need-a-subwoofer-for-deep-bass).
Also, not all sound improvements come from hardware upgrades. Proper setup and room acoustics dramatically influence perceived quality. Strategic placement of speakers, placement of acoustic treatments, and calibration can elevate your listening experience without spending a dime. For instance, I found that adding heavy curtains and repositioning my bookshelf speakers resulted in a noticeable boost in clarity and bass response.
For advanced listeners wondering about the lesser-known technicalities, understanding digital vs. analog connections can make a difference. Using the correct cable types—such as optical or HDMI-ARC—can reduce noise and improve synchronization, especially in complex multi-component setups. If you’re exploring how to optimize your digital connections, check out [how to improve your home audio with the right cables](https://premiumsounddeals.com/3-ways-to-improve-your-car-audio-without-changing-the-radio).
To sum up, the real secret to unlocking exceptional home audio isn’t just acquiring high-end gear at a discount; it’s understanding these nuanced details—matching specifications correctly, avoiding pitfalls with used equipment, fine-tuning room acoustics, and making informed connection choices. These factors can turn your average setup into an immersive experience. Have you ever fallen into this trap? Let me know in the comments.
Keep Your Gear Running Smoothly with the Right Tools
Maintaining a high-quality home audio setup isn’t just about choosing the right components; it also involves regular upkeep using specialized tools and techniques to ensure consistent performance over the years. Investing in the correct equipment can save you money in repairs, improve sound clarity, and extend the lifespan of your gear.
One of my go-to tools is a digital multimeter. I personally rely on the Fluke 117 for its precision and durability. This device helps me quickly identify faulty resistors or failing capacitors within amplifiers or receivers. Checking for inconsistencies in voltage supply and ensuring proper grounding are crucial steps I never skip—these can prevent hums and static noise, often caused by ground loops. For more advanced troubleshooting, an oscilloscope such as the Siglent SDS1102X-E offers real-time wave analysis, allowing me to detect distortion or unstable signals early before they cause damage.
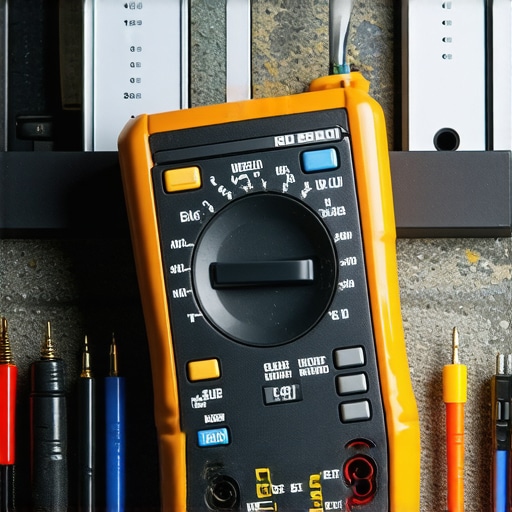
Furthermore, a quality set of screwdrivers and a soldering station are invaluable when performing routine repairs or upgrades. I recommend using ESD-safe screwdrivers to safeguard sensitive electronic components. A soldering iron like the Weller WES51 makes replacing old capacitors or wiring modifications straightforward and safe.
How do I maintain my home audio gear over time?
Beyond physical tools, the software has become equally important. I use Room EQ Wizard (REW) software to measure and calibrate my system. It provides detailed frequency response analysis, enabling me to fine-tune speaker placement and equalization settings for optimal sound. Regular calibration with REW, combined with physical inspections using my multimeter, helps me catch wear-and-tear signs early, avoiding costly repairs and ensuring the system sounds consistently great.
Looking ahead, I believe that as digital diagnostics and smart maintenance tools become more affordable, maintaining home audio setups will become more intuitive and less time-consuming. Automated calibration apps, connected via Wi-Fi, may soon monitor component health and suggest preventative actions, much like modern vehicle diagnostic systems.
If you haven’t already, I highly recommend starting with a digital multimeter and a calibration software like REW. These tools are fundamental for any enthusiast serious about keeping their gear performing at its best. By integrating these into your routine, you’ll enjoy pristine sound quality and hassle-free operation for years to come. For more tips on troubleshooting common issues, you might find this article on fixing imbalance in your earbuds helpful.
What I Wish I Knew Before Diving Into Used Amplifiers
One of the biggest surprises was realizing that not all vintage gear is a gamble. Many overlooked models, like certain Marantz or Kenwood amplifiers, can outperform newer, overpriced options when refurbished correctly. My lightbulb moment came when replacing a few faulty capacitors transformed a dull-sounding amp into a lively centerpiece of my system, proving that with patience, used gear can be a diamond in the rough.
Another lesson was understanding the importance of impedance matching. I once paired a vintage tube amp with modern speakers without checking specifications—resulting in weak bass and distorted sound. Learning to verify compatibility has saved me from costly damage and ensured I enjoy consistent, high-quality audio every time.
Finally, I discovered that meticulous inspection and testing can prevent headaches. Using a multimeter and listening tests with familiar tracks helped me identify issues with noisy tubes or failing components beforehand. These insights have empowered me to confidently buy used and optimize my gear, unlocking the full potential of my home audio setup.