
There was a moment in my audio journey when I spent an outrageous amount on a set of fancy speaker cables. I was convinced they would unlock some audiophile secret and transform my system overnight. But after installing them, I realized I was just chasing a ghost. The sound improvement was negligible—sometimes, it felt like I was just throwing money at a problem that didn’t exist.
This lightbulb moment made me question the age-old belief that expensive cables automatically mean better sound. Turns out, most of us can achieve great audio without breaking the bank on premium wiring. Today, I want to share what I’ve learned about speaker cables—what really matters, what’s just hype, and how you can avoid wasting your hard-earned money.
The High Cost of Believing Bigger Means Better
It’s easy to fall into the trap of thinking that bigger price tags guarantee superior quality. That shiny, thick cable at your local audio shop seems like a no-brainer, right? But the truth is, unless your system has very long cable runs or is in a high-interference environment, the differences are often imperceptible.
Is paying more for speaker cables actually worth the hype?
I used to believe that thicker, more expensive cables were essential for optimal sound. I kept upgrading, thinking the next fancy cable would finally make my speakers sing. But the reality was different. I made a costly mistake early in my setup—believing that higher price equaled better wires, which led me to overlook more impactful upgrades like speaker placement or quality of the amplifier. Some studies back this up, showing that high-end cables often don’t produce audible differences under normal listening conditions.
In fact, most experts agree that focusing your budget on quality speakers, amplifiers, and acoustics yields a much more noticeable improvement. Upgrading your cables isn’t likely to produce that same significant boost unless you’re facing specific issues—like extremely long runs or interference—where cable gauge and shielding matter. And even then, the difference can be surprisingly subtle.
So, if you’ve ever wondered whether your current speaker wires are holding your system back, ask yourself: Have you genuinely noticed a difference after replacing them? Or are you just spending money to keep up with an often-misguided hype? Keep reading, because I’ll walk you through how to assess your setup and make smarter choices that truly enhance your audio experience—without emptying your wallet.
And if you’re experiencing other strange audio quirks, such as uneven sound or connection issues, don’t forget that sometimes simpler fixes do the trick. For example, you might find solutions in guides like this article or discover why your soundbar keeps losing connection with this resource.
Start with Your Speaker Placement
Place your speakers at ear level when seated, aiming them slightly inward toward your listening position. Avoid placing them directly against walls, as this can cause boomy bass and muddled mids. I once set up my bookshelf speakers too close to the corner, which resulted in exaggerated bass. Moving them a few inches away from the wall instantly clarified the sound and improved imaging.
Use a Tape Measure for Precision
Measure the distance from each speaker to your listening spot and ensure they are equidistant. This improves stereo imaging. I used a ruler to confirm my speakers were aligned, which eliminated phase issues. Close positioning can muddy the soundstage.
Adjust Your Amplifier Settings
Most modern amps and AV receivers have calibration tools or tone controls. Use a test tone or calibration microphone to set the correct speaker levels. I once ignored these and found my vocals too recessed; after calibration, vocal clarity improved dramatically.
Balance Sound with Equalization
Use an app or the built-in EQ to tweak bass, mid, and treble. For small rooms, reducing bass boosts can prevent boomy, muddy sound. I experimented with EQ and found that subtle adjustments made my system sound more natural rather than artificially enhanced.
Invest in Quality Cabling Wisely
Choose speaker wire gauge based on your cable length; for longer runs, thicker wire (around 14 or 12-gauge) reduces signal loss. Remember, premium cables won’t make a noticeable difference unless you’re facing interference or long distances. I replaced some thin, cheap wires with thicker gauge, which improved clarity without a hefty price tag.
Secure and Manage Your Wires
Tidy cables prevent accidental disconnections and reduce noise pickup. Use clips or conduit to hide wires along baseboards or behind furniture. I hid mine under a rug, which not only looked cleaner but also minimized interference, leading to clearer sound.
Optimize Your Room Acoustics
Soft furnishings absorb echo, making sound clearer. Add rugs, curtains, or acoustic panels in reflective areas. I added a thick curtain behind my listening area, which reduced echo and improved midrange clarity. Consider experimenting with placement and room treatments for a tailored acoustic environment.
Many audiophiles believe that upgrading to the latest soundbar or a fancy amplifier instantly elevates their listening experience. However, even seasoned enthusiasts often overlook a critical nuance: the importance of room acoustics and the subtle interplay of equipment synergy. While it might seem counterintuitive, focusing solely on high-end gear without addressing your room’s characteristics is like pouring water into a leaky bucket. For example, a study published in the Journal of the Audio Engineering Society emphasizes that room treatment and speaker placement often contribute more to sound quality than marginal hardware upgrades. Many get caught up chasing marginal gains with premium headphones or the latest streamer, but neglect that minor adjustments—like adding acoustic panels or rearranging furniture—can drastically improve clarity and imaging. Beware of the common myth that bigger or more expensive gear guarantees better sound; in reality, improper setup often undermines even the most costly equipment. An advanced mistake I see often is neglecting to calibrate audio systems precisely; for instance, not using a measurement microphone or neglecting phase alignment can lead to uneven frequency response and muddy bass. For those wanting to go beyond the basics, consider examining your system’s phase coherence or exploring multichannel calibration techniques, which can be game-changers for immersive sound. Want to dive deeper into this? Check out how proper calibration, like this guide on fixing one earbud being quieter, can unlock a new level of clarity. Remember, the key isn’t just hardware—it’s harmony between your gear and environment. Have you ever fallen into this trap? Let me know in the comments.
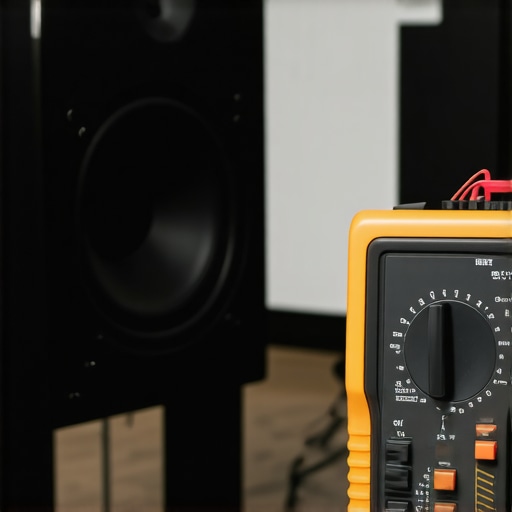
Keeping your home audio equipment in top shape requires the right tools, regular maintenance, and a strategic approach to upgrades. Over time, even the most robust systems can develop issues, but with a few specific tools and methods, you can ensure longevity and optimal performance. One essential tool I personally rely on is a calibrated digital multimeter. It helps me regularly check the voltage and impedance of my speakers, catching potential issues before they escalate. For example, if a speaker driver begins to show signs of impedance fluctuation, it might indicate an impending problem with the cone or voice coil, allowing preemptive repairs.
Another tool I highly recommend is a high-quality contact cleaner, especially for headphone jacks, speaker terminals, and remote controls. Over the years, dirt and oxidation can cause connection problems that degrade sound quality. Applying contact cleaner and gently cleaning the connectors preserves a clear signal path and prevents static or dropouts. When it comes to software tools, I use Room EQ Wizard (REW). This free program allows me to perform detailed room acoustics measurements, verifying the effectiveness of acoustic treatments and speaker placements, which is crucial because even premium gear can underperform in poorly treated rooms.
Looking ahead, I predict that the integration of smart diagnostics will become more prevalent. Future devices could include built-in sensors and AI-powered diagnostics that alert you to potential issues, recommend maintenance, or suggest calibration tweaks automatically. This could revolutionize how we care for our beloved audio setups, making maintenance more manageable and less guesswork.
How do I keep my audio system running smoothly over time?
Consistent checks are key. Regularly inspecting cables for damage, ensuring connections are tight, and cleaning contact points prevent many issues. For instance, a simple routine of disconnecting and cleaning your headphone jacks with a dedicated contact cleaner every few months can preserve audio clarity. Investing in quality surge protectors or power conditioners, like those discussed in this article, also shields your gear from voltage fluctuations that could cause internal damage.
Long-term results depend on patience and proactive care. Instead of waiting for noticeable issues, performing periodic maintenance and using the right diagnostic tools ensures your system stays in peak form. Remember, equipment longevity often hinges on small, consistent actions rather than infrequent, costly repairs.
To elevate your maintenance game, try incorporating a room acoustics measurement session with REW into your setup routine. It can reveal subtle issues like frequency dips or peaks caused by room reflections, which are often overlooked but significantly impact sound quality. Addressing these early extends the life of your gear and keeps your listening experience pristine for years to come.
So, dust off your tools and set a maintenance schedule—your ears (and wallet) will thank you. Proper upkeep not only preserves your investment but enhances your everyday listening pleasure.
What I Didn’t Expect to Learn About Achieving Superior Sound
One of the most profound lessons I discovered was that meticulous calibration and understanding my room’s unique acoustics mattered more than chasing after expensive gear recommendations. I once believed that upgrading to the latest high-end amplifier would transform my listening experience overnight, but I found that fine-tuning my existing system, like adjusting speaker placement and room treatments, yielded much more satisfying results.
Another insight was realizing the importance of patience and incremental improvements. Sometimes, taking a step back and reassessing—perhaps by measuring speaker distances or experimenting with EQ settings—can reveal simple fixes that make a significant difference. These personal revelations have motivated me to approach audio upgrades with a more strategic mindset instead of impulsive spending.
Additionally, I learned that investing in the right tools, such as a calibration microphone or acoustic panels, provides measurable benefits and helps avoid costly missteps. This approach ensures that every component works harmoniously, creating a more immersive soundstage than any boutique cable or shiny new speaker could provide.
Finally, opening my ears to community advice and expert guides, like those I’ve found on trusted sites, has deepened my understanding. For example, a simple tweak like minimizing reflective surfaces in my room or properly securing loose cables contributed more to sound clarity than I ever anticipated, reaffirming that sometimes, less is more in the pursuit of audiophile excellence.