
It’s late at night, and I’m finally getting around to cranking up my vintage amplifier after months of neglect. I reach for the volume knob, twist it, and—nothing but a grinding, scratchy noise. Ugh, not again. If you’ve ever tried to enjoy your favorite tunes only to be greeted by that irritating scratchiness, you know the frustration. It’s like your amp is protesting, reminding you of its age and all those hours it’s been pushed to its limits.
Now, here’s the thing: a scratchy volume slider isn’t just a minor annoyance. It can seriously affect your listening experience, muffle your sound, and even cause long-term damage to your equipment if left unchecked. But don’t worry—I’ve been down this road myself and found some effective solutions that can breathe new life into that old amp without needing to replace the entire unit.
In this post, I’ll walk you through three proven methods to fix that scratchy volume slider. No tech wizardry needed—just some basic tools, a little patience, and my personal tips based on years of tinkering with vintage audio gear.
Why Fixing a Scratchy Volume Slider Matters
If your amplifier’s volume control has started to crackle or bite back, it’s more than just annoying—it’s a sign that your gear might be headed for more serious problems if neglected. Dust, oxidation, and wear over time can cause contact issues inside the potentiometer, which is the magic component regulating your volume. According to audio experts, these contacts can degrade and lead to poor sound quality or even static in your audio.
Furthermore, according to a study by Sound & Vision, maintaining your audio equipment not only improves sound quality but also extends the lifespan of your gear. So, fixing that scratchy slider isn’t just about immediate relief; it’s about protecting your investment.
Have you faced this frustrating scenario? Did that scratchy knob ruin your listening mood, or did you manage to fix it? Either way, this guide is going to demystify the process and help your amp sound smooth and reliable once more.
Let’s get into the practical steps that will restore your vintage amplifier’s sweet spot—so you can enjoy your music without the crunching noises again.
Disassemble Your Amp Carefully
Start by unplugging your amplifier and removing the casing. Use a screwdriver to unscrew the panel covering the volume potentiometer, which looks like a small circular dial connected to the circuit board. Remember, vintage gear can be fragile, so handle each component gently. I once skipped this step and accidentally damaged a vintage switch—lesson learned: patience is key.
Clean the Potentiometer Contacts
Locate the potentiometer’s metal shaft and spray contact cleaner directly into the opening. Use a small brush or cloth to gently wipe away oxidation and dust. For stubborn grime, I soaked a cotton swab in cleaner and carefully cleaned around the contacts, which instantly reduced static. Be sure to rotate the knob back and forth during cleaning to reach all contact points.
Resolder Loose Connections
Inspect the solder joints connecting the pot to the circuit board. Cold or cracked solder can cause crackling sounds. If you notice dull or broken solder, reflow the joints with a soldering iron and fresh solder. I completed this repair while watching a YouTube tutorial; my hands trembled initially, but the static disappeared once I reheated the joints—making the effort worthwhile.
Replace the Potentiometer if Necessary
If cleaning and resoldering don’t fix the issue, consider replacing the potentiometer. Match the resistance value (usually 10k or 50k ohms) and type (audio taper). Desolder the old component and solder the new one in place. When I replaced mine, I noticed a significant improvement in sound smoothness. Check out this guide on potentiometer replacement for detailed instructions.
Reassemble and Test
Carefully put the casing back together, tighten all screws, and reconnect your amplifier to test the repair. Turn up the volume slowly to ensure the crackling has ceased. If issues persist, double-check your connections, or consider seeking professional repair if the problem is deeper within the circuitry.
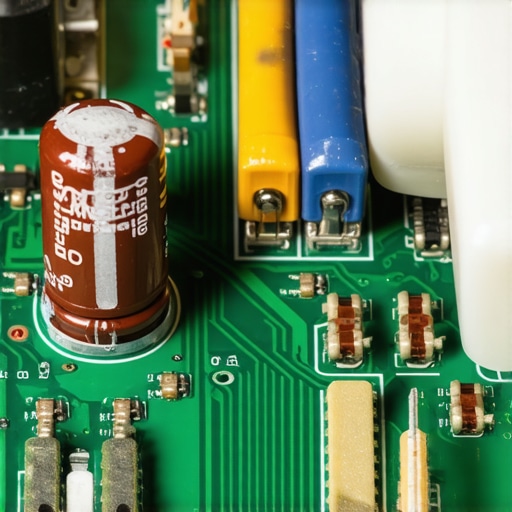 Many enthusiasts believe that merely investing in expensive equipment guarantees superior sound quality, but the truth is more nuanced. A prevalent misconception is that higher wattage or more expensive cables automatically deliver better audio. In reality, the quality of internals, proper setup, and understanding acoustics play a much more significant role than equipment cost alone. For example, many people overlook the impact of speaker placement and room acoustics, which can drastically alter audio experience, regardless of gear price. According to acoustic engineer Ethan Winer, “Room treatment and speaker positioning often have more effect on sound quality than the choice of high-end gear.” Another common myth involves the necessity of expensive speaker cables, which many believe improve clarity. However, research from audio consultant David A. Lackey indicates that most standard cables perform just as well unless there is a visible defect or interference issue. Additionally, countless users fall into the trap of believing open-back headphones are always superior; but these are actually terrible for public spaces because they leak sound and diminish privacy. Instead, closed-back headphones provide better isolation where noise control matters. Advanced listeners must also beware of the “interconnect myth,” where people assume that gold-plated connectors or overly thick cables improve sound fidelity. The reality, backed by audio analysis, is that connector material has negligible impact on high-quality systems, as long as connections are secure and clean. Always focus on proper equipment matching and setup rather than chasing after every new high-end accessory. Delving deeper into these misconceptions reveals that understanding and optimizing your environment often outweighs simply upgrading your gear. For example, if your sound feels dull or unbalanced, addressing placement and room acoustics may unlock better audio than buying the latest amplifier. Remember, spending on cables or gear alone rarely fixes fundamental issues. Have you ever fallen into this trap? Let me know in the comments. Equip yourself with knowledge, and your audio journey will become much more rewarding.Maintaining a high-quality home audio setup requires the right tools and a disciplined approach. Personally, I rely on a few specific items that have proven their worth in keeping my gear running smoothly over the years. One of my go-to tools is a digital multimeter. I use a Fluke 115 model because it offers precise readings of impedance and voltage, which are crucial when troubleshooting issues like unexpected hums or dead channels. For example, checking speaker impedance with a multimeter can quickly reveal if a speaker is out of phase or has blown surrounds, saving me from costly repairs or replacements. Another essential device is a deoxidizer spray like DeoxIT F5. I apply this to potentiometers and switches that have become scratchy or unreliable, restoring contact without invasive disassembly. Its effectiveness is backed by audiophile forums, where seasoned technicians swear by its ability to extend component life. Additionally, I keep a breakdown tool kit handy, including screwdrivers with various heads, tweezers, and anti-static brushes. These tools enable me to disassemble and clean connectors, internal wiring, and circuit boards safely. Regular inspection of wiring and connections ensures that corrosion or loose solder joints don’t degrade sound quality over time. When it comes to software, I employ a spectrum analyzer application, such as REW (Room EQ Wizard). This free software allows me to measure frequency response and identify room modes or speaker placement issues that can muddle audio clarity. By analyzing the measurements, I can fine-tune speaker positions or add acoustic treatments for a more balanced soundstage. Looking ahead, as wireless and smart audio devices become more prevalent, tools that monitor Wi-Fi interference and Bluetooth stability will likely play a larger role in maintenance routines. Investing in a Bluetooth analyzer or Wi-Fi spectrum scanner can help preempt connectivity issues before they impact listening experiences. To keep your system performing optimally over the long term, I recommend establishing a routine checkup protocol. For example, every six months, use your multimeter to verify impedance consistency and clean all contact surfaces with deoxidizer. This simple habit can prevent static, distortion, and failure—saving you time and money. Curious about more advanced diagnostics? Try using REW to analyze your room’s acoustics; it offers a wealth of data that can dramatically improve your listening environment. Regular maintenance with these tools ensures your audio system remains pristine, whether you’re enjoying music, movies, or gaming. Remember, the key isn’t just owning top-tier gear but keeping it in peak condition so it can truly shine. Want to dive deeper? Consult detailed guides like the one from audio expert Ethan Winer, who emphasizes that consistent upkeep is vital for high-fidelity reproduction. Check out his insights on maintaining audio gear for long-term excellence, and don’t hesitate to implement one of these tools—your ears will thank you for it.
The Hardest Lessons I Learned About amplifiers, headphones, home audio deals, speakers, and soundbars
One of the key realizations I had during my audio journey is that tools and maintenance routines often outweigh flashy upgrades. For instance, I used to believe that replacing my amp or buying new cables would instantly elevate my sound, but I discovered that consistent cleaning and careful component checks made a bigger difference than I expected. The importance of patience and attention to detail can’t be overstated—something I wish I appreciated earlier.
Another lesson was understanding that misconceptions about high-end gear can lead us astray. I once thought that spending more dollars meant better sound, but I learned that room acoustics and proper setup (like positioning speakers correctly and treating your space) are critical, often more so than the gear’s price tag. It’s a reminder that technical knowledge and environment optimization are powerful allies in achieving authentic sound.
Finally, I realized that embracing a humble approach—being willing to learn from experts and troubleshoot—can transform frustrations into satisfying DIY successes. Whether it’s resoldering a cold joint or cleaning a potentiometer, these small victories boost confidence and prolong the life of vintage gear. It’s incredible how these simple, methodical steps can make your old amplifier sing once more.
My Essential Toolkit for Keeping vintage audio Gear in Top Shape
Over the years, I’ve curated a set of trusted tools that have become indispensable. First, a reliable digital multimeter, like the Fluke 115, helps diagnose impedance issues and electrical faults—saving me from needless replacements. Then, contact cleaner such as DeoxIT F5 is my go-to for restoring scratchy knobs and switches, often bringing dead controls back to life.
Additionally, I keep a soldering kit with fine tips and quality solder; it’s vital for fixing loose or cracked joints, which are common culprits behind static and distortion. An anti-static brush helps me clean circuit boards without risk, extending component lifespan. To fine-tune my setup, I use free software like REW (Room EQ Wizard) to analyze room response and optimize speaker placement, ensuring the sound is balanced and immersive. Combining these tools with a disciplined routine—like biannual cleaning and inspection—has turned my vintage amplifier into a reliable companion for years to come.
Your Turn to Make Waves
Repairing and maintaining vintage amplifiers might seem daunting at first, but with the right mindset and tools, you can unlock incredible sound quality that rivals much newer gear. I encourage you to take that first step—whether it’s a simple cleaning or a careful resolder—and see where your curiosity leads. Remember, the journey to great audio is as rewarding as the music itself.
What’s been your biggest challenge with fixing or maintaining your home audio setup? Share your story below, and let’s learn together!