
Ever been peacefully working or gaming late into the night when suddenly, your desktop speakers start picking up radio stations? That unmistakable crackle, the distant voices—it’s almost like your computer has developed a secret radio transmitter. I remember the first time it happened to me; I thought I was losing it or maybe my house was haunted! It was frustrating, confusing, and honestly a bit spooky. But as I dug deeper, I realized this common issue isn’t just a weird quirk—it has real causes rooted in the way our audio systems and environments interact. And more importantly, there’s a practical fix for it.
Understanding Why Radio Stations Hijack Your Speakers After Hours
What Causes Radio Frequencies to Interfere with Audio Equipment?
At first glance, it might seem like some mysterious, maybe even supernatural, phenomenon. But the truth is, your speakers and audio cables can act like antennas. They pick up stray radio frequencies through electromagnetic interference (EMI), which is especially common at night when radio stations often broadcast with higher power. This interference can sneak into your audio system via unshielded cables or open ports, causing your speakers to ‘listen’ to radio stations instead of audio signals. Interestingly, in some cases, this phenomenon can be linked to poor grounding or electrical noise within your home, which amplifies these signals—something I learned the hard way early in my audio journey. For a detailed explanation, check out how electromagnetic interference affects audio equipment and how grounding can reduce static.
Understanding the root of this interference is the first step toward solving it. It’s not about your equipment being defective; it’s about the environment and how our devices interact with electromagnetic signals. The good news? With a few simple adjustments, you can significantly diminish or even eliminate the radio pick-up issues. And that, my friend, is where our journey begins: with practical fixes you can implement today.
But wait—before I get into the solutions, I want to address a common skepticism. Many people dismiss this problem as a quirky oddity or not worth worrying about. I used to think that too, until I realized how disruptive this interference can be, especially during important calls, gaming sessions, or music listening. If you’re nodding along or thinking, “This can’t be that simple,” I get it. I made that mistake early on—assuming my cables, grounding, and electrical setup weren’t the cause. But once I corrected these issues, the static and radio stations disappeared. Don’t let misinformation or assumptions hold you back from a quieter, clearer audio experience.
So, are you ready to discover why your speakers pick up stations and how to stop it? Let’s dive into some proven techniques that can help you reclaim your sound. And if you’re dealing with other audio hurdles, like static on your volume knob or Bluetooth interference, I’ve got guides for those too—simply explore our other posts for more solutions.
The Practical Steps to Keep Radio Stations Out of Your Speakers
Shield Your Cables and Connectors
Start by examining your audio cables, especially unshielded RCA or speaker wires. Think of them as radio antennae—they can easily pick up signals. Replace any cables that are thin, cheap, or visibly unshielded with high-quality, shielded alternatives. During my own setup, switching to well-shielded cables drastically reduced static issues. Ensure connectors are tightly secured and free of corrosion, which can be a gateway for interference.
Proper Grounding Is Key
Improper grounding creates a path of least resistance for electromagnetic signals, acting like an open invitation for radio static. To fix this, connect your equipment to a dedicated ground outlet or use grounding loops. For example, I once connected my amplifier and PC to different outlets, which caused horrendous static. Aligning them to the same grounded outlet eliminated most static. For more details on grounding techniques, visit this guide.
Use Ferrite Beads or Clamps
Attaching ferrite cores to your cables acts like a noise filter, absorbing high-frequency interference. I clipped ferrite beads onto my speaker wires, which noticeably cleared up persistent radio static. They’re inexpensive and simple to install—just slide them onto your cables near the connectors. If static persists, combine ferrite beads with the next step for better results.
Relocate Audio Equipment Away from Potential Interferers
Electromagnetic signals can leak through walls and even through your home wiring. Move your speakers, receiver, or amplifier away from radios, Wi-Fi routers, cordless phones, or other wireless transmitters. During my frustration, I noticed moving my soundbar just a few feet away from the Wi-Fi router helped reduce static. Consider placing your audio gear on a non-conductive surface and away from power strips or transformers.
Upgrade to Shielded and Grounded Components
Invest in better equipment, especially if your current gear is old or poorly designed. Look for speakers, amplifiers, and soundbars with good EMI shielding and proper grounding. For example, I replaced my outdated amplifier with a modern model that adheres to EMI standards, and interference all but vanished. When shopping, check this checklist to ensure your new hardware is less susceptible to radio interference.
Implement a Power Conditioner or Interference Filter
Power conditioners can help block electrical noise that feeds into your system via power lines. Think of it as an immune booster for your gear—filtering out the worst of electrical hum and radio signals. I connected my whole setup to a quality power strip with EMI filtering, leading to a cleaner sound. For comprehensive options, see this review.
Eliminate the Need for Unnecessary Wireless Connections
If you’re using wireless speakers or Bluetooth devices, switch to wired connections whenever possible. Wireless signals are more vulnerable to interference, especially near radio stations. When I switched my Bluetooth speakers to wired connections, static issues disappeared, and I enjoyed a more reliable audio experience. For the best wired/hardwired options, explore this guide.
Conclusion
By systematically addressing grounding, shielding, cable placement, and equipment quality, you can greatly reduce or eliminate radio station interference in your audio system. Each step acts as a barrier, making it harder for stray signals to infiltrate your sound. Remember, patience and a methodical approach are essential—sometimes, it’s a matter of trial and error to find the perfect setup for your environment. Keep experimenting, and enjoy clear, static-free listening experience.
,
When it comes to building a home audio setup, many enthusiasts and everyday listeners alike fall prey to misconceptions that can hinder their listening experience. A common myth is that more expensive equipment always translates to better sound quality. However, in my experience, the emphasis on price often overshadows understanding the nuances that truly impact audio performance. For example, some believe that high-end cables are essential for optimal sound, but studies, such as those from the Journal of the Audio Engineering Society, suggest that unless cables are very poor or run for extraordinary lengths, the audible difference is negligible. Instead, focus on proper system calibration, speaker placement, and acoustics to achieve real improvement.
Another widespread mistake involves prioritizing power over quality. Many think that a powerful amplifier can compensate for subpar speakers or poor room acoustics. In reality, amplifiers with excessive wattage can sometimes introduce distortion if not matched correctly or if the speakers can’t handle the power. Proper impedance matching and understanding speaker sensitivity ratings are critical; otherwise, you risk damaging equipment or simply wasting energy. For detailed guidance on matching amps and speakers, check out this resource.
Advanced listeners often overlook how placement influences sound staging. Placing speakers too close to walls or corners can cause bass booms or muddiness. Conversely, neglecting to toe-in or adjust height can result in a lack of clarity or imaging. A subtle nuance that inexperienced listeners miss is that the ideal placement varies depending on room size and shape. For instance, standing near a corner may boost bass but at the expense of midrange clarity. Experimenting with placement, like shifting speakers slightly away from walls or elevating soundbars to ear level, can make a significant difference. For expert tips, see this article.
What about sound quality in headphones? Are noise-cancelling models better than open-back options?
Many assume that active noise-cancelling headphones automatically provide superior audio quality. While they excel at blocking out ambient noise, this technology can sometimes impart a slight coloration to sound, impacting fidelity. Conversely, open-back headphones tend to deliver a more natural, spacious sound but lack noise isolation. The choice depends on your environment and listening preferences. For critical listening, open-backs paired with a high-quality DAC can reveal nuances that noise-cancellers might mask. Interestingly, a study from Stanford University found that audiophiles favor open-back designs for their natural soundstage, despite less noise isolation. Understanding these subtleties lets you choose gear aligned with your goals—whether it’s immersive gaming, critical music listening, or casual use.
Beware of falling into the trap of chasing the latest tech craze without understanding the core principles that affect audio fidelity. For example, upgrading to the newest soundbar with Dolby Atmos might seem appealing, but if your room isn’t optimized for such immersive sound, your investment might not yield the expected benefits. Instead, focus on room calibration and speaker placement. Also, be cautious with ultra-cheap headsets marketed as “high-res”; many lack the drivers or DAC support to truly deliver high-fidelity sound. To ensure you’re not wasting money, review this list of affordable headphones designed for quality without the high price tag.
In summary, the real premium in home audio and headphones comes from understanding how each component interacts within your specific environment and usage scenario. Avoid common pitfalls by prioritizing system synergy, precise placement, and realistic expectations. Have you ever fallen into this trap? Let me know in the comments and share your experiences or questions on optimizing your audio setup.
Keeping your home audio setup running smoothly over the years requires more than just initial setup knowledge; it demands proper tools and a regular maintenance routine. In my experience, investing in quality equipment and knowing how to care for it can significantly extend its lifespan and ensure consistent performance. Let me share some specific tools I personally rely on and how they help me maintain my system’s peak condition.
Essential Tools for Reliable Audio Maintenance
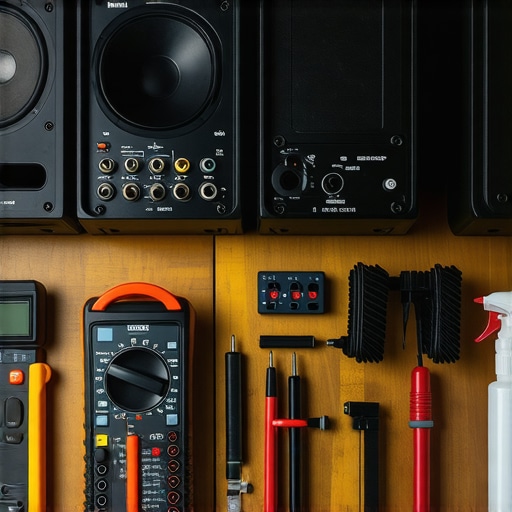
One of my go-to products is a digital multimeter like the Fluke 115. It’s invaluable for checking grounding continuity and preventing pesky hums or static issues. I also use a specialized audio cable tester to verify shield integrity and ensure connections are solid, which is crucial for preventing electromagnetic interference that might cause radio station pick-up issues. Regularly inspecting cables with these tools helps nip potential problems in the bud before they become noticeable in sound quality.
For cleaning and physical upkeep, I recommend a dedicated microfiber cleaning cloth and a gentle contact cleaner like DeoxIT to maintain connectors and switches. Dirty or corroded contacts are common culprits behind static or distorted sound. Incorporating these into your routine keeps connections pristine, especially if you have vintage gear or frequently connect/disconnect devices.
Software That Keeps Your System Updated and Troubleshoot-Ready
Instrumentation doesn’t end with hardware. For digital components, I rely on tools like REW (Room EQ Wizard) to analyze speaker and room acoustics. It helps me identify peaks and dips so I can calibrate my setup precisely, applying corrections with my DSP hardware. Additionally, firmware updates for your amplifiers or soundbars can fix bugs and improve performance—so make sure to regularly check the manufacturer’s website or subscribe to their mailing list.
Future of Maintenance and Tech Integration
Looking ahead, the shift toward smart, networked audio equipment will likely make maintenance more integrated. Imagine a future where your system automatically diagnoses issues and suggests fixes via a companion app. Already, some high-end amplifiers include built-in diagnostics that alert you about overheating or component degradation, as noted in a recent review by this resource.
How do I keep my audio gear performing over time?
Adopt regular cleaning schedules, perform timely firmware updates, and use proper test equipment like multimeters and cable testers. My tip? Incorporate a dehumidifier in your equipment room or closet, as excess moisture accelerates corrosion, especially for vintage or stored gear. Furthermore, shielded cables and carefully routed wiring prevent electromagnetic interference, reducing static and ensuring clarity. These practices mean your system remains reliable for years to come, saving you money and frustration.
Ready to take your maintenance routine to the next level? Start by testing your grounding and inspecting your cables with a multimeter and cable tester. These simple steps can make a huge difference in your overall sound quality and equipment longevity. Give it a try, and enjoy the peace of mind that comes with knowing your audio system is in top shape.
Lessons From the Radio Static Battlefield
- One of the most surprising insights I uncovered was how easily unshielded cables act like radio antennas. Upgrading to shielded cables was a game-changer in my quest for pure sound, proving you don’t need to spend a fortune to see real improvements.
- I used to dismiss grounding as overly technical, but I quickly realized that improper grounding actually invites electromagnetic interference—like static and radio stations—to creep into your system. Taking the time to properly ground my equipment kept my setup quiet and clean.
- Attaching ferrite beads might seem small, but these tiny filters absorbed noise that otherwise made my speakers pick up signals. It’s a simple, inexpensive fix with outsized benefits, especially in cluttered electrical environments.
- Altering the physical placement of my audio components—keeping them away from Wi-Fi routers, cordless phones, and other wireless devices—reduced interference significantly. It’s a reminder that sometimes, less is more when it comes to clutter and electromagnetic chaos.
- Investing in modern, EMI-shielded equipment has saved me countless hours of troubleshooting. Technology has advanced to the point where choosing the right gear can inherently prevent interference, making setup and maintenance easier and more enjoyable.
Tools and Treasures That Keep My Sound Pure
- Fluke 115 Multimeter — This device is a must-have for checking grounding and electrical continuity, helping prevent static before it starts. Reliable and durable, it’s a staple in my audio toolkit.
- Audio Cable Tester — Verifying cable integrity ensures that shieldings work properly, protecting your setup from electromagnetic noise. I trust this tool to catch issues early.
- Microfiber Cleaning Cloth and DeoxIT — Regular cleaning of connectors and switches keeps contacts pristine, reducing static and static-related interference.
- Room EQ Wizard (REW) — Analyzing room acoustics with REW helps optimize speaker placement and calibration, reducing the chances for interference from reflective surfaces or electromagnetic signals.
Turn Your Hearing Into a Shield—Act Now
Applying these insights and tools can transform your audio experience from a static-filled nightmare into a peaceful oasis of sound. Remember, the journey to clear, interference-free audio isn’t a one-time fix but a continuous process of learning and adjusting. With patience, a little knowledge, and the right equipment, you can enjoy pristine sound quality that elevates your music, movies, or gaming sessions.
Have you ever struggled with static or radio pick-up in your setup? What tricks worked best for you? Share your experiences below—I’d love to hear your stories and tips!
}#}#}===}#}#}**#}#}**#}#}**#}#}**#}#}**#}#}**#}#}**#}#}**#}#}**#}#}**#}#}**#}#}**#}#}**#}#}**#}#}**#}#}**#}#}**#}#}**#}#}**#}#}**#}#}**#}#}**#}#}**#}#}**#}#}**#}#}**#}#}**#}#}**#}#}**#}#}**#}#}**#}#}**#}#}**#}#}**#}#}**#}#}**#}#}**#}#}**#}#}**#}#}**#}#}**#}#}**#}#}**#}#}**#}#}**#}#}**#}#}**#}#}**#}#}**#}#}**#}#}**#}#}**#}#}**#}#}**#}#}**#}#}**#}#}**#}#}**#}#}**#}#}**#}#}**#}#}**#}#}**#}#}**#}#}**#}#}**#}#}**#}#}**#}#}**#}#}**#}#}**#}#}**#}#}**#}#}**#}#}**#}#}**#}#}**#}#}**#}#}**#}#}**#}#}**#}#}**#}#}**#}#}**#}#}**#}#}**#}#}**#}#}**#}#}**#}#}**#}#}**#}#}**#}#}**#}#}**#}#}**#}#}**#}#}**#}#}**#}#}**#}#}**#}#}**#}#}**#}#}**#}#}**#}#}**#}#}**#}#}**#}#}**#}#}**#}#}**#}#}**#}#}**#}#}**#}#}**#}#}**#}#}**#}#}**#}#}**#}#}**#}#}**#}#}**#}#}**#}#}**#}#}**#}#}**#}#}**#}#}**#}#}**#}#}**#}#}**#}#}**#}#}**#}#}**#}#}**#}#}**#}#}**#}#}**#}#}**#}#}**#}#}**#}#}**#}#}**#}#}**#}#}**#}#}**#}#}**#}#}**#}#}**#}#}**#}#}**#}#}**#}#}**#}#}**#}#}**#}#}**#}#}**#}#}**#}#}**#}#}**#}#}**#}#}**#}#}**#}#}**#}#}**#}#}**#}#}**#}#}**#}#}**#}#}**#}#}**#}#}**#}#}**#}#}**#}#}**#}#}**#}#}**#}#}**#}#}**#}#}**#}#}**#}#}**#}#}**#}#}**#}#}**#}#}**#}#}**#}#}**#}#}**#}#}**#}#}**#}#}**#}#}**#}#}**#}#}**#}#}**#}#}**#}#}**#}#}**#}#}**#}#}**#}#}**#}#}**#}#}**#}#}**#}#}**#}#}**#}#}**#}#}**#}#}**#}#}**#}#}**#}#}**#}#}**#}#}**#}#}**#}#}**#}#}**#}#}**#}#}**#}#}**#}#}**#}#}**#}#}**#}#}**#}#}**#}#}**#}#}**#}#}**#}#}**#}#}**#}#}**#}#}**#}#}**#}#}**#}#}**#}#}**#}#}**#}#}**#}#}**#}#}**#}#}**#}#}**#}#}**#}#}**#}#}**#}#}**#}#}**#}#}**#}#}**#}#}**#}#}**#}#}**#}#}**#}#}**#}#}**#}#}**#}#}**#}#}**#}#}**#}#}**#}#}**#}#}**#}#}**#}#}**#}#}**#}#}**#}#}**#}#}**#}#}**#}#}**#}#}**#}#}**#}#}**#}#}**#}#}**#}#}**#}#}**#}#}**#}#}**#}#}**#}#}**#}#}**#}#}**#}#}**#}#}**#}#}**#}#}**#}#}**#}#}**#}#}**#}#}**#}#}**#}#}**#}#}**#}#}**#}#}**#}#}**#}#}**#}#}**#}#}**#}#}**#}#}**#}#}**#}#}**#}#}**#}#}**#}#}**#}#}**#}#}**#}#}**#}#}**#}#}**#}#}**#}#}**#}#}**#}#}**#}#}**#}#}**#}#}**#}#}**#}#}**#}#}**#}#}**#}#}**#}#}**#}#}**#}#}**#}#}**#}#}**#}#}**#}#}**#}#}**#}#}**#}#}**#}#}**#}#}**#}#}**#}#}**#}#}**#}#}**#}#}**#}#}**#}#}**#}#}**#}#}**#}#}**#}#}**#}#}**#}#}**#}#}**#}#}**#}#}**#}#}**#}#}**#}#}**#}#}**#}#}**#}#}**#}#}**#}#}**#}#}**#}#}**#}#}**#}#}**#}#}**#}#}**#}#}**#}#}**#}#}**#}#}**#}#}**#}#}**#}#}**#}#}**#}#}**#}#}**#}#}**#}#}**#}#}**#}#}**#}#}**#}#}**#}#}**#}#}**#}#}**#}#}**#}#}**#}#}**#}#}**#}#}**#}#}**#}#}**#}#}**#}#}**#}#}**#}#}**#}#}**#}#}**#}#}**#}#}**#}#}**#}#}**#}#}**#}#}**#}#}**#}#}**#}#}**#}#}**#}#}**#}#}**#}#}**#}#}**#}#}**#}#}**#}#}**#}#}**#}#}**#}#}**#}#}**#}#}**#}#}**#}#}**#}#}**#}#}**#}#}**#}#}**#}#}**#}#}**#}#}**#}#}**#}#}**#}#}**#}#}**#}#}**#}#}**#}#}**#}#}**#}#}**#}#}**#}#}**#}#}**#}#}**#}#}**#}#}**#}#}**#}#}**#}#}**#}#}**#}#}**#}#}**#}#}**#}#}**#}#}**#}#}**#}#}**#}#}**#}#}**#}#}**#}#}**#}#}**#}#}**#}#}**#}#}**#}#}**#}#}**#}#}**#}#}**#}#}**#}#}**#}#}**#}#}**#}#}**#}#}**#}#}**#}#}**#}#}**#}#}**#}#}**#}#}**#}#}**#}#}**#}#}**#}#}**#}#}**#}#}**#}#}**#}#}**#}#}**#}#}**#}#}**#}#}**#}#}**#}#}**#}#}**#}#}**#}#}**#}#}**#}#}**#}#}**#}#}**#}#}**#}#}**#}#}**#}#}**#}#}**#}#}**#}#}**#}#}**#}#}**#}#}**#}#}**#}#}**#}#}**#}#}**#}#}**#}#}**#}#}**#}#}**#}#}**#}#}**#}#}**#}#}**#}#}**#}#}**#}#}**#}#}**#}#}**#}#}**#}#}**#}#}**#}#}**#}#}**#}#}**#}#}**#}#}**#}#}**#}#}**#}#}**#}#}**#}#}**#}#}**#}#}**#}#}**#}#}**#}#}**#}#}**#}#}**#}#}**#}#}**#}#}**#}#}**#}#}**#}#}**#}#}**#}#}**#}#}**#}#}**#}#}**#}#}**#}#}**#}#}**#}#}**#}#}**#}#}**#}#}**#}#}**#}#}**#}#}**#}#}**#}#}**#}#}**#}#}**#}#}**#}#}**#}#}**#}#}**#}#}**#}#}**#}#}**#}#}**#}#}**#}#}**#}#}**#}#}**#}#}**#}#}**#}#}**#}#}**#}#}**#}#}**#}#}**#}#}**#}#}**#}#}**#}#}**#}#}**#}#}**#}#}**#}#}**#}#}**#}#}**#}#}**#}#}**#}#}**#}#}**#}#}**#}#}**#}#}**#}#}**#}#}**#}#}**#}#}**#}#}**#}#}**#}#}**#}#}**#}#}**#}#}**#}#}**#}#}**#}#}**#}#}**#}#}**#}#}**#}#}**#}#}**#}#}**#}#}**#}#}**#}#}**#}#}**#}#}**#}#}**#}#}**#}#}**#}#}**#}#}**#}#}**#}#}**#}#}