
Ever been caught off guard by that annoying buzzing sound when you crank your car’s audio system? One minute, you’re enjoying your favorite tunes, and the next, that rattle-driven noise ruins the vibe. I remember the first time I experienced it vividly; I was jamming out on the highway, only to be greeted by this relentless drone coming from my door panels. Turns out, that little flaw can seriously degrade your driving experience, and honestly, it’s more common than you’d think.
Why that buzzing noise is more than just an annoyance
The first time I encountered this issue, I thought it was a faulty speaker or perhaps a loose screw. But after some digging, I realized that the culprit was often the lack of proper damping material inside the door panels. Without the right insulation, vibrations from the speaker transfer directly into the vehicle’s body, causing that pesky buzzing. And believe me, this isn’t just a minor inconvenience; it can distort your sound quality and even cause long-term damage to your speakers and panels.
Now, you might be wondering: “Is it worth spending a fortune on soundproofing, or is there a simple, budget-friendly fix?” Well, friends, I’ve found through personal trial and error that a straightforward foam hack can make a world of difference. This cheap, easy solution isn’t just a quick fix—it’s a game-changer for anyone serious about maintaining audio clarity without breaking the bank.
Before we dive into the solution, I want to share a common mistake I made early on. I bought expensive damping mats without considering that often, a basic foam layer is enough to dampen vibrations effectively. Over-investing in high-end materials when a simple fix would suffice is a mistake I hope you avoid. If you’re interested, I’ve also explored other tricks for enhancing your vehicle’s sound system, like how to get deep bass out of shallow-mount subwoofers, which you can check out for more insights.
So, are you tired of that buzzing ruining your drives? Let’s get into the practical steps you can take right now to silence those panels for good. And believe me, once you see how effective a bit of foam can be, you’ll wonder why you didn’t try it sooner.
Remove the Door Panel Carefully
Start by disconnecting your vehicle’s battery to prevent any electrical issues. Use a panel removal tool to gently pop off the door panel clips, working from the bottom up. Keep track of all screws and clips to avoid losing them. Once the panel is loose, disconnect any wiring connectors for the window controls or speakers. This initial step makes accessing the inside of the door much easier and sets the stage for the damping process.
Identify Vibrating Areas and Potential Noise Sources
Press lightly on the door panel while playing music at a volume that causes buzzing. You might notice certain spots vibrate more, such as the inner door frame or around the speaker mount. Use a flashlight to inspect for loose components, such as screws or metal parts, that might be rattling. Recognizing these hotspots allows for targeted damping, which is more effective and saves material costs.
Apply Damping Foam to Critical Areas
Cut a piece of foam slightly larger than the vibrating area. For a quick, budget-friendly fix, I recommend using closed-cell foam, which resists moisture and provides excellent vibration damping. Press the foam into place behind the panel, especially around the speaker mounts and inner metal frame. Secure it with doubled-sided tape if needed. This approach absorbs vibrations that transfer into the panels, dramatically reducing buzzing and rattling.
Reinforce Loose Components
Check all screws and fasteners inside the door. Tighten any that are loose, as they often cause or contribute to buzzing. If screws are stripped or don’t hold well, replace them with new ones of the same size. Tightening these components prevents vibrations transmitted through loose parts, further quieting the door panel during music playback.
Test and Adjust Your Work
Reconnect wiring and reattach the door panel, making sure all clips snap securely into place. Reconnect the battery and play your audio system at high volume. Walk around the door while music plays, listening carefully for residual buzz. If you still hear vibrations, identify the new source—perhaps around the window frame or door handle—and add more foam or tighten components as necessary.
Prevent Future Vibrations with Simple Upgrades
For long-term peace of mind, consider replacing worn rubber seals around the window or applying additional damping material during regular maintenance. Remember, preventing vibrations is often easier than curing them after they start. If you’re looking to boost your overall sound quality, enhancing your car’s damping layers can make your system sound more precise and less echo-prone, just like proper home audio tuning—you might find this guide helpful for understanding the importance of proper damping in subwoofers.When it comes to investing in home audio gear, many enthusiasts fall prey to misconceptions that can lead to subpar sound quality and wasted money. One widespread myth is that the most expensive equipment always delivers the best performance. While high-end gear can offer premium features, calibration and room setup are often more critical than just the price tag. For example, even a top-tier speaker can underperform if placed incorrectly or if the room acoustics aren’t optimized, as discussed in detailed guides on speaker placement and DIY room tuning.
Another common mistake is believing that more watts or power equals better sound. This misconception ignores the fact that sound quality depends heavily on the amplifier’s design and how well it matches the speakers. Oversized amps for small speakers can cause distortion, while underpowered amps might struggle to drive high-sensitivity speakers properly. For advanced users, understanding the nuances of amplifier damping factors and impedance matching is essential. To learn how to prevent your amplifier from overheating or distorting, check this specialized guide.
Many believe that soundbars are a perfect replacement for a full surround system. While soundbars offer convenience, they rarely match the spatial accuracy and immersive experience of dedicated speakers placed strategically around the room. Interestingly, some high-quality soundbars utilize virtual surround algorithms, which can be convincing but still lack the depth of a well-implemented multi-speaker setup.
For headphone lovers, there’s a misconception that higher impedance always results in better audio. In reality, impedance impacts how much power your device needs and how compatible it is with your player. Many high-impedance headphones require dedicated amplifiers to reach optimal levels, but this doesn’t inherently mean they sound better—just that they need more power to perform as intended. If you’re aiming to improve your headphone experience, consider ensuring your amplifier or dongle provides enough current; for instance, upgrading your DAC might make a noticeable difference.
Let’s also examine a sneaky area—subwoofers and the myths surrounding their placement. Many assume that sticking a subwoofer in the corner yields the deepest bass. While corners can amplify low frequencies due to boundary effect, they can also cause boomy, muddy sound if not carefully tuned. The real secret lies in how you fine-tune your subwoofer’s phase, crossover, and location to match your room acoustics, which can be quite nuanced. For instance, know that ported enclosures can sound ‘floppy’ in small trunks; adjusting placement or considering sealed boxes might solve these issues.
Finally, a vital but overlooked aspect in any setup is the importance of room acoustics and proper calibration. Even the most advanced components can fall short without proper tuning. Investing in a calibration microphone and software can reveal frequencies that need additional treatment, such as bass traps or diffusers, which often surpass the benefits of just upgrading hardware.
As a home audio enthusiast, deciphering these myths and nuances can dramatically improve your listening experience. Avoid falling into surface-level solutions or trendy misconceptions—dig deeper into your room and gear. Have you ever fallen into this trap? Let me know in the comments or explore our related guides on deep bass tricks and more.
Keeping your home audio gear in peak condition requires more than just choosing the right speakers or amplifiers. Regular maintenance and the right tools ensure your investment continues to deliver optimal sound. As someone who’s consistently fine-tuned their setup over the years, I can attest that using specific equipment and adopting disciplined routines make a tangible difference in longevity and performance.
Get the Right Tools for Calibration and Cleaning
First and foremost, investing in a reliable calibration microphone like the **MiniDSP UMIK-1** is invaluable. I use this device personally to perform room measurements and calibration, ensuring my subwoofer crossover points and speaker placement maximize sound clarity. Proper calibration can prevent issues like uneven frequency response, which not only improves listening quality but also prolongs equipment life by avoiding undue strain. Additionally, a precision screwdriver set with anti-static properties is essential for tightening or replacing components without risking static damage or stripped screws. For cleaning, a set of soft-bristled brushes and microfiber cloths helps maintain diaphragms, tweeters, and ports without scratching or removing dust that can cause distortion over time.
Regular Checks and Firmware Updates Make a Difference
Periodically inspecting connectors, cables, and joints prevents signal degradation. I personally schedule a monthly quick check, verifying cable integrity and ensuring no corrosion has developed on terminals. Firmware updates for AV receivers and soundbars provide performance enhancements and security patches, which are crucial for future-proofing your system. Many premium brands, like Denon or Yamaha, offer firmware updates accessible through their apps or websites, and I recommend setting these up as part of your routine maintenance.
Experiment with Advanced Sound Optimization Techniques
Beyond routine checks, I suggest deploying advanced equalization tools like Room EQ Wizard (REW). This free software, paired with your calibration mic, allows for detailed analysis of your room’s acoustics. I’ve found that applying targeted EQ adjustments based on REW measurements drastically improves sound clarity and minimizes long-term wear on specific driver ranges. Many users overlook this step, but it’s an example of how technological tools can extend the lifespan and performance of your gear. If you haven’t explored room correction software yet, I recommend trying REW to fine-tune your setup—and it’s surprisingly straightforward to get started with a tutorial from experts in the field.
Looking Ahead: Trends in Maintenance and Tools
Predicting future trends, I believe smarter, AI-powered calibration systems are on the horizon. Devices that can automatically analyze room acoustics and adjust settings in real-time will reduce manual effort while preserving system integrity. As these tools improve, expect more home audio enthusiasts to prioritize ease of maintenance without sacrificing sound quality. For now, embracing precise tools like calibration microphones and sound analysis software remains the most effective way to keep your system performing at its best long-term.
How do I maintain my home audio setup over time?
Routine checks, careful cleaning, firmware updates, and leveraging advanced calibration tools like Room EQ Wizard form the backbone of maintaining your system. By establishing these habits, you’ll ensure your audio remains crisp and reliable for years to come. Take the initiative today—try deploying REW for a deeper understanding of your room’s acoustics and see the difference it makes in your listening experience.
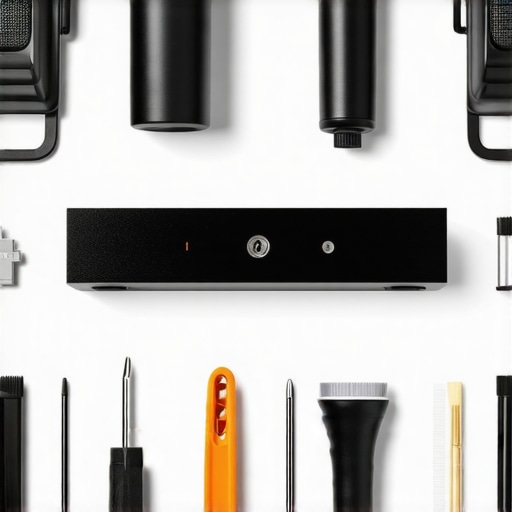
The Deep Lessons I Discovered About Home Audio Equipment
One of the most eye-opening lessons I learned was that the thrill of new gear can quickly fade if you neglect room acoustics and calibration. Relying solely on high-end components without understanding their interaction with your environment can lead to underwhelming sound quality. The realization that smart placement and tuning trump the price tag shifted my entire approach, making me more thoughtful and patient in optimizing my system.
I also found that quick fixes—like adding damping foam—offer surprisingly effective results and save both time and money. It’s tempting to invest in expensive dampening mats, but sometimes a simple foam layer behind the speaker or inside a cabinet makes a noticeable difference, revealing the importance of targeted, practical solutions over flashy upgrades.
Another lightbulb moment was understanding the myth that more wattage equals better sound. Power is just one piece of the puzzle; proper matching, quality components, and correct impedance are what truly elevate listening experiences. This insight helped me avoid overdriving my speakers and damaging my gear, leading to longer-lasting performance and richer sound.