
I vividly remember the moment it hit me—my home theater system sounded as if I was listening through a tunnel. Despite spending a small fortune on speakers and soundbars, I couldn’t get the clarity I craved. The culprit? The center channel speaker was perched uncomfortably close to the floor, right below my knees. I realized that positioning matters more than I had ever imagined, and that my placement choice was sabotaging my listening experience.
The Mistake That Muffled My Dialogues and Ruined My Movies
Like many enthusiasts, I thought placing the center channel low—sometimes even on the floor—was a quick fix or a matter of convenience. But I was wrong. The soundwaves from speakers are designed to project at ear level, where they can deliver crisp dialogue and enveloping sound. When positioned below your knees, the sound waves have to travel through furniture, rugs, and other obstacles, causing muffling and distortion. The difference in audio clarity is noticeable, and it can make you miss that crucial line or subtle sound effect, ruining the immersion.
Since then, I’ve been determined to learn the best practices for speaker placement. Let me tell you, the difference is night and day. Not only did the dialogue become clearer, but the entire audio landscape seemed more natural. If you’ve faced similar issues—poor sound quality, muffled dialogue, or a lack of clarity—I promise that adjusting your speaker placement can transform your home theater experience.
If you’ve ever wondered whether your setup is fundamentally flawed, you’re not alone. Many people make the mistake of placing their speakers too low or in less-than-ideal spots, which leads to subpar sound. In fact, a study by the Acoustic Society highlights that speaker height and placement are critical for optimal sound imaging and clarity. Proper placement ensures that sound reaches your ears directly and with the intended intensity, giving you the cinema-quality experience you deserve.
Early on, I made the mistake of assuming that more expensive equipment would mask poor placement. It doesn’t. A costly speaker will still sound terrible if it’s placed on the floor or behind furniture. To get the full benefit of your gear, positioning is key. For more tips on optimizing your setup, check out this guide on speaker placement.
In the sections ahead, I’ll walk you through practical steps to elevate your center channel and other speakers to ear level, ensuring every dialogue crackles with clarity and every musical note resonates perfectly. Ready to ditch the muffled sound and enjoy real home theater magic? Let’s get started on making your space sound its absolute best.
,
Set Up Ear Level for Your Speakers
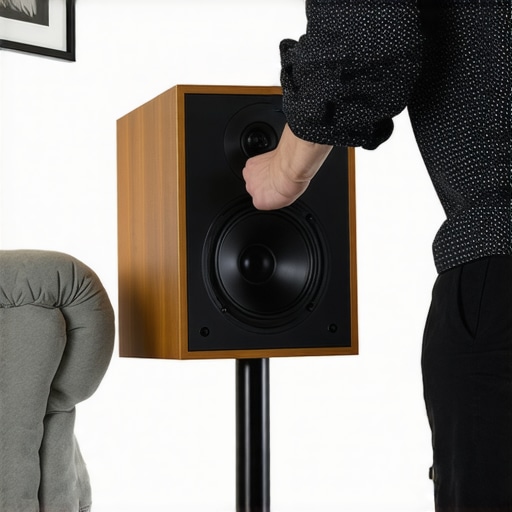
Start by positioning your center channel right at ear height when seated. This might require moving your TV or mounting the speaker on a sturdy stand. I once used books and stacked them until I got my center speaker to the perfect level, which dramatically improved dialogue clarity. Aim for about the same height as your seated ears to ensure sound projects directly into your listening area.
Use Flexible Mounts or Stands
Invest in adjustable speaker mounts or dedicated stands to fine-tune the height and angle. During my first attempt, I attached adjustable wall mounts that allowed me to tilt and rotate the speaker. This way, I could experiment with angle until the sound seemed to come straight from the mouths of the actors. Proper angle and stability are key—loose mounts cause vibrations and muddled sound, so secure your gear well.
Optimally Space Your Speakers
Place your surrounds and front speakers at ear level when possible, following the ‘sweet spot’ principle. Use painter’s tape or string to mark the ideal positions during setup. I used a simple tape measure and restringing to ensure symmetry. This arrangement helps distribute sound evenly and creates a more immersive experience. Remember, uneven spacing can lead to localization issues, making your soundstage unnatural.
Test and Adjust for Perfect Sound
After initial placement, sit in your listening position and play testing sounds. Adjust the angle and height incrementally, listening for clarity and imaging. I often played test tones and moved my speakers slightly, which made a noticeable difference. This iterative process ensures that each speaker points directly toward your ears, providing crisp, clear dialogue and rich surround effects.
Keep the Path Clear for Sound Waves
Remove obstacles like furniture or decorative items from between your speakers and listening spot. I once placed a bookshelf directly in front of my front left speaker, muffling the sound. Clearing the path prevents sound from bouncing or being absorbed prematurely. Positioning is about more than height; it’s about creating a direct, unobstructed line of sound travel to your ears.
Leverage Room Acoustics for Better Sound
Consider adding soft furnishings, curtains, or acoustic panels to improve sound clarity. When I added thick curtains to my windows and a plush rug, the reflections softened, making voices clearer and bass tighter. Experimenting with these elements alongside proper placement ensures your home theater sounds balanced and natural. For specific room treatments, see receiver performance tips.
When it comes to home audio deals, most enthusiasts focus on specifications and brand reputation, but there’s a nuanced layer many overlook: the importance of understanding the subtleties behind amplifiers, soundbars, and speakers. For example, many believe that a higher wattage amplifier automatically delivers better sound, but in reality, matching the amplifier’s power to your speakers’ capacity is crucial to prevent distortion or damage. An underrated aspect is the grounding quality of vintage amplifiers, which can cause noise issues—more on that in this guide. A common myth is that open-box gear is inherently inferior; however, savvy buyers know it can be a cost-effective way to snag high-end components in pristine condition, so long as they check for hidden damage or missing parts.
Why do some high-end speakers sound off even when new? This often stems from neglected maintenance—like foam surrounds that have deteriorated over time—highlighting the importance of inspecting vintage speakers, as discussed here. Moreover, many users underestimate the significance of proper cable quality. Premium cables won’t fix a bad power supply or a poorly grounded amplifier, so investing blindly in expensive wires can lead to disappointment. It’s essential to balance all these aspects to unlock the full potential of your home audio system.
One advanced mistake I see often is ignoring room acoustics, which can severely impair speaker performance regardless of quality. Strategic placement and acoustic treatments can make a dramatic difference, sometimes even more so than upgrading equipment. For instance, adding bass traps or cushions near reflective surfaces can improve clarity and bass response. For more tips on optimizing your listening environment, explore these room treatment insights.
Have you ever fallen into this trap? Let me know in the comments. Remember, upgrading your gear is just one piece of the puzzle; fine-tuning the nuances can elevate your listening experience from good to extraordinary.
Tools That Keep Your Sound System Running Smoothly
Investing in the right tools is essential for ongoing maintenance and troubleshooting of your home audio equipment. I personally rely on a high-quality digital multimeter for testing speaker impedance and verifying connections. It’s an inexpensive yet invaluable device that helps identify wiring issues or faulty components early, preventing costly damage. For cleaning delicate headphone mesh or speaker cones, I recommend a microfiber brush, which gently removes dust without risking damage or static buildup. Additionally, a calibrated test tone generator like REW (Room EQ Wizard) allows me to analyze room response and fine-tune speaker placement or equalization over time, ensuring consistent audio quality.
Regularly updating your system calibration software—especially if you have a receiver with automatic room correction—is another practice that maintains sound fidelity. These tools automatically adapt your system to the room’s acoustics, which can change with furniture rearrangement or wear. Plus, dedicating a cable tester helps verify the integrity of speaker and power cables, avoiding dropouts or distortion during critical listening moments.
How do I keep my gear in top shape long-term?
The secret lies in routine checks and maintenance routines. For vintage equipment, inspecting foam surrounds for deterioration and cleaning binding posts with contact cleaner are vital steps. For newer gear, keeping firmware updated via manufacturer tools ensures you benefit from performance improvements and bug fixes. Remember, component longevity depends on proper ventilation and avoiding overdriving your system—installing a thermal thermometer probe near your amplifier can help monitor temperature spikes and prevent overheating.
Furthermore, establishing a regular clean-up routine with compressed air for vents and connectors prevents dust buildup that can impair cooling and performance. I use a quality air blower designed explicitly for electronic components, ensuring safety and device longevity. Over time, this proactive approach saves you from costly repairs or replacements, making your investment last for years.
Scaling Your Sound System Responsibly
Growing your system should be a thoughtful process. Before adding new speakers or amplifiers, consider modeling your room acoustics with software like REW, which provides detailed analysis and recommends optimal positioning. When upgrading, choose compatible components by checking technical specifications and power ratings—consulting manufacturer documentation ensures that your new gear won’t strain or damage existing equipment.
As your system expands, investing in quality cables and connections becomes even more critical. I personally prefer oxygen-free copper cables with gold-plated connectors for their durability and conductivity. Remember, gradual, well-informed upgrades tend to be more cost-effective and rewarding than impulsive purchases—prioritize compatibility and long-term functionality.
Where will home audio technology head in the future?
Looking ahead, I predict that smart home integration and wireless multi-room setups will become more seamless, driven by advances in Wi-Fi 6 and Bluetooth 5. As these technologies mature, maintaining stable connections and minimizing latency will be crucial. Investing in compatible equipment now, such as multi-zone streamers and smart amplifiers, can simplify future expansion and maintenance.
To optimize your system now, try calibrating your room acoustics with the 20-minute warm-up routine for tube amps. This simple step helps ensure your equipment reaches peak performance each time you listen. Incorporate these maintenance and upgrade practices, and you’ll enjoy pristine sound for years to come.
The Hardest Lesson I Learned About amplifiers,soundbars,speakers,headphones,home audio deals
One of my biggest eye-openers was realizing that equipment quality isn’t the only factor in stellar sound; placement and room acoustics are equally critical. Investing in high-end gear without proper setup can be like having a sports car with a flat tire—it just doesn’t perform as it should.
3 Myths About amplifiers,soundbars,speakers,headphones,home audio deals That Held Me Back
- Wattage guarantees better sound: I used to think more power meant louder, but overdriving can cause distortion. Matching the amplifier’s capacity to your speakers truly matters.
- Expensive cables are essential: I learned that quality cables matter, but they won’t fix fundamental setup flaws or poor grounding issues.
- Open-box gear is inferior: With proper inspection, many open-box items are essentially brand new and save you money for better components or room treatments.
Where to Go from Here
To elevate your home audio, focus on the little details—like fine-tuning speaker angles and managing room reflections. For practical tools, consider exploring this routine for warming up tube amps or using ground loop tricks to eliminate noise. Remember, consistent tweaks and care can make your system sing, transforming your listening experience into something truly immersive.