
There was a day I almost ruined my favorite bookshelf speakers. I hunched over with a handful of canned air, aiming to clear out the stubborn dust buildup. In my haste, I gave a quick blast—and heard that sickening crunch. Yep, I pushed the cone in just enough to ruin the speaker’s delicate voice coil. That moment was a wake-up call. Cleaning speakers isn’t as simple as it looks—and it’s easy to cause costly damage if you’re not careful.
The Hidden Trap of Dusting Speakers
Are You Using the Right Methods to Clean Your Speakers?
Here’s the reality: many people reach for a cloth, or worse, canned air, without thinking about the fragility of the cone. It’s tempting because dust on speakers is unsightly, and canned air feels quick and easy. But, without proper technique, it can lead to punctured cones, broken dust caps, or misaligned drivers. I learned this the hard way, and I bet you have too, or at least considered it. Early on, I thought that blowing dust away was enough—until I realized that the pressure of canned air can exert enough force to press against the cone, especially if held too close. According to audio experts, misusing compressed air can cause permanent damage, turning a simple maintenance task into a costly fix.
If you have faced this dilemma, don’t worry. There are safe, effective ways to keep your speakers dust-free without risking their health—methods that I now swear by. Today, I’ll guide you through the best practices I’ve found so you can clean with confidence and keep your sound crystal clear. Plus, I’ll share a common mistake many make early on and how avoiding it can save your gear. Ready to give your speakers the gentle care they deserve? Let’s dive into the practical steps and ensure your audio investment stays pristine for years to come.
Prepare Your Workspace Carefully
Before anything else, turn off your speakers and unplug them from power sources to prevent any electrical accidents or damage. Clear a clean, dust-free area where you can work comfortably, reducing the risk of dropping tools or bringing in debris. Place a soft cloth underneath your speakers if you plan to move them around.
Use the Right Cleaning Tools and Materials
Select Gentle Cleaning Accessories
Opt for a microfiber cloth, which is soft and minimizes the risk of scratching delicate surfaces. Avoid abrasive materials like paper towels or rough cloths that could leave scratches or fibers behind. For stubborn dust, use a small, soft-bristled brush or a dedicated electronics cleaning brush. A can of compressed air can be employed cautiously—holding it at a safe distance and with controlled bursts to blow dust away without exerting high pressure.
Applying Cleaners Properly
If necessary, lightly dampen the microfiber cloth with distilled water or a specialized electronics cleaner. Never spray liquids directly onto the speaker cones or cabinet. Keep the cloth only slightly moist and wipe gently in a circular motion. For speaker grills, remove them if removable and wash with warm, soapy water, then let them dry thoroughly.
Addressing Dust and Debris on speaker cones
Dust on the cone surface can be cleaned with a soft brush or microfiber cloth. Avoid using canned air directly on cones; the high-pressure air can cause physical damage, similar to what I experienced when I mistakenly blew canned air too close and pushed in my speaker cone. Instead, use a gentle vacuum with a brush attachment or a soft brush to dislodge dust without risking harm to the cone’s integrity.
Dealing with Dust Caps and Surrounds
Dust caps protect the voice coil but are fragile. Clean them with a cotton swab dipped in distilled water or a mild cleaner, dabbing gently to lift dirt. Take care not to press or poke the cap, as this can cause permanent damage. Surrounds, often made of foam or rubber, can accumulate dust and dirt; if they appear dirty, carefully clean with a soft, damp cloth and avoid harsh chemicals that could degrade the material.
Special Tips for Soundbars and Home Theater Speakers
Soundbars are usually sealed units; clean their surfaces with a microfiber cloth, and tune in your audio with properly positioned speakers. In tight spaces, dust can collect easily, so regular maintenance is crucial. For home theater setups, prevent dust from settling inside by covering equipment when not in use and cleaning air vents and grills periodically. Proper position and maintenance maintain your audio quality and prolong equipment lifespan.
Remember, patience and gentle handling are key. Rushing or using excessive force can cause irreparable harm, turning a simple cleaning into a costly repair. When in doubt, consult your speaker’s manual or experts, especially for high-end models that demand delicate care.
Many audio enthusiasts believe that choosing the latest tech or the most expensive gear guarantees superior sound quality. However, this perception often overlooks nuanced factors that truly influence audio performance. For instance, a common misconception is that bigger speakers automatically produce better bass, but without proper room placement and calibration, large speakers can underperform. According to audio engineer Ethan Winer, “Room acoustics and correct speaker positioning are far more critical than sheer size or cost.”
Are Your Expectations Overinflated by Marketing Hype?
Many consumers are swayed by marketing claims suggesting that high-end headphones or amplifiers will deliver flawless sound, but in reality, the interplay between gear and environment matters immensely. An overemphasis on specifications like wattage or driver size often leads to neglecting the importance of proper setup and room acoustics. This oversight can result in subpar experiences despite owning top-tier equipment.
Another common pitfall is the belief that soundbars can replace traditional speaker setups entirely. While soundbars offer convenience and decent sound, they rarely match the immersive quality of a well-calibrated surround sound system. The trap here is assuming one device can do it all—leading to disappointment. For optimal home audio, combining soundbars with additional speakers or dedicated amplifiers, as discussed in this guide, can significantly improve your experience.
What Advanced Users Might Miss When Upgrading Their System
Seasoned audiophiles often focus on upgrading components like DACs, amps, or cables, but neglect the importance of proper calibration and room treatment. An upgrade without addressing acoustics can result in negligible improvements or even worsened sound. A study published in the Journal of the Audio Engineering Society emphasizes that room modes significantly color perceived sound, sometimes more than the gear itself. Therefore, integrating acoustic panels or bass traps can be a game-changer, ensuring that new equipment achieves its full potential.
It’s also vital to understand the role of digital formats and codecs. For instance, some wireless earbuds or headphones claim to block air noise, but without supporting standards like AAC or aptX HD, audio quality can suffer. If you want to get the most out of your wireless setup, consider exploring earbuds with advanced noise cancellation that support high-quality codecs. This attention to detail elevates your listening experience beyond basic expectations.
Finally, keep in mind that consistent maintenance and understanding your gear’s limitations are essential. Overspending on features you never use or misunderstandings about compatibility can lead to wasted resources. Always refer to authoritative sources and user manuals before making significant upgrades or adjustments. Remember, the goal is to create an environment where your equipment performs optimally, providing an authentic and enjoyable soundstage.
Have you ever fallen into this trap? Let me know in the comments. Taking the time to understand these nuances can make a noticeable difference in your audio journey, transforming your setup from average to extraordinary.
Maintain Your Sound System for Long-Term Performance
Investing in quality audio equipment is only half the battle; keeping it functioning optimally requires proper maintenance and the right tools. Personally, I rely on a combination of specialized cleaning products and calibration software to ensure my headphones, speakers, and amplifiers stay in top shape over the years. Regularly inspecting connectors for corrosion with a magnifying glass or using contact cleaner on jacks helps prevent static and signal loss. For delicate repairs or adjustments, I recommend audio-specific cleaning kits—these contain gentle brushes and solvents designed precisely for sensitive components.
Another crucial aspect is calibration. Using a measurement microphone, like the Dayton SDP-Series, paired with free software such as REW (Room EQ Wizard), allows you to analyze your room’s acoustics and adjust speaker settings accordingly. This process enhances clarity, bass response, and overall sound quality, preventing small issues from deteriorating over time.
Tools I Recommend for Longevity and Performance
For routine cleaning, a microfiber cloth combined with a can of compressed air, used cautiously, does wonders. I apply compressed air at a safe distance to dislodge dust from speaker grilles and internal vents—avoiding direct blasts that can damage cones—as explained in this guide. For maintaining the electrical contacts, I use DeoxIT contact cleaner, which restores conductivity without leaving residue. It’s invaluable for preventing intermittent audio issues caused by oxidation.
In terms of software, regular firmware updates for AV receivers and wireless headphones ensure compatibility and feature enhancements. Manufacturers often release improvements that fix bugs or optimize performance—making it worth checking their support sites periodically.
Forecasting the Future of Audio Maintenance
As technology evolves, we can expect smart, self-monitoring systems to emerge, alerting users to potential issues before they become noticeable. Integration with home automation will enable automatic calibration and diagnostics—reducing the manual effort required to keep systems at peak performance. For enthusiasts, the ability to remotely monitor and fine-tune gear via apps will become standard practice, ensuring long-term satisfaction and minimal downtime.
How do I maintain my audio setup over time?
Establishing a regular maintenance routine—cleaning, calibration, and firmware updates—paired with the use of specialized tools, is key. Don’t wait for problems to appear; proactive care extends your equipment’s lifespan and preserves sound quality. Try incorporating the use of measurement microphones or contact cleaners into your routine; they make a tangible difference. And remember, sometimes simple steps like adjusting placement or airflow can prevent costly repairs down the line. Keep your gear calibrated and clean, and you’ll enjoy consistently outstanding audio performance for years to come.
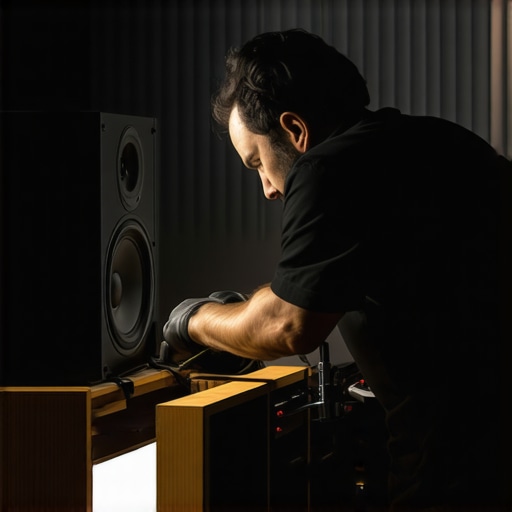
What I Wish I Could Tell My Past Self About Speaker Care
One of the deepest lessons I learned was how easy it is to overlook the delicate balance involved in maintaining audio gear. I once thought that a quick blast of canned air was harmless—until I damaged a speaker cone. That experience taught me the importance of patience and understanding the nuances of speaker design. Now, I realize that every component, from dust caps to voice coils, requires gentle handling and expert knowledge to preserve its function.
Another insight I gained is that quality audio isn’t solely about expensive equipment. Proper placement, room acoustics, and maintenance play pivotal roles—much more than I originally believed. Investing time in calibration and routine cleaning, rather than just gear upgrades, significantly elevates listening experience. Trust me, the smallest tweak often leads to remarkable sound improvements.
My Go-To Tools for Long-Term Audio Happiness
Over the years, I’ve come to rely on specific tools that ensure my setup stays pristine. A quality microfiber cloth is my everyday companion, gently removing dust without scratching surfaces. For internal cleaning, a soft-bristled brush paired with controlled compressed air provides a safe way to dislodge debris—avoiding damage I once feared from high-pressure blasts. I also swear by DeoxIT contact cleaner; it keeps jacks and connectors corrosion-free, preventing those annoying static issues.
On the calibration front, a measurement microphone like the Dayton SDP-Series combined with free software such as Room EQ Wizard has transformed my approach. This duo helps analyze my room’s acoustics and fine-tune speaker settings—unlocking clarity I never knew was possible. These tools have become indispensable in my quest for audio excellence, helping me avoid costly mistakes and get the most out of my investment.
Find Your Rhythm: Taking Action Today
The beauty of good sound lies in the ongoing journey of discovery and care. By applying gentle cleaning techniques, investing in the right tools, and understanding your environment, you can elevate your audio experience to a new level. Remember, small, consistent efforts pay off—turning the average setup into something extraordinary.
What’s one step you’re excited to try or improve in your current audio setup? Share your thoughts below—let’s inspire each other to enjoy better sound every day.