
Ever pulled off your headphones after a long session, only to be greeted by that unmistakable smell of sweat and the sticky feel of damp pads? Trust me, I’ve been there. I used to think my headphone pads were just something to be wiped down now and then, but I quickly realized they can become breeding grounds for bacteria if neglected. That realization hit during a particularly sweaty workout session when I noticed my headphones developing a strange odor and that uncomfortable slip when I moved. It’s not just about comfort—dirty pads can actually impact your hearing comfort and even pose health risks.
The Hidden Battle Against Sweat-Soaked Headphone Pads
Have you ever wondered why your headphones start to smell and feel gross after just a few uses, especially in hot weather or during intense workouts? It’s a common problem, and honestly, it caught me off guard initially. I’d wipe them quickly, toss them back in their case, and think I was doing enough. But that was a mistake. Sweat, oil, and dirt accumulate over time, turning headphone pads into a playground for bacteria and mold.
One of the frustrating parts? Most people don’t realize how dirty their headphone pads actually are until the smell becomes impossible to ignore or their skin reacts negatively. Plus, failing to clean them properly can shorten the lifespan of the pads and even lead to discomfort or infections. Early on, I used harsh chemicals that damaged my headphones, which made me wish I had known better. So, I committed to finding a safe and effective way to keep those pads fresh and sweat-free.
Today, I’ll share the most practical methods I’ve discovered—methods that have kept my headphones smelling clean and feeling comfortable, no matter how intense my workouts get. If you’re tired of the sweaty, sticky feeling and those funky odors that seem to linger no matter what you do, stick around. We’re going to turn that smelly problem into a thing of the past.
Is Cleaning Headphone Pads Worth the Hassle?
You might be skeptical, thinking, “Is it really that important?” Well, not only does a good clean improve comfort and hygiene, but it also protects your headphones and prolongs their lifespan. Plus, a fresh pair of headphones makes listening more enjoyable and less distracting. I used to ignore these issues until I read that bacteria on headphone pads can transfer to your skin, potentially causing infections—something I definitely want to avoid. And yes, it’s totally doable without damaging your gear.
By the way, I once tried to clean my headphones with just a damp cloth and some soap—big mistake. It left residue that built up, making things worse. Learning from that misstep, I now follow a simple, safe routine that keeps my headphones in top shape. Ready to find out how to do it right? Let’s dive into the step-by-step process.
Start with Gathering Your Supplies
Before diving into cleaning, assemble gentle cleaning materials such as a soft microfiber cloth, a small bowl of warm water, mild soap or isopropyl alcohol (70%), and, if needed, a soft toothbrush. I remember the first time I tried to clean my over-ear headphones; I grabbed a dry cloth and scrubbed vigorously, which only pushed dirt further in. Learning from that, I now start with the basics.
Remove and Inspect the Ear Pads
Carefully detach the ear pads if possible, following the manufacturer’s instructions. This step allows for a thorough clean and prevents excessive moisture from damaging other components. During my own cleaning, I removed the pads and noticed a thick layer of sweat and oil built up—motivation to clean more often!
Check for Material Compatibility
Determine whether your pads are made of foam, leather, or silicone. For foam and leather, gentle cleaning is essential, while silicone pads can withstand more rigorous wiping. I learned the hard way that using too much water on leather can cause cracks, so I applied a damp cloth rather than soaking.
Wipe Down with a Damp Cloth
Dip your microfiber cloth into warm water mixed with a few drops of mild soap or alcohol solution. Wring out excess liquid to avoid soaking the pads. Gently wipe the surface, moving in circles. I once oversaturated my foam pads, which led to a soggy mess that took days to dry—lesson learned: keep moisture minimal.
Deep Clean for Stubborn Dirt
For tougher grime, lightly dip a soft toothbrush into the cleaning solution and gently scrub the surface. Be cautious not to puncture or damage the material. Once, I used too much pressure and accidentally tore a foam pad, reminding me to treat the cleaning process with patience.
Rinse Carefully and Dry
If using soap, lightly dampen a clean cloth with plain water to wipe off any residue. Then, pat the pads dry with a towel and let them air dry completely before reattaching. I always leave my pads in a well-ventilated space, avoiding direct sunlight, which can cause fading or cracking. Remember, moisture is your enemy here—ensure everything is thoroughly dry.
Sanitize to Eliminate Odors
To banish lingering odors and bacteria, lightly spritz the pads with isopropyl alcohol. Avoid saturating; a couple of sprays suffice. During my last cleaning, this step made my headphones smell fresh again and reduced the risk of skin irritation. Use a small spray bottle and apply evenly.
Reattach and Maintain Regularly
Once dry, carefully reassemble your headphones. Regular cleaning—every few weeks—can prevent buildup and odors. I’ve found that establishing a routine keeps my headphones comfortable and extends their lifespan.
For more practical sound setup tips, check out adding a subwoofer to enhance your home audio experience or explore cleaning your audio controls effectively. By maintaining your gear properly, you ensure optimal sound quality and hygiene every time you listen.When it comes to home audio, many enthusiasts and casual listeners alike often fall prey to misconceptions that hinder their audio experience. One common myth is that more expensive equipment always guarantees better sound quality. While high-end gear has its merits, in my experience, proper setup and understanding of your system’s nuances matter more than price tags. For instance, a well-placed soundbar can outperform pricier bookshelf speakers if positioned correctly, emphasizing the importance of placement and room acoustics.
Is Your Listening Environment Undermining Your Equipment?
Many believe their hardware’s capabilities are the sole determinants of sound quality, but room acoustics play a vital role. Hard surfaces, furniture placement, and even window treatments can drastically alter speaker performance. Ignoring these factors often leads to frustratingly muddled audio, despite owning top-tier components. For a deep dive into optimizing your space, check out why your Bluetooth codec matters more than your headphones—it’s a perfect example of how source quality and environment shape sound.
Another frequent mistake is overlooking the significance of matching components correctly. Many think that any amplifier can drive any speaker, but impedance mismatches can cause significant performance drops or even damage. For instance, pairing a high-impedance headphone with a low-output amplifier results in weak, tinny audio, a surprisingly common oversight among newcomers. To ensure compatibility, always check specifications and consider professional advice if uncertain. Interestingly, using an amplifier with a higher power output than necessary can also be detrimental, leading to distortion or even permanent damage over time.
Are you aware of the subtle details that can elevate your home audio system? For example, adding a dedicated subwoofer can significantly enhance bass response and overall clarity, but many skip this step. You can explore how to add a subwoofer properly without complex wiring or space complications. Beware of common pitfalls like placing the sub in a corner, which can cause boomy bass or using incorrect crossover settings, both of which distort the listening experience instead of enriching it.
Finally, understanding the importance of cable quality often gets dismissed as mere aesthetics. However, as detailed in recent studies, subpar cables can introduce interference and degrade sound clarity. It’s tempting to opt for cheap wires, but investing in well-shielded, quality cables ensures cleaner signal transmission, especially for longer runs. For more insights on optimizing your setup, consider reading tips on making affordable gear sound premium.
Are you still relying on outdated assumptions about your home audio gear? Let’s dig deeper. Remember, mastering the nuances—like room setup, component compatibility, and cable quality—can transform your audio from good to truly exceptional. Have you ever fallen into this trap? Let me know in the comments.
Gear Up with the Right Tools for Long-Term Sound Excellence
Maintaining your home audio system isn’t just about occasional cleaning; it’s about having the right toolkit and routines that ensure consistent performance over years. I recommend investing in a high-quality, soft microfiber cloth paired with isopropyl alcohol (at least 70%) for cleaning delicate surfaces like headphone pads or speaker grills. This combo allows for safe, thorough cleaning without risking damage.
Another essential is a stereo test tone generator and a multimeter, which I personally use when troubleshooting issues like uneven sound levels or intermittent connections. These tools help pinpoint problems rapidly, saving you time and preventing further damage. In particular, a reliable test tone generator like the Behringer PS400 aids in calibrating your speakers to achieve balanced sound across the room, making every listening session optimal.
Maintain and Scale Your Setup with Smart Solutions
As your collection grows, consider software solutions like Room EQ Wizard (REW). This free software enables detailed acoustic measurements, helping you identify and compensate for room anomalies. I regularly run REW to fine-tune my system’s equalization—something I couldn’t do without it. This level of precision ensures that your gear continues to perform at its best long-term.
When scaling, cable management becomes vital. Use high-quality, shielded cables with robust connectors to prevent signal degradation—sometimes overlooked but crucial for maintaining clarity over time. I personally prefer Monoprice’s shielded audio cables, which offer durability and outstanding shielding.
Future Trends in Home Audio Maintenance
Advancements like smart home integration will soon enable real-time monitoring of your audio gear’s health, with predictive maintenance alerts sent directly to your device. Companies are developing IoT-enabled amplifiers that track temperature, voltage, and component health, reducing unexpected failures. Keeping pace with such innovations will make maintenance even more effortless.
How do I keep my gear performing well over years?
Commit to regular cleaning routines using gentle tools and solutions, track your system’s performance with software like REW, and choose durable, well-shielded cables. Remember, preventative maintenance extends the life and sound quality of your investment. For specialized cleanup, you might want to check out this detailed guide.
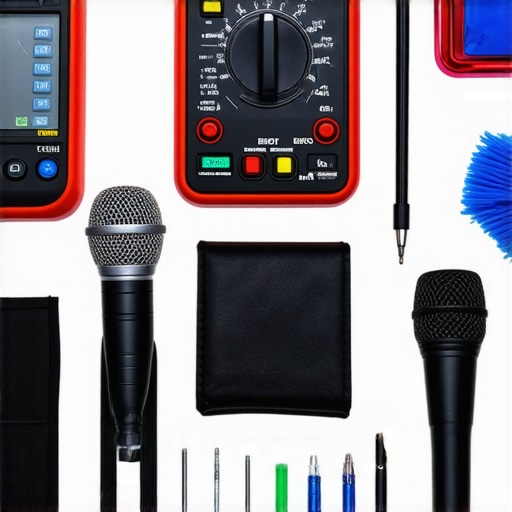
In the future, expect smarter, integrated systems that will alert you before performance drops, minimizing downtime and unnecessary repairs. Start implementing these tools now, and you’ll enjoy flawless sound for years to come. For routine troubleshooting, always verify connections and calibration—it’s a simple step that pays dividends in clarity and reliability.
Lessons That Took Me from Sound Novice to Savvy
One of the most profound lessons I learned was that even the smallest details—like the material of headphone pads—can drastically impact sound quality and hygiene. I once thought replacing pads every few years was enough, but I realized that regular, gentle cleaning significantly maintains clarity and comfort. Additionally, I discovered that room acoustics often overshadow expensive gear; positioning speakers and treating surfaces made more difference than I expected. Another lightbulb moment was understanding that proper cable management isn’t just aesthetic—it prevents interference and preserves sound integrity over time. Finally, I learned that investing in quality cleaning tools and maintaining a routine is the real secret to long-term audio satisfaction, transforming my listening experience from good to exceptional.
My Arsenal for Devoted Home Audio Maintenance
Over the years, I’ve curated a toolkit that keeps my setup in top shape. A high-quality microfiber cloth is essential—it gentle cleans without damaging delicate surfaces. For disinfecting and odor elimination, I trust isopropyl alcohol at 70%, used sparingly; it sanitizes without leaving residues. A soft-bristled toothbrush is perfect for tackling stubborn grime on headphone pads and speaker grilles, especially when combined with mild soap solutions. I also rely on software like Room EQ Wizard (REW) to analyze room acoustics and fine-tune my system—this has been transformative in achieving balanced sound. Lastly, durable, shielded cables prevent interference, which I consider critical, especially for long runs or high-precision setups. These tools, combined with consistent routines, ensure my equipment sounds its best year after year.
Keep the Beats Alive—Your Listening Journey Continues
Don’t wait for your gear to show signs of wear—be proactive, explore new techniques, and stay curious about your home audio environment. With small but deliberate steps now, you’re investing in decades of rich, immersive sound. Whether it’s perfecting your room setup, choosing the right cables, or maintaining your headphones, every effort counts. The future of home audio maintenance is headed toward smarter, predictive systems that will alert you before performance drops—getting ahead now ensures you’ll enjoy flawless sound adventures for a long time. So, take the plunge, experiment with those placement tweaks, and cherish your journey to audio mastery. Your ears—and your favorite tunes—will thank you.