
Ever been midway through your favorite song, enthusiastically adjusting the volume on your vintage receiver, only to be greeted by that irritating scratchy turn? It’s like the knob has developed a life of its own — stubborn, noisy, and downright frustrating. I remember thinking I’d have to replace the entire unit just because of a stubborn, scratchy volume pot. But after some trial, error, and a few lessons learned, I discovered it’s often a simple fix that can breathe new life into your beloved gear.
Why That Scratchy Sound Matters More Than You Think
That annoying scratch isn’t just a minor annoyance; it can be a sign that your equipment is struggling with accumulated dust, oxidation, or worn components. Over time, contact points inside the potentiometer (that’s the technical name for the volume knob) can become tarnished or dirty. Ignoring it could lead to worse noise issues or even damage. Plus, let’s be honest—nothing kills the vibe more than static or crackling when you’re getting into a groove.
Here’s the kicker: according to audio repair experts, routine cleaning can restore clarity and extend the life of your vintage gear significantly. So, instead of shelling out for a new receiver or risking damage with untested fixes, let’s get that knob turning smoothly again.
Have You Ever Faced This Problem and Felt Helpless?
If this sounds familiar, you’re not alone. I’ve been there, and I know how disheartening it feels to troubleshoot audio gear that’s cherished but stubborn. Early on, I made the mistake of using harsh chemicals, which only worsened the corrosion. Trust me, it’s a common mistake, but one easily avoided.
In the upcoming sections, I’ll share the tested, neighbor-approved techniques that I’ve used to get my old receiver sounding crystal clear again. So, grab your toolkit, and let’s fix that scratchy volume knob — because your vintage audio deserves to be enjoyed, not endured.
Access the Potentiometer Carefully
Turn off and unplug your receiver to avoid shocks. Remove the casing using a screwdriver, keeping track of all screws. Gently locate the volume potentiometer, which usually looks like a small cylindrical component with three or more terminals. Mine was hidden behind a dust cover, so be patient and careful not to damage any wiring. This initial step was crucial; rushing could mishandle delicate parts or void warranties. Remember, patience is key when working with vintage gear.
Identify the Type of Potentiometer
Check if it’s a sealed or open design
Most vintage receivers use sealed potentiometers, which require different cleaning methods. If your pot has a cover or seems exposed, it’s likely open. My receiver had a sealed unit, so I opted for contact cleaner. Knowing the type helps determine how to proceed without causing damage. For sealed units, avoid penetrating liquids; instead, use specialized cleaning sprays.
Choose the Right Cleaning Solution
Use a contact cleaner specifically made for electronics, such as DeoxIT. Do not use harsh chemicals or alcohol, as these can corrode components further. I found that aerosol contact cleaner with a precision nozzle allowed directed, mess-free application. Just spraying indiscriminately can cause pollution; precision is essential. I also wore gloves to avoid contamination. Proper cleaning keeps the internal contact points free of oxidation, which is often the culprit behind scratching sounds.
Apply the Cleaner Effectively
Spray the cleaner into the gap where the shaft enters the potentiometer. Rotate the knob back and forth multiple times to work the solvent into all contact points. This movement dislodges dust, dirt, and oxidation. I did this several times, ensuring all internal contact surfaces got treated. For older units with heavy buildup, repeating this step might be necessary. The goal is to ensure a reliable, clean contact that restores smooth operation and eliminates noise.
Test Before Reassembly
Reconnect the receiver temporarily to test the result. Turn it on, and adjust the volume knob to check for static or crackling. If the sound is clearer and smooth, you’re on the right track. If not, repeat the cleaning process. In my case, after two rounds, the static disappeared, and the volume turned silky smooth—replicating that satisfying vintage sound I remembered.
Reassemble and Enjoy the Results
Carefully put the casing back on, ensuring no wires are pinched. Tighten all screws securely. When you power up the receiver, the difference is obvious: no more scratching, just pure, clean audio. Regular maintenance like this can extend your gear’s lifespan and save you costs on repairs or replacements. If you’re curious about optimizing your entire setup, check out this guide on headphone comfort.
 Many home audio enthusiasts fall prey to misconceptions that can hinder their entire setup. One common mistake is assuming that cheaper gear equals worse sound quality, ignoring nuances like room acoustics and proper calibration, which matter far more than price tags. For example, a budget-friendly soundbar can outperform a pricey one if placed correctly and paired with the right accessories. However, many overlook the importance of positioning and room treatment, leading to suboptimal sound quality despite having high-end components.
Another misconception is that more speakers automatically translate to better sound. This oversimplifies the issue, as improper placement or mismatched speaker impedance can create uneven soundscapes, dead zones, or phase cancellations. Instead, focus on quality over quantity and strategic placement, like isolating speakers with stands or wall mounts to optimize your listening experience. Want to boost your bass? Remember, adding multiple subwoofers can improve low-frequency response, but only if they’re properly integrated with your main speakers—misalignment here can cause phase issues and muddy sound.
Why do so many get confused about amplifier power ratings and speaker compatibility? In my experience, consumers often believe higher wattage means louder, but that’s not always true. Excessive power can even damage sensitive speakers if not matched correctly. The real trick lies in understanding RMS ratings and the impedance mismatch, which can lead to distortion or clipping. An amplifier that clips introduces distortion that damages your speakers over time. Regularly checking for signs of clipping with a professional measurement tool can save your equipment—read more about this important check in my guide on how to tell if your amplifier is actually clipping. There’s also a surprising myth about fancy cables making a difference—be skeptical of claims suggesting silver or gold-plated wires will enhance sound unless your setup is on the extreme high-end. Focus on quality speaker wire with proper thickness, like 16 or 14 gauge for long runs, to avoid voltage drop and maintain clarity.
Headphones often get the royal treatment, but many overlook the impact of impedance and source compatibility. High-impedance headphones require more power, so plugging them directly into smartphones yields a weak sound with little bass. Using a proper headphone amp tailored for high-impedance models can dramatically improve audio detail, but avoid cranking the volume to dangerous levels. Curious about how to optimize your headphone listening? Check out this deep dive into common issues and solutions. Finally, beware of the trap of over-investing in accessory upgrades—like expensive cables or DACs—when basic setup improvements, such as room treatment or correct placement, will deliver far better results. Have you ever fallen into this trap? Let me know in the comments and share your experiences with misunderstood audio principles.
Keeping your home audio equipment in top shape isn’t just about initial setup—regular maintenance ensures longevity and optimal performance. As technology advances, so does the toolkit needed for troubleshooting and fine-tuning your system. From specialized software to precise cleaning supplies, having the right tools can make all the difference in maintaining high-quality sound.
Invest in Quality Measurement Tools for Accurate Adjustments
One of my go-to devices is the
Use Software That Demystifies Your Equipment’s Performance
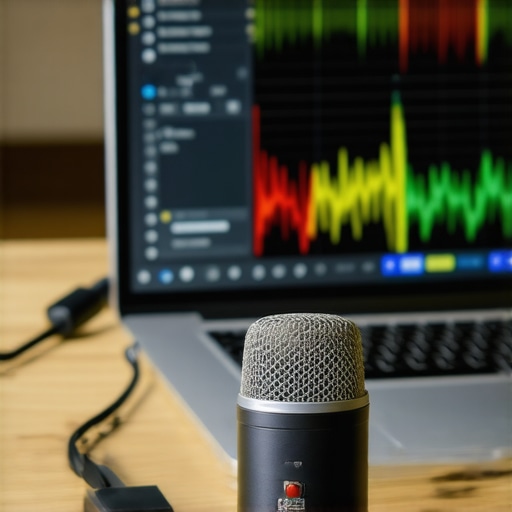
For digital components, I rely on software like REW (Room EQ Wizard). It’s free, highly detailed, and compatible with most measurement microphones. REW allows me to perform room correction, check for ground loop hum, and analyze frequency response graphs, providing actionable insights. Setting up REW involves connecting your microphone to your PC and running a series of test signals—an investment of time that pays off by revealing subtle issues that can degrade sound quality over time.
Maintain Connectors and Cables with Specialized Cleaning Products
Regularly cleaning your audio connectors prevents oxidation and static buildup. I recommend using contact cleaner sprays like DeoxIT, which is renowned among audiophiles for restoring clean connections. Applying a small amount to RCA, XLR, or 3.5mm jacks and then plugging and unplugging a few times ensures optimal conductivity. This simple step can eliminate static, crackles, or volume drops that develop over time. Remember, avoiding harsh chemicals—like alcohol—is crucial to prevent corrosion, as warned by audio repair experts.
How do I maintain my gear over time?
Keep dust and debris away with gentle cleaning using a microfiber cloth and compressed air in tight spaces. Regularly inspect wires for wear and replace old or frayed cables proactively. For components like capacitors or bulbs, consulting a technician for periodic checks can prevent sudden failures. Also, consider temporary environmental control—avoiding high humidity and extreme temperatures—since these factors accelerate component aging.
The Future of Home Audio Maintenance Will Emphasize Smart and Remote Monitoring
As home automation and IoT technology evolve, we can expect smarter tools for maintenance. Devices that monitor signal integrity or component health remotely will become more accessible, allowing homeowners to diagnose issues before audible problems emerge. For example, AI-driven systems could analyze usage patterns and suggest preventive measures, reducing downtime and repair costs.
Ready to elevate your maintenance game? Try incorporating a measurement tool like REW into your routine. It’s a powerful way to detect subtle anomalies early and ensure your system continues delivering pristine sound for years to come. For more in-depth tips, check out this guide on subwoofer vibration prevention.
Lessons That Turn My World of Home Audio Upside Down
One of the most eye-opening moments for me was realizing that cleaning a potentiometer isn’t just about fixing static noise; it’s about reviving the soul of my vintage gear. I learned the importance of patience—rushing can cause more harm than good—and developed a deep respect for the delicate internal components. It dawned on me that proper maintenance isn’t a chore but a way to truly connect with the music, hearing nuances I’d forgotten existed. Also, I discovered that mastering simple tools, like contact cleaners and measurement devices, empowers even a beginner to unlock professional-grade sound at home.
My Toolbox for Superior Sound Revival
Over the years, I’ve curated some go-to resources that have truly transformed my approach. The Subwoofer Vibration Guide helped me tame annoying rattles, while REW (Room EQ Wizard) opened my eyes to subtle room and equipment issues. For cleaning contacts, I swear by DeoxIT—its precision and effectiveness are unmatched. For understanding amplifier-settings and avoiding damage, the clipping check became an essential step in my routine. These tools and guides aren’t just investments—they’re investments in my passion for authentic sound.
Your Journey to Sonic Perfection Starts Now
Taking action today can mean the difference between enjoying a dull, muffled sound and experiencing your favorite tracks as if for the first time. Remember, even small adjustments—like cleaning a volume pot or re-arranging speaker placement—can have a profound impact. Vintage gear holds a special charm, but it’s your commitment to care and maintenance that ensures its magic continues. Don’t let unworn components or dust sabotage your audio adventures—embrace the process, and let your gear reward you with purity and clarity. So, what’s the first upgrade or fix you’re excited to try? Share your thoughts and stories below, and let’s elevate our home audio journeys together.