
Ever been in the middle of a quiet, critical moment — maybe during your favorite song’s solo or a crucial movie scene — and suddenly your sound system just doesn’t hit the notes right? I’ve been there. I remember spending hours fiddling with my home audio setup, convinced I was doing something wrong. It was frustrating, until I had that lightbulb moment: not all amplifiers are created equal. The real difference between Class A and Class D amplifiers isn’t just technical jargon — it’s about how your sound is shaped, how much power you get, and ultimately, how much enjoyment you can squeeze out of your gear.
Why Knowing Your Amplifier Class Matters for Better Sound
This revelation transformed how I approached my audio investments. I realized that just buying shiny new speakers or a fancy receiver wasn’t enough. You need to understand the core — and that starts with amplifiers. Whether you’re feeding powerful bass into your subwoofers or ensuring your headphones deliver crisp dialogue, the amplifier’s class directly impacts both sound quality and efficiency. Do you find yourself wondering if you’re settling for mediocre sound? If you’ve ever felt that your equipment underperforms despite good speakers, it might be your amplifier at fault — or at least, a key part of the puzzle that’s worth exploring.
Are High-End Amplifiers Truly Worth the Investment?
In my early days, I made the mistake of assuming that all amplifiers sounded the same. I bought a budget model that seemed fine at first, but I soon noticed distortion at higher volumes and a lack of clarity in my music. That mistake taught me something essential: the class of an amplifier makes a real difference. For example, Class A amps tend to produce cleaner audio with minimal distortion, but they can be less efficient and run hotter. Conversely, Class D amps look simple and efficient on paper, but the devil is in the details — they can deliver incredible power in a compact size, ideal for small spaces or portable setups. So if you’re still on the fence, ask yourself: are you ready to optimize your listening experience or just settle for ‘good enough’? As the saying goes, “you get what you pay for,” especially when it comes to sound quality.
Match Your Amplifier with Your Speakers and Headphones
Start by verifying your gear compatibility. For instance, if your headphones are high-impedance, using a weak amplifier will result in low volume and dull sound. Check the specifications of your equipment and ensure your amplifier can deliver adequate power. I once tried connecting budget headphones to my hi-fi receiver, only to realize they sounded thin and quiet. Upgrading to a suitable amp instantly improved clarity. Use resources like this guide to match your setup effectively.
Proper Placement of Speakers and Subwoofers is Key
Placement influences soundstage and bass response dramatically. Place bookshelf speakers on isolation pads to prevent vibrations and position them at ear level, forming an equilateral triangle with your listening position. When setting up subwoofers, avoid placing them too close to walls to prevent exaggerated bass. I experimented with different positions in my apartment and discovered that angling my front speakers slightly inward created a more focused stereo image. For in-car setups, check out these tips on optimal tweeter placement.
Optimize Internal Wiring and Cables
Use quality speaker wire and ensure tight connections. In my experience, cheap wires can lead to sound degradation, causing muffled audio or static like I encountered when I used thin, oxidized cables. Regularly inspect your wiring, replacing any that have turned green or show corrosion. For long runs, opt for thicker gauge wire to maintain signal integrity, avoiding thin speaker wire that acts like a bottleneck. Check this article for detailed wiring recommendations.
Fine-Tune Acoustic Environment
Room treatment can make a significant difference. Use soft furnishings like rugs and curtains to absorb unwanted reflections, creating a warmer, more natural sound. I added a rug to my listening area and noticed improved clarity, especially with delicate details. Avoid placing large furniture directly behind speakers, which can cause sound reflections. To further enhance your space, consider mounting speakers at ear level or adjusting their angle to avoid sound being absorbed by nearby objects. For perfect speaker positioning, see these placement tips.
Use Decoupling and Isolation Techniques
Reducing vibrations helps preserve sound integrity. Place your speakers on isolation pads, especially if placed on hard surfaces like tile or wood floors. When I moved my bookshelf speakers onto dedicated isolation pads, the sound became clearer, and the bass tightened up, akin to removing background noise from a crowded room. Consider wall-mounting tweeters or using rubber gaskets to prevent vibrations from transferring to walls or furniture. For expert guidance, explore this approach.
Connect and Calibrate for a Balanced Soundstage
Finally, ensure your amplifier’s settings match your speakers. Adjust the volume levels so they are balanced; too high and you risk distortion, too low and the sound lacks presence. Use a calibration microphone or simply listen for balanced dialogue and bass. When I used an SPL meter, I was able to fine-tune my setup precisely, eliminating harshness and ensuring clarity across the spectrum. For more detailed calibration techniques, see this resource. Proper calibration is the last step in transforming your listening experience from average to extraordinary.
Many enthusiasts believe that upgrading to a more expensive amplifier or speaker guarantees superior sound. However, this common misconception often leads listeners astray. The real challenge isn’t just about selecting high-end gear; it’s about understanding the intricate interactions and overlooked details that influence sound quality. For instance, pairing a powerful amplifier with incompatible speakers can cause distortion or subpar performance, regardless of the equipment’s price tag. Always consider the synergy between components rather than focusing solely on individual specifications. Additionally, many assume that all soundbars deliver comparable audio quality, but subtle differences in design and materials can significantly impact clarity and spatial reproduction. Don’t fall into the trap of thinking that newer or more popular models are automatically better. Instead, focus on matching the right gear and optimizing your setup for your unique space.
One critical nuance often missed is how room acoustics dramatically shape perceived sound. Many overlook the importance of proper placement and room treatment, which can make a modest system outperform a high-end one in a poorly treated environment. For example, placing speakers too close to walls can cause bass booms and muddiness, negating the benefits of high-quality drivers. An external study from Sound Advice emphasizes that room acoustics account for up to 50% of audio quality perception. Therefore, investing in acoustic treatments or strategic placement can unlock hidden potential in your system, a detail many neglect in their upgrade cycles.
Common Myths That Can Harm Your Setup
One prevalent myth is that more expensive cables inherently improve sound quality. In reality, the difference between quality cables and cheap ones is often negligible in practical scenarios. A thorough investigation reveals that cable quality matters less than proper connections and avoiding interference. Additionally, some believe that high impedance headphones always sound better; but, in practice, impedance matching with your source device is what truly matters. Mismatched impedance can lead to volume issues or distorted sound, especially with smartphones or lower-powered amplifiers.
Fascinatingly, many audiophiles underestimate how advanced digital processing features can sometimes degrade audio authenticity. Features like virtual surround or dynamic range compression, while tempting for convenience, can distort the original recording’s intent. Expert engineers suggest disabling unnecessary DSP features to preserve sound integrity. If you’re curious about optimizing your digital setup, explore this helpful guide.
In essence, mastering home audio isn’t solely about purchasing top-tier components; it’s about understanding the nuanced relationships between gear, room, and your listening habits. The devil is truly in the details, and overlooking these can prevent you from reaching optimal sound. Have you ever fallen into this trap? Let me know in the comments, and share your experiences or questions for deeper insights.
Keep Your Gear Running Smoothly
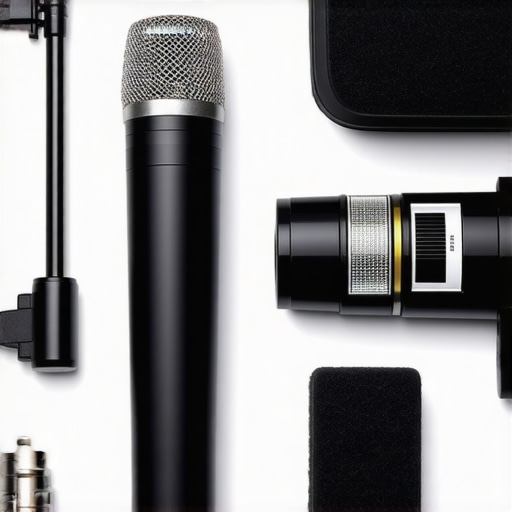
Maintaining your home audio setup isn’t just about avoiding breakdowns; it’s about ensuring consistent, high-quality sound over time. One of my go-to tools is a calibration microphone like the Xiaomi Mi Professional Microphone. I personally use it because it’s affordable yet highly accurate, allowing me to fine-tune my speakers and receivers effortlessly. Regular calibration helps prevent issues like muddiness or imbalance, which can develop as equipment ages or room conditions change.
Another indispensable item is a set of high-quality contact cleaner sprays for audio connectors. I’ve found that cleaning your speaker and headphone jacks with a small brush and contact cleaner every six months can eliminate static or intermittent sound issues. For example, dirty headphone jacks often cause volume inconsistencies, and a simple clean can restore clarity without needing costly repairs.
How do I maintain my sound system over time?
In my experience, consistent dust removal and proper cable management are crucial. Use antistatic brushes to gently clean equipment surfaces and avoid tangled or frayed wires. Upgrading to quality cables, such as those discussed in this article, also helps maintain optimal signal flow and reduces degradation over years of use.
Additionally, employing isolation pads under speakers and subwoofers—especially in home environments where vibrations can travel—keeps your sound pure and prevents mechanical damage. I recommend the IsoAcoustics Gaia series; I’ve used these pads to tighten bass response and improve clarity in my setup.
Tools I recommend for ongoing performance
Invest in a handheld SPL meter like the
Looking ahead, I predict that digital room correction software—powered by AI—will become more accessible and crucial for personal setups. They promise to analyze acoustics in real-time, automatically adjusting equalizer settings and speaker positions virtually. Until then, systematic maintenance and the right tools, like calibration microphones and measurement devices, will keep your system performing at its best.
What are some ways to ensure long-term reliability of your sound setup?
One tip I emphasize is to periodically inspect and replace worn-out components before they cause damage or compromise sound quality. For instance, replacing aging speaker surrounds or worn cables prevents issues like rattling or muffled audio. Small investments in maintenance tools and routine checks can save you from costly replacements down the line.
Finally, don’t forget to keep a record of calibrations and maintenance tasks. This habit helps you identify when improvements plateau or new issues emerge, guiding you to take timely action. Try incorporating a monthly check-in routine, adjusting your setup as needed and incorporating new tools as your system evolves.
Remember, a well-maintained system not only sounds better but lasts much longer. Whether you’re a casual listener or an audiophile, using specific tools like calibration microphones, contact cleaners, and measurement devices ensures your gear remains in peak condition. Start with one new tool today—perhaps a calibration microphone—and experience the difference firsthand.
My Biggest Eye-Opener About Amplifier Choices
One of the most surprising lessons I discovered was how much the amplifier’s class influences my listening experience. I used to think that any reliable amplifier would do, but switching from a Class A to a Class D model transformed my sound quality entirely — sharper clarity, tighter bass, and no more listening fatigue. It made me realize that understanding these nuances can elevate your setup beyond appearances or specs alone.
Why Trusting Brand Labels Isn’t Enough
Early on, I believed that going for the most popular brands would guarantee premium sound. However, I found that even lesser-known models with proper matching and room setup outperformed some flagship brands I once admired. The real key was matching components thoughtfully and paying attention to your room’s acoustics, not just brand prestige. This lesson saved me from countless buyer’s remorse moments.
The Unexpected Power of Small Adjustments
Sometimes, tiny tweaks — like repositioning a speaker slightly or changing cable types — made a profound difference in soundstage and clarity. I once moved my bookshelf speakers just a few inches, and the result was a more immersive experience, almost like magic. These small details, often overlooked, can have a disproportionately positive impact on your overall system performance.
Where to Go from Here
Now, I focus on continuous fine-tuning and understanding the interplay between gear and space. Tools like calibration microphones can reveal issues you didn’t notice before, and expanding your setup step-by-step ensures sustainable progress. Instead of rushing for the latest upgrade, I recommend patience and gradual integration — your ears will thank you and your wallet will too.
Ready to Transform Your Listening Haven?
Investing in the right amplifier and optimizing your home audio setup can turn everyday listening into an extraordinary experience. Remember, it’s all about the details and harmonious pairing, not just high price tags. So go ahead — experiment, learn, and enjoy the process of crafting your perfect sound environment. Have you ever experienced a moment where a small change made your system sound radically better? Share your story below!