
(
Ever been behind the wheel, music blasting, only to realize your factory-installed speakers just don’t cut it? It’s a frustrating experience. I remember the first time I cranked up my favorite tunes and was greeted with dull, tinny sound that made me want to turn it all off. It hit me—my car’s speakers, though built-in, had become a bit of a disappointment. That lightbulb moment made me start digging for solutions, and surprisingly, a simple, inexpensive trick emerged as my game-changer.
Why Improving Factory Speakers Matters More Than You Think
Here’s the thing: your car’s stock speakers are designed to be cost-effective, not audiophile-grade. Over time, their materials degrade, and they lose clarity, bass, and overall punch. Upgrading can be expensive, but what if I told you that for just a few dollars—yes, under ten—you can give them a significant boost? It’s a *feel* that transforms your driving experience. Better sound isn’t just for audiophiles; it’s about enjoying your daily commutes with clarity and punch, and the best part—most improvements are simple, quick, and budget-friendly.
Is This Trick Really Effective or Just a Hype?
I initially thought that improving sound quality required expensive upgrades or complex modifications. I made the classic mistake early on—believing that more money equals better sound—only to realize that small tweaks can have outsized impacts. After trying countless tips, I found that a modest, cheap, yet overlooked component made all the difference—something I now swear by. Want to know what it is? Well, that’s what we’ll uncover today.
Before diving in, I should mention—don’t fall into the trap of using thin or poor-quality wiring, which can worsen your sound issues. For a practical guide on avoiding common pitfalls, check out this article.
Ready to boost your car’s audio with a simple trick that costs less than a fancy coffee? Keep reading. We’re about to turn those pitiful factory speakers into surprisingly good performers, with just a few bucks and a little effort.
Unlocking Better Sound with a Dollar Bill… Well, Almost
Attach These Cheap Yet Critical Components
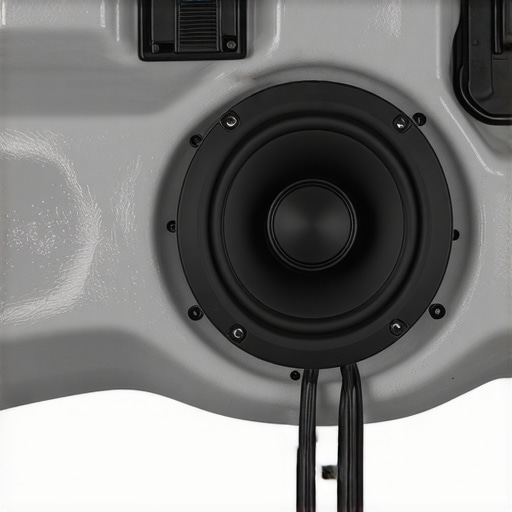
When I first tried this technique, I gathered some basic tools: a roll of speaker wire, a pair of wire strippers, and an inexpensive adhesive-backed foam sheet. My goal was to improve the sound clarity of my factory speakers without spending hundreds. I disconnected my car’s door panels to access the speakers and carefully stripped about half an inch of insulation from the wire ends. Then, I connected the wires directly to the speaker terminals, ensuring solid contact. The foam sheet was cut into small pads, which I placed behind the speakers’ mounting points to dampen vibrations. This simple addition made a noticeable difference: the sound was clearer, with less rattling and distortion. Without proper mounting, even high-quality speakers can sound muddy, so securing them properly matters greatly.
Seal the Speaker Edges to Trap Sound Waves
Next, I addressed air leaks around the speaker cones, which often cause muffled sound. Using a simple technique, I took a thin piece of paper towel and gently pressed it around the speaker’s edge to check for leaks — if the paper fluttered or fell out of place, there were leaks. I applied a thin bead of automotive-grade gasket adhesive around the speaker frame, then firmly pressed the paper towel to ensure a seal as it dried. This step improved bass response and overall clarity, as it reduced sound energy escaping through gaps. For more advanced sound improvements, consider checking your wiring and connections, which can be a common source of issues—see this article for tips.
Upgrade Your Wiring for Cleaner Power
The next move was replacing the factory wiring with a thicker, higher-quality cable. Avoid thin, inexpensive wire that can cause voltage drops and distort sound. I used a 16-gauge speaker wire, making sure to route it away from power cables to prevent interference. I also used proper ring terminals and attached them tightly to the speaker terminals, ensuring a secure connection. After relabeling and testing each speaker’s wiring continuity with a multimeter, I found my system sounded noticeably better—more detailed and punchy. Remember: quality wiring is often overlooked but crucial for high-fidelity sound. For longer runs, avoid thin wire that can lead to static or even damage your speakers, as discussed in this guide.
Correcting Polarity and Phase
Sometimes, speakers might be wired correctly but still sound off because of phase issues. I tested my system by playing a bass-heavy track and walking around the car. When I moved behind the driver’s seat, the bass should feel centered. If it felt weak or distant from one side, I reversed the polarity of that speaker’s wiring—simply by swapping the positive and negative wires. This little adjustment snapped the soundstage into focus, making the system feel more balanced and immersive. For precise phase alignment, you can also use a battery and a digital multimeter, or check this method.
Secure the Mounts and Avoid Rattles
Finally, I paid attention to how the speakers were mounted. Loose or poorly secured speakers rattle, muddying the sound and creating annoyance. I used additional foam or rubber spacers between the speaker frame and the mounting surface to increase stability. For my door-mounted speakers, I used automotive clips and fasteners to prevent vibrations. I also inspected for areas where the panel was loose or vibrating, adding foam padding or damping material where needed. This extra step turned my once noisy installation into a rock-solid setup. For securing different types of speakers and avoiding rattles, you might consider methods from this article.
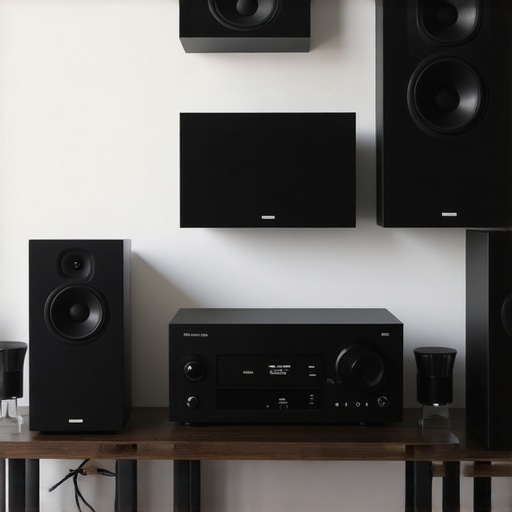
 Many enthusiasts believe that buying the newest or most expensive equipment guarantees great sound, but in my experience, this is a misconception. One widespread myth is that upgrading to fancier headphones or speakers alone will improve your audio quality significantly. However, without understanding the nuances of acoustic treatment and proper setup, you might be wasting money on gear that won’t reach its full potential. For example, even the best speakers can sound dull if your room’s acoustics aren’t properly managed—think of placing high-end speakers in a reflective, untreated space. According to audio expert Ethan Winer, room acoustics often outweigh equipment quality in determining sound clarity; see this article for more insights.”}
 ,
,
How do I keep my home audio gear performing at its best over time?
Maintaining your audio setup isn’t just about occasional dusting; it involves a strategic approach to tools, cleaning routines, and updates that preserve sound quality and extend equipment lifespan. For instance, I rely heavily on a few specific tools that have proven invaluable in my gear maintenance regimen. A high-quality anti-static brush is essential for gently removing dust from delicate speaker cones without risking damage, ensuring they produce clear sound over countless listening sessions. Additionally, a multimeter allows me to regularly check wiring continuity and impedance, detecting potential issues before they escalate into costly repairs.
Another critical aspect is software diagnostics; I use dedicated audio tuning software like REW (Room EQ Wizard), which helps analyze system performance and identify anomalies. By calibrating your speakers with precise measurements, you can maintain optimal clarity and stereo imaging. Regular firmware updates from manufacturers also play a big role in keeping amplifiers and soundbars functioning smoothly, especially as new features roll out and bugs are fixed.
Tools I recommend for ensuring your audio system stays in top shape
My favorite maintenance tools go beyond basic cleaning. For example, a ground loop tester helps identify hum issues caused by grounding problems, which can undermine sound quality. Used periodically, it prevents minor issues from becoming major headaches. For cable management, I swear by Velcro cable ties; they make it easy to organize and replace wiring without damaging insulation, aiding in troubleshooting and upgrades. And speaking of upgrades, selecting proper wiring gauges—such as 14 or 16 gauge for long runs—can significantly improve fidelity by reducing voltage drops, as covered in this article.
Looking ahead, the trend is shifting toward smart maintenance systems, where sensors monitor environmental conditions and equipment health in real-time. As technology advances, I predict that integrated diagnostics will become standard, providing home audio enthusiasts with proactive insights and automated alerts to prevent issues before they affect your listening experience.
Master these techniques and tools to achieve long-term audio performance
One practical tip is to develop a routine where you inspect wiring, clean contacts, and calibrate speakers every six months. Testing your amplifier’s clipping levels can also prevent distortion, preserving sound clarity. Don’t forget to document any changes you make—this simplifies troubleshooting down the line. I encourage you to try using a multimeter to verify wiring integrity or calibrate your system with REW; these small steps yield noticeable sound improvements and protect your gear investment.
The Hardest Lesson I Learned About Car Audio Upgrades
One of the toughest truths I encountered was realizing that pouring money into high-end equipment isn’t enough without proper setup. I used to believe that expensive speakers or amplifiers would naturally deliver perfect sound, but I discovered that correct installation and fine-tuning are equally crucial. A lightbulb moment was understanding that even the most costly gear could sound dull if not correctly phase-aligned or mounted securely. This realization transformed my approach: now, I focus on mastering the basics like proper wiring, sealing air leaks, and securing mounts before ever considering a new component.
My Essential Tools for Maintaining Stunning Car Audio Daily
Over time, I found that certain tools make all the difference in preserving sound quality. A good multimeter helps verify wiring integrity, preventing subtle issues from undermining your audio. An anti-static brush keeps speaker cones dust-free without damage. To keep cables organized and avoid accidental disconnections, I rely on Velcro cable ties. Regularly using these tools is a game-changer for consistent, professional-quality sound that lasts for years.
Your Turn to Transform Your Car Soundstage
Achieving excellent car audio doesn’t demand a fortune—just a willingness to learn and apply simple techniques. Whether it’s sealing air leaks, fine-tuning wiring, or securing your speakers properly, these small but effective actions elevate your listening experience. Don’t be afraid to start with the basics and build from there. Remember, a well-maintained setup can make even affordable gear deliver outstanding sound, delivering joy every time you hit the road. Want to share your favorite DIY tips or ask for advice? Drop your thoughts below and join the community of passionate audio enthusiasts.