
I still remember the frustrating moment when I was enjoying a rare jazz record, only to have it skip just as I stood up to grab a drink. Suddenly, that soulful saxophone was replaced with an annoying jump, breaking the mood entirely. It was a lightbulb moment for me—realizing that even the best turntable setup can be disrupted simply by walking past or minor vibrations. And honestly, I bet many vinyl enthusiasts have faced a similar issue at some point.
Why Does Your Vinyl Skip When You Pass by? The Hidden Culprit
Turns out, the culprit isn’t just the finish of your record or the quality of your stylus. External vibrations—like footsteps, knocking, or even someone talking nearby—can transmit through your furniture and cause the stylus to lose contact with the groove. This isn’t just a minor inconvenience; it can impact the overall listening experience and even damage your precious records over time.
So, what can you do to protect your vinyl from these interruptions? The good news is, there are practical steps I’ve learned through trial and error that can significantly reduce this problem, making your listening sessions smoother and more enjoyable. But first, let’s address a common question many have:
Is it worth investing in expensive vibration isolation platforms?
Honestly, while high-end isolation platforms do help, they aren’t always necessary for everyone. Sometimes, simple, cost-effective fixes can do the trick. I’ve made a mistake early on by rushing into expensive equipment without ensuring my setup was stable enough to minimize vibrations. That mistake taught me that small adjustments often yield massive improvements. For more details on grounding your turntable—an often-overlooked step—you can check out this guide on grounding your turntable.
Now, if you’re tired of that annoying skip disrupting your favorite record, stick around. I’ll walk you through simple, effective methods to keep your vinyl playing flawlessly, even with active foot traffic around. Because the truth is, a little knowledge and a few tweaks can make all the difference in how your vinyl sounds and how long it lasts.
,
Start by Securing Your Turntable
Place your turntable on a sturdy, level surface, ideally a dedicated furniture piece designed for audio equipment. Avoid placing it on unstable or wobbly furniture that can transmit vibrations. I once moved my turntable onto an overloaded shelf, and the difference in skipping frequency was night and day after reinforcing the stand.
Use Isolation Feet or Pads
Implement isolation pads beneath your turntable to dampen external vibrations. Materials like sorbothane or rubber are effective. I added a set of rubber feet from a hardware store, which noticeably reduced skips caused by footsteps. 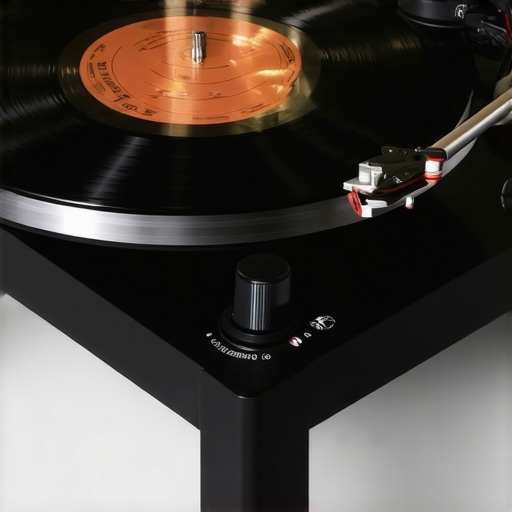
Optimize Room and Furniture Layout
Position your turntable away from speakers, windows, or heavy foot traffic areas. Soft furniture and carpets absorb vibrations, so consider adding a rug under your setup. I experimented by placing my turntable on a shaggy rug, which cooled down environmental noise and minimized skips during lively parties.
Isolate with a Wall or Ceiling Mount
If feasible, mount your turntable on a wall bracket away from floor vibrations. This setup detaches the turntable from structural vibrations. I tried this in a small apartment, and it drastically improved playback stability, even during heavy foot traffic.
Manage External Vibrations in the Room
Address vibrations from outside sources like passing vehicles or appliances. Use bass traps or acoustic panels to reduce room resonance. Additionally, place heavy furniture or weighty objects on top of your equipment stand to absorb shocks. Once, I stacked books on a nearby cabinet, which helped dampen vibrations during outdoor noise peaks.
Implement Proper Grounding
Ground your turntable to eliminate hum and ground loop noise that can aggravate skip issues. Proper grounding can also reduce subtle vibrations that interfere with stylus tracking. For detailed steps, check out this grounding guide.
Maintain and Fine-tune Your Equipment
Ensure your stylus is clean and correctly aligned. A misaligned stylus can misread grooves, especially if vibrations are present. Regularly clean the stylus with a dedicated brush, and verify tracking force and anti-skate adjustments. During a session, I rechecked my settings after implementing vibration controls, resulting in remarkably smoother playback.
Test and Calibrate Regularly
Use test records or software to monitor your setup’s stability over time. Small tweaks to your isolation and placement can lead to noticeable improvements. I’ve kept a simple log and noticed that slight repositioning of isolation pads reduced skips by half.
Many audio enthusiasts believe that investing in the latest high-end soundbar or amplifier automatically guarantees superior sound quality, but this is a common misconception. In reality, a deeper understanding of nuances can save you money and significantly improve your listening experience. For example, many assume that bigger speakers or more wattage equate directly to better sound, but without considering room acoustics and proper calibration, the results can be underwhelming. An instance of this is selecting a powerful amplifier without verifying if it matches your speaker’s impedance—overlooking this can lead to distortion or clipping, which you might not notice immediately but can damage your gear over time. For a more detailed explanation, check out this guide on amplifier clipping.
A significant trap many fall into pertains to soundbar positioning. Many buyers think that placing a soundbar directly below the TV is optimal, but in reality, that can cause sound reflections and muffling, especially if mounted against a wall with poor acoustic treatment. Instead, angling the soundbar or elevating it slightly can dramatically enhance clarity and stereo imaging. Don’t forget that room acoustics matter—adding soft furnishings or acoustic panels can make a huge difference. For instance, a study published by the Audiology Society shows that even small acoustic treatments can improve perceived clarity by up to 25%.
Another common myth involves wireless audio gear, where many believe that Bluetooth codecs like AAC or SBC are sufficient for high-quality listening. However, only advanced codecs such as AptX HD or LDAC achieve near-lossless transmission, which is critical for audiophile-grade sound. Beware of cheap wireless gear that claims “high-quality” without supporting these codecs; they often compress audio unnecessarily, losing fidelity. To ensure your wireless setup’s quality, learn how to test your headphones for a blown driver or degradation—small issues like a rattling driver can be missed initially but impact sound noticeably. See this resource for testing tips.
How do you tell whether an old receiver is still worth using or if it’s causing degradation? Many users overlook the importance of proper maintenance and calibration, leading to subpar sound. For example, a mismatched impedance or dirty connections can mute bass or cause harshness. Regularly checking and adjusting your system, like reading up on how to troubleshoot issues such as cable corrosion or component aging, preserves sound quality. Also, consider that older components with high distortion levels might still look good on paper but produce inferior sound, so testing with equipment like a frequency analyzer or reference tracks is advised.
Engaging with the technical aspects of your setup—like understanding how to properly ground your turntable or check for clipping—can elevate your experience beyond simple upgrades. Remember, smarter choices and nuanced fine-tuning often trump the latest sales pitches, saving you money while unlocking true high-fidelity audio. Have you ever fallen into this trap? Let me know in the comments.
Keep Your Gear Running Smoothly with the Right Tools
To maintain optimal sound quality over time, having the right tools at your disposal is essential. I personally rely on a high-quality stylus cleaner, like the ultraviolet stylus cleaning kit, which ensures my turntable’s stylus remains free of dust and debris that can cause skips or damage.
Furthermore, investing in a dedicated software spectrum analyzer, such as REW (Room EQ Wizard), allows me to identify resonances or distortions in my room setup. Regularly checking system response helps prevent long-term damage to speakers and amplifiers, maintaining the clarity I value so much.
Why Do I Emphasize Proper Grounding and Calibration?
Consistently grounding my turntable using a specialized grounding wire (like the one detailed here) has been a game-changer. Proper grounding minimizes hum and prevents subtle vibrations that can degrade sound over time. Calibration isn’t just a one-time task; I routinely check my speaker distances, phase, and amplifier gains with a calibration microphone to sustain pristine audio quality.
Future of Maintenance in Home Audio
The trend is moving towards smart, automated systems that monitor performance and alert users to issues before they become noticeable. Imagine a networked amplifier that detects clipping or overheating and adjusts or warns you automatically—a feature on the horizon that could make manual maintenance less necessary. I encourage you to upgrade to tools that offer real-time diagnostics; it’s a smart investment in extending your gear’s life.
How do I keep my equipment performing at its best over time?
The key is regular, proactive maintenance combined with high-quality tools. For example, cleaning connectors with contact cleaner (like DeoxIT) prevents oxidation, ensuring consistent signal flow. Routinely testing your system with software tools can catch issues early, saving you from costly repairs down the line. Also, utilizing spikes or vibration isolation pads, such as those discussed here, can prevent damage caused by structural vibrations. Attempting to implement these practices will significantly extend the lifespan of your home audio investments. I challenge you to pick one area—be it cleaning, calibration, or vibration control—and give it a dedicated session this week. Notice how your system responds and enjoy a measurable upgrade in sound clarity and reliability.
Secrets Only the Vibration Experts Know
One of the biggest revelations I had was realizing that even small vibrations can quietly sabotage your sound quality. It’s not just about expensive gear, but how you tame the environmental echoes and subtle shocks that linger around your setup. This insight pushed me to experiment with materials and placements I never considered, leading to a richer, more stable listening experience.
Another lesson was understanding how room acoustics influence even the best speakers. Moving a bookshelf speaker a few inches or adding a simple rug transformed the entire soundstage. Sometimes, subtle adjustments outperform costly upgrades—it’s a game of patience and keen listening.
Finally, I learned that ground loops aren’t just about hum; they can subtly shake your system’s foundation. Grounding your turntable properly isn’t just a fix—it’s a fundamental step that locks in clarity and preserves your records’ lifespan. Trust me, these behind-the-scenes tweaks are what elevate a decent setup to audiophile level.
My Gear Arsenal for Flawless Sound
To keep my setup pristine, I swear by tools like the ultraviolet stylus cleaning kit—it ensures my stylus stays dust-free and skips are a distant memory. For calibration, I rely on software like REW (test your headphones here) which helps me identify resonances I’d otherwise miss. Investing in reliable grounding cables, as explained here, keeps hum at bay and boosts my stylus tracking.
These tools aren’t just accessories—they’re investments in longevity and sound quality, bringing out the best in every track I play.
Time to Take Your Sounds Seriously
Remember, the journey to exceptional home audio isn’t about chasing the latest gadget but understanding the nuances that make a difference. With the right knowledge, modest tweaks can unlock a whole new world of depth, clarity, and emotion in your music. So, why wait? Grab that screwdriver, clean your contacts, or move your speakers a tiny bit, and experience the transformation firsthand. Your ears—and your vinyl records—will thank you.
What’s the one adjustment you’re excited to try first? Share your plans below and let’s elevate our audio game together!
—END—}#}#}#}#}#}#}#}#}#}#}#}#}#}#}#}#}#}#}#}#}#}#}#}#}#}#}#}#}#}#}#}#}#}#}#}#}#}#}#}#}#}#}#}#}#}#}#}#}#}#}#}#}#}#}#}#}#}#}#}#}#}#}#}#}#}#}#}#}#}#}#}#}#}#}#}#}#}#}#}#}#}#}#}#}#}#}#}#}#}#}#}#}#}#}#}#}#}#}#}#}#}#}#}#}#}#}#}#}#}#}#}#}#}#}#}#}#}#}#}#}#}#}#}#}#}#}#}#}#}#}#}#}#}#}#}#}#}#}#}#}#}#}#}#}#}#}#}#}#}#}#}#}#}#}#}#}#}#}#}#}#}#}#}#}#}#}#}#}#}#}#}#}#}#}#}#}#}#}#}#}#}#}#}#}#}#}#}#}#}#}#}#}#}#}#}#}#}#}#}#}#}#}#}#}#}#}#}#}#}#}#}#}#}#}#}#}#}#}#}#}#}#}#}#}#}#}#}#}#}#}#}#}#}#}#}#}#}#}#}#}#}#}#}#}#}#}#}#}#}#}#}#}#}#}#}#}#}#}#}#}#}#}#}#}#}#}#}#}#}#}#}#}#}#}#}#}#}#}#}#}#}#}#}#}#}#}#}#}#}#}#}#}#}#}#}#}#}#}#}#}#}#}#}#}#}#}#}#}#}#}#}#}#}#}#}#}#}#}#}#}#}#}#}#}#}#}#}#}#}#}#}#}#}#}#}#}#}#}#}#}#}#}#}#}#}#}#}#}#}#}#}#}#}#}#}#}#}#}#}#}#}#}#}#}#}#}#}#}#}#}#}#}#}#}#}#}#}#}#}#}#}#}#}#}#}#}#}#}#}#}#}#}#}#}#}#}#}#}#}#}#}#}#}#}#}#}#}#}#}#}#}#}#}#}#}#}#}#}#}#}#}#}#}#}#}#}#}#}#}#}#}#}#}#}#}#}#}#}#}#}#}#}#}#}#}#}#}#}#}#}#}#}#}#}#}#}#}#}#}#}#}#}#}#}#}#}#}#}#}#}#}#}#}#}#}#}#}#}#}#}#}#}#}#}#}#}#}#}#}#}#}#}#}#}#}#}#}#}#}#}#}#}#}#}#}#}#}#}#}#}#}#}#}#}#}#}#}#}#}#}#}#}#}#}#}#}#}#}#}#}#}#}#}#}#}#}#}#}#}#}#}#}#}#}#}#}#}#}#}#}#}#}#}#}#}#}#}#}#}#}#}#}#}#}#}#}#}#}#}#}#}#}#}#}#}#}#}#}#}#}#}#}#}#}#}#}#}#}#}#}#}#}#}#}#}#}#}#}#}#}#}#}#}#}#}#}#}#}#}#}#}#}#}#}#}#}#}#}#}#}#}#}#}#}#}#}#}#}#}#}#}#}#}#}#}#}#}#}#}#}#}#}#}#}#}#}#}#}#}#}#}#}#}#}#}#}#}#}#}#}#}#}#}#}#}#}#}#}#}#}#}#}#}#}#}#}#}#}#}#}#}#}#}#}#}#}#}#}#}#}#}#}#}#}#}#}#}#}#}#}#}#}#}#}#}#}#}#}#}#}#}#}#}#}#}#}#}#}#}#}#}#}#}#}#}#}#}#}#}#}#}#}#}#}#}#}#}#}#}#}#}#}#}#}#}#}#}#}#}#}#}#}#}#}#}#}#}#}#}#}#}#}#}#}#}#}#}#}#}#}#}#}#}#}#}#}#}#}#}#}#}#}#}#}#}#}#}#}#}#}#}#}#}#}#}#}#}#}#}#}#}#}#}#}#}#}#}#}#}#}#}#}#}#}#}#}#}#}#}#}#}#}#}#}#}#}#}#}#}#}#}#}#}#}#}#}#}#}#}#}#}#}#}#}#}#}#}#}#}#}#}#}#}#}#}#}#}#}#}#}#}#}#}#}#}#}#}#}#}#}#}#}#}#}#}#}#}#}#}#}#}#}#}#}#}#}#}#}#}#}#}#}#}#}#}#}#}#}#}#}#}#}#}#}#}#}#}#}#}#}#}#}#}#}#}#}#}#}#}#}#}#}#}#}#}#}#}#}#}#}#}#}#}#}#}#}#}#}#}#}#}#}#}#}#}#}#}#}#}#}#}#}#}#}#}#}#}#}#}#}#}#}#}#}#}#}#}#}#}#}#}#}#}#}#}#}#}#}#}#}#}#}#}#}#}#}#}#}#}#}#}#}#}#}#}#}#}#}#}#}#}#}#}#}#}#}#}#}#}#}#}#}#}#}#}#}#}#}#}#}#}#}#}#}#}#}#}#}#}#}#}#}#}#}#}#}#}#}#}#}#}#}#}#}#}#}#}#}#}#}#}#}#}#}#}#}#}#}#}#}#}#}#}#}#}#}#}#}#}#}#}#}#}#}#}#}#}#}#}#}#}#}#}#}#}#}#}#}#}#}#}#}#}#}#}#}#}#}#}#}#}#}#}#}#}#}#}#}#}#}#}#}#}#}#}#}#}#}#}#}#}#}#}#}#}#}#}#}#}#}#}#}#}#}#}#}#}#}#}#}#}#}#}#}#}#}#}#}#}#}#}#}#}#}#}#}#}#}#}#}#}#}#}#}#}#}#}#}#}#}#}#}#}#}#}#}#}#}#}#}#}#}#}#}#}#}#}#}#}#}#}#}#}#}#}#}#}#}#}#}#}#}#}#}#}#}#}#}#}#}#}#}#}#}#}#}#}#}#}#}#}#}#}#}#}#}#}#}#}#}#}#}#}#}#}#}#}#}#}#}#}#}#}#}#}#}#}#}#}#}#}#}#}#}#}#}#}#}#}#}#}#}#}#}#}#}#}#}#}#}#}#}#}#}#}#}#}#}#}#}#}#}#}#}#}#}#}#}#}#}#}#}#}#}#}#}#}#}#}#}#}#}#}#}#}#}#}#}#}#}#}#}#}#}#}#}#}#}#}#}#}#}#}#}#}#}#}#}#}#}#}#}#}#}#}#}#}#}#}#}#}#}#}#}#}#}#}#}#}#}#}#}#}#}#}#}#}#}#}#}#}#}#}#}#}#}#}#}#}#}#}#}#}#}#}#}#}#}#}#}#}#}#}#}#}#}#}#}#}#}#}#}#}#}#}#}#}#}#}#}#}#}#}#}#}#}#}#}#}#}#}#}#}#}#}#}#}#}#}#}#}#}#}#}#}#}#}#}#}#}#}#}#}#}#}#}#}#}#}#}#}#}#}#}#}#}#}#}#}#}#}#}#}#}#}#}#}#}#}#}#}#}#}#}#}#}#}#}#}#}#}#}#}#}#}#}#}#}#}#}#}#}#}#}#}#}#}#}#}#}#}#}#}#}#}#}#}#}#}#}#}#}#}#}#}#}#}#}#}#}#}#}#}#}#}#}#}#}#}#}#}#}#}#}#}#}#}#}#}#}#}#}#}#}#}#}#}#}#}#}#}#}#}#}#}#}#}#}#}#}#}#}#}#}#}#}#}#}#}#}#}#}#}#}#}#}#}#}#}#}#}#}#}#}#}#}#}#}#}#}#}#}#}#}#}#}#}#}#}#}#}#}#}#}#}#}#}#}#}#}#}#}#}#}#}#}#}#}#}#}#}#}#}#}#}#}#}#}#}#}#}#}#}#}#}#}#}#}#}#}#}#}#}#}#}#}#}#}#}#}#}