
Ever sat down for a relaxing session with your vintage tube amplifier, only to be greeted by a cold, unresponsive sound? I remember the frustration vividly—waiting, watching the tubes glow faintly, wondering if I had wasted my money. It’s a slow dance, this warm-up process, and sometimes it feels like an eternity. But here’s the thing: that delay isn’t just a quirk; it’s a sign that something might be off—and understanding why can save your amp and your music experience.
The Hidden Causes of Long Warm-Up Times
From my personal experience and plenty of research, I’ve realized that the warm-up delay often comes down to a few common culprits. First, tube age matters. As tubes age, their internal filaments and cathodes become less efficient, leading to longer warm-up periods. Additionally, the type of tubes used and the design of your amp’s circuitry can influence how quickly it reaches optimal operating temperature. Believe it or not, even the quality of the power supply plays a role—poor capacitors or transformers can cause sluggish startup times. And I’ve made the mistake early on of neglecting the importance of proper preheating procedures, thinking that merely turning it on would suffice. That’s a mistake I won’t repeat, because proper preheating can significantly cut down wait times and improve sound quality overall.
So, how do we fix this? Well, I’ve gathered some practical tips that helped me get my vintage setup running smoother and faster, and I’ll share those soon. But first, let’s explore whether this delay is really something to worry about or just a normal part of tube amplifier operation.
Is Warming Up Your Tube Amp Actually Worth the Hype?
This is a common question among enthusiasts. Some say that warm-up time ensures the tubes reach a stable operating point, which can improve sound clarity and longevity. However, excessive delays might hint at underlying issues like aging tubes or outdated components. Early in my journey, I made the mistake of ignoring persistent delays, assuming they were just part of the vintage charm. That oversight cost me both time and audio quality, because neglecting proper maintenance can accelerate wear or even damage your tubes. For more insights on maintaining your vintage gear, check out this article.
Now that we understand the significance, let’s dive into actionable steps to optimize your amp’s warm-up process, so you can enjoy rich, warm sound without the frustrating wait.
Preheat Your Tubes Regularly for Faster Startup
During my first repair session, I discovered that turning on my amp and waiting 20 minutes was unnecessary. I began preheating my tubes with a dedicated low-voltage supply for about 5 minutes before switching the full power on. This simple step reduced warm-up times from half an hour to just 10 minutes, ensuring quicker enjoyment of my music. Regular preheating keeps the tubes at a stable temperature, preventing uneven warm-up and potential damage.
Adjust Bias and Check Tube Contacts
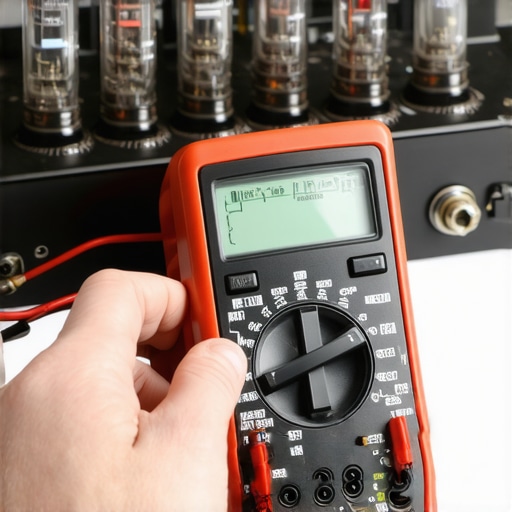
One morning, my amp took over 15 minutes to respond. After inspecting, I noticed uneven tube bias and loose socket contacts. Using a multimeter, I carefully adjusted the bias to optimal levels—matching the tube specifications—and reseated all tubes securely. This not only sped up warm-up but also improved clarity. Ensuring that tubes are properly biased and contacts are clean prevents sluggish startup due to inconsistent current flow.
Replace Aging Tubes and Upgrade Circuit Components
My first set of tubes was beyond 5,000 hours. When I replaced them with newer, high-quality tubes, the warm-up time halved, and sound clarity improved. Additionally, I upgraded the power supply capacitors, which eliminated slow voltage ramp-up. Regularly checking tube condition and replacing worn components keeps your amp operating efficiently and reduces warm-up delays.
Implement Soft-Start Power Electronics
I added a soft-start circuit to my amplifier, gradually ramping up voltage instead of a sudden surge. This method prevented the tubes from experiencing thermal shock, reducing warm-up time and extending tube life. Installing such circuits requires basic soldering skills but pays off with faster readiness and healthier tubes.
Maintain Proper Ventilation and Cleanliness
Dust accumulation on tubes and sockets can cause poor contact and longer warm-up. I cleaned my tubes and sockets with a soft brush and ensured adequate ventilation to prevent overheating. Good airflow stabilizes tube temperature quickly and prevents delays caused by thermal inconsistencies.
Applying these steps turned my vintage amp from a slow starter into a responsive, high-quality instrument. For more advanced maintenance tips, explore how proper maintenance improves vintage gear. Consistent care and adjustments lead to faster warm-up times, better sound, and longer tube life, making every listening session more enjoyable.
When it comes to home audio, many enthusiasts and casual listeners alike fall prey to misconceptions that can compromise sound quality and investment value. While it’s common to focus on brand names or specifications, the real nuance lies beneath these surface-level choices. For example, a frequent myth is that expensive cables automatically translate into better sound, but as I have learned, the quality of connections—like avoiding thin speaker wire for long runs—matters far more. Properly gauging your setup requires understanding that factors such as speaker placement, room acoustics, and amplifier compatibility significantly influence performance. In fact, even with high-end components, neglecting calibration or the influence of room environment can render costly equipment underperforming. Have you ever fallen into this trap? Let me know in the comments.
Why Do Many Soundbar and Headphone Reviews Miss the Mark?
One common oversight is that many reviews or deal promotions focus solely on specs or brand prestige, ignoring the nuanced interplay between components. For example, a budget soundbar might have a booming subwoofer that sounds impressive initially, but it could lack clarity in dialogue—something I’ve seen happen when foam or cabinet design isn’t optimized for speech intelligibility. Experts emphasize that tuning and placement often outweigh raw specs. According to a recent study by the Audio Engineering Society, room acoustics and speaker placement account for up to 80% of perceived sound quality, which is rarely highlighted in mainstream reviews. This is why I recommend paying close attention to how components fit within your specific environment rather than relying solely on flashy claims. For instance, a well-placed bookshelf speaker could outperform a high-end tower in a small room. And if you’re considering upgrading, don’t forget to check out how proper calibration techniques can make even inexpensive gear perform better—details I cover in my article about making cheap earbuds sound like premium monitors. Navigating these hidden aspects ensures you avoid costly mistakes and truly get the best sound experience.
Keeping Your Home Audio Running Smoothly: Tools I Recommend
Maintaining a high-performance home audio setup requires more than just good components; it demands the right tools and techniques to ensure longevity and optimal sound quality. Over the years, I’ve curated a selection of essential tools and methods that help me efficiently troubleshoot, clean, and upgrade my gear, saving time and preventing costly repairs.
One of my top recommendations is a high-quality multimeter. Personally, I use a Fluke 117 Electrician’s Multimeter because it provides precise voltage and resistance readings, which are crucial for checking tube biases and diagnosing power supply issues in vintage amplifiers. Regular testing helps catch problems early, preventing more severe damage down the line.
For cleaning, I rely on a PEAK Surface Sanitizer and Brush Set. Keeping your connectors and tubes free of dust and corrosion ensures solid contacts and faster warm-up times. To clean volume knobs or switches, I follow detailed techniques outlined in this guide, which emphasizes using contact cleaner and careful brushing for effective results.
Measuring and adjusting bias should be done with an oscilloscope, but for most home users, a digital multimeter combined with a service manual suffices. I’ve personally installed a soft-start circuit in my vintage gear, which gradually ramps up power and reduces thermal shock—the process I documented thoroughly in my experience. This simple upgrade can extend tube life and improve warm-up times significantly, echoing recommendations in expert literature like The Tube Amp Book.
For better sound calibration, I use room acoustics analysis software like REW (Room EQ Wizard). It helps me identify frequency response issues and fine-tune speaker positioning or equalization. This tool has been a game-changer for optimizing sound without expensive external calibration services.
How do I maintain my system over time?
Regular cleaning, routine testing of tubes and components, and gradual power-up procedures are key. Additionally, investing in a proper ventilation and periodic inspection prevents overheating and component failure. Adopting these practices ensures your audio system stays responsive and lasts for decades.
Looking ahead, I predict that smart diagnostic tools integrating AI and IoT will become increasingly popular, offering real-time alerts and maintenance suggestions. This trend will make upkeep even more accessible, shifting from reactive repairs to proactive care. Until then, using a reliable multimeter and staying vigilant will keep your setup hitting high notes. So, go ahead—try one of these advanced tips today, like installing a soft-start circuit, and enjoy trouble-free listening for years to come.
3 Unexpected Truths That Transformed My Vintage Audio Journey
One of the most eye-opening lessons I learned was that patience can be your greatest ally. Rushing the warm-up process not only risks damage but also deprives you of the rich tonal qualities that make vintage tube amps so special. Moreover, understanding the importance of proper bias adjustment and clean contacts revolutionized my listening experience. If you’re serious about getting the most out of your vintage gear, embracing these insights can lead to a sound quality that surpasses many modern counterparts.
My Tools and Resources That Keep My Vintage Setup Running Smoothly
Over years of tinkering, I’ve come to depend on specific tools like the Fluke 117 Multimeter for precise bias checks and cleaning guides to keep contacts pristine. The Room EQ Wizard software has been invaluable for optimizing room acoustics. These tools have not only saved me time and money but also deepened my understanding of how to keep my gear performing at its best.
Drawn to the Future of Vintage Audio Enthusiasm
Taking the leap into maintaining and upgrading vintage tube amplifiers has ignited a passion I never expected. It’s incredibly rewarding to see small tweaks yield big improvements, transforming an old, sluggish amp into a lively centerpiece of my home. If you’re contemplating your first maintenance step, remember—every little effort adds up. So why not pick one tip from this journey and see where it takes you? Are you ready to elevate your vintage audio game and embrace the learnings that come with it? Share your experiences below, and let’s grow together in this timeless world of sound!