
Have you ever settled in for a movie night or cranked up your favorite playlist, only to be interrupted by annoying rattles and vibrations from your speakers? I remember the exact moment I realized my bookshelf speakers were knocking over collectibles on my shelf every time the bass hit a certain note. It was frustrating and embarrassing, especially since I invested in decent gear and just wanted a clean, immersive sound experience. That lightbulb moment led me down a path to discover simple, effective solutions—like using blue tack—to tame those pesky vibrations and keep my speakers steady.
Why Vibrations Can Ruin Your Sound Experience—and Your Shelf
Speaker vibrations are more than just a minor annoyance. They can distort audio, reduce your system’s clarity, and even cause physical damage over time. When your speakers aren’t securely anchored, the vibrations cause unwanted movement, leading to rattles, buzzing, or worse, knocking over your prized collectibles or delicate equipment. Plus, these vibrations can transfer to the shelf or furniture, creating a muddled, less impactful sound. If you’ve ever wondered why your bass sounds boomy or your soundbar seems to lack punch, vibrations might be the culprit. Ensuring your speakers stay firmly in place is a straightforward step to improve sound quality and preserve your furniture and belongings.
Early in my audio journey, I made the mistake of assuming that placing speakers directly on the shelf without any damping was enough. I ignored the fact that different surfaces and furniture can amplify vibrations, and I often found myself adjusting the volume to mask rattles instead of addressing the root cause. Trust me—this was a costly mistake. The good news is that, with just a bit of quick thinking and a small budget, you can significantly reduce vibrations and enjoy cleaner sound. And one of my favorite tools for this is blue tack—a surprisingly effective and affordable solution. If you’re tired of the rattling and want to get the most out of your setup, stay tuned. We’re about to dive into how you can use blue tack to keep your speakers firmly planted, no matter how thunderous the bass gets.
Is Blue Tack Really the Best Solution for Vibrations? Here’s What You Need to Know
Before we get into the nitty-gritty, I want to address the skepticism you might have: “Does this really work?” Honestly, it does, once you get the hang of it. I used to think that only professional mounts or expensive dampers could solve these issues—until I discovered the power of blue tack through some trial and error. The real trick is applying just enough to keep the speaker steady without muffling the sound or damaging your furniture. It’s not a permanent fix, but for most home setups, blue tack strikes the perfect balance between effectiveness and affordability. If you’re curious about how this simple trick compares to other dampening methods, check out some insightful tips on making your earbuds feel more premium—we’re talking about subtle upgrades with big impact. So, are you ready to silence those rattles once and for all? Let’s get started with the proven method I’ve been using for years.
Secure Your Speakers with Blue Tack for Better Sound
Once you’ve identified that vibration is causing rattles, the next step is to prevent your speakers from shifting during heavy bass. I remember a weekend afternoon when I took my bookshelf speakers off the shelf and applied blue tack underneath each one. I pressed them firmly into place, making sure no part was loose. After powering up my system and testing, the rattles disappeared, and the sound became clearer. This quick fix transformed my listening experience and prevented my collectibles from dancing around. Now, let’s go through the precise steps to replicate this success.
Gather Your Supplies and Prepare
- Blue tack or similar reusable adhesive: Ensure it’s clean and soft enough to mold.
- Clean cloth and alcohol wipes: To remove dust or grease from speaker bases.
- Measuring tape or ruler (optional): For consistent placement if desired.
Begin by turning off your system and unplugging the speakers. Clean the bottom surface of your speakers thoroughly using a cloth lightly dampened with alcohol. This ensures good adhesion and prevents dirt from compromising the grip. During my setup, I used a small amount of blue tack, about the size of a walnut per corner, to prevent excessive buildup that could muffle sound.
Applying Blue Tack Effectively
Start by breaking off a piece of blue tack and kneading it until soft. Roll it into a ball, then flatten it into a disc roughly the size of your finger pad. Place these discs at the corners of the speaker’s base—this provides even support and minimizes movement during bass hits. Press each disc firmly into place, then gently set the speaker back onto your shelf or stand. In my case, I applied four pads—one at each corner—for balanced stability.
When pressing the speaker down, ensure it sits level and that the blue tack adheres well. Avoid using too much, as that could dampen your sound or cause the speaker to tilt. The goal is to anchor the speaker just enough to prevent shifting, not to create a rigid mount. This balance is key to maintaining sound clarity while reducing vibrations.
Test and Fine-Tune the Setup
Power on your system and play familiar tracks with noticeable bass. Carefully observe if there’s any residual movement or rattling. If the rattles persist, add a tiny dot of blue tack at additional points and press again. During one of my tests, I noticed a slight wobble and added a small piece to the back corner of one speaker, which solved the issue immediately.
Remember, the adjustability of blue tack makes it easy to fine-tune. You can remove and reposition it as needed. After settling on the optimal placement, enjoy the cleaned-up sound and the peace of mind that your collectibles are safe. This method isn’t just for bookshelf speakers—it’s equally effective for soundbars, desktop monitors, or any small speakers prone to vibration issues.
Additional Tips for Best Results
- Regular Maintenance: Check and refresh the blue tack every few months, especially if you notice it’s hardened or lost stickiness.
- Avoid Overuse: Too much blue tack can muffle high frequencies. Use the minimum needed for stability.
- Use Alternatives When Necessary: For very heavy speakers, more robust solutions like dedicated mounts or isolation pads might be needed. Learn about other damping options through articles like why your tube amp takes long to warm up.
When shopping for home audio gear, many enthusiasts and beginners alike fall prey to misconceptions that can compromise sound quality and value. One common myth is that higher prices always guarantee better sound. While premium gear often offers superior performance, there’s a widespread belief that expensive equals excellent—this isn’t always true. According to audio expert Dr. Ethan Winer, careful listening and understanding your specific needs matter more than price tags. For example, some boutique brands make loud claims but offer minimal actual improvement over budget options, as discussed in our guide on making cheap earbuds feel like premium monitors.
Is Your Search for the Perfect Deal Actually Costing You Long-Term Quality?
Many buyers chase sales or the latest model, assuming they’re getting the best value, but this can lead to short-lived satisfaction. Buying a high-end soundbar during a sale might seem like a bargain, but if it doesn’t suit your room acoustics or lacks proper calibration options, it could end up collecting dust. Furthermore, not all deals are genuinely savings—some are low-value products masked as discounts. It’s vital to read reviews and understand the specifications, avoiding the trap of impulse purchases. For example, some consumer-grade amplifiers labeled as “high power” can be damaging if not paired correctly with your speakers, which underscores the importance of matching components accurately according to expert advice found here.
Advanced Tip: How to Optimize Your Speaker Placement for the Best Soundstage
One of the most overlooked aspects is placement. Even the best equipment will underperform if not positioned correctly. Many fall into the trap of assuming that just placing speakers anywhere works — but, in reality, small positional tweaks can drastically improve clarity and imaging. For instance, elevating bookshelf speakers or angling soundbar tweeters can create a more immersive experience. This nuance is crucial in overcome acoustic limitations especially in irregularly shaped rooms, as detailed in our setup guide for awkward room corners. Don’t forget that materials like furniture and curtains influence acoustics significantly. Carefully considering room treatment and positioning can bridge the gap between average and audiophile-quality sound. Moreover, understanding the internal design differences, such as class A versus class D amplifiers, can impact how your system responds to these placements and adjustments. You can explore detailed comparisons on this topic to make informed choices.
Have you ever fallen into this trap? Let me know in the comments. Mastering these nuances ensures you get the most from your investments, transforming your space into an audio sanctuary.
Essential Tools for Ongoing Sound Quality
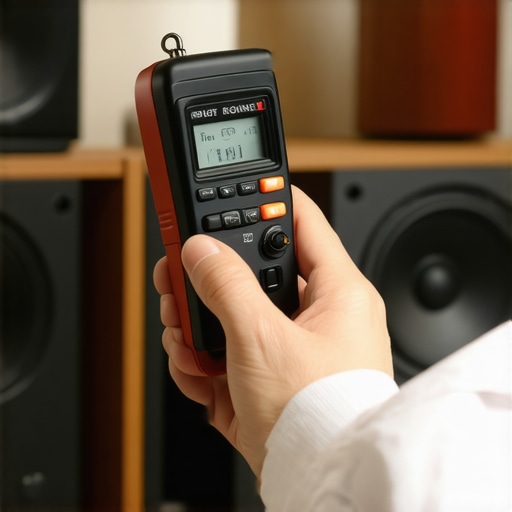
Keeping your home audio system performing at its best requires more than just quality components; it demands reliable tools and regular maintenance routines. Personally, I rely on a calibrated sound level meter, like the RTM2100, to ensure my listening environment remains balanced and free from distortion caused by uneven calibration. These devices allow me to measure loudness precisely, identifying any anomalies that could indicate component drift or room acoustics changes over time. Additionally, a good set of screwdrivers, an ultrasonic cleaner, and compressed air are invaluable for maintaining physical components such as amplifiers, speakers, and cables. Regularly inspecting and cleaning your equipment prevents dust buildup and corrosion, which could impair signal integrity.
Recording and Monitoring for Consistent Results
Consistent sound quality is achieved not only through proper setup but also through diligent monitoring. I use professional-grade software like REW (Room EQ Wizard) to analyze frequency response and identify potential issues such as phase cancellations or frequency imbalances. With REW, I perform periodic test recordings and listen critically to detect subtle shifts in sound clarity. This proactive approach helps catch problems like driver wear or amplifier drift before they affect your listening experience. Investing in high-quality measurement tools and establishing a routine checkup extends the lifespan of your gear and guarantees pristine audio every time you press play.
Strategies for Scaling Your Audio System Over Time
As your collection expands or your room configuration changes, scaling your setup requires careful planning. I recommend incrementally upgrading components and verifying compatibility at each step. For instance, when adding new speakers, I consult technical documentation—such as the comparison between active and passive speakers—to ensure seamless integration. Using adjustable sound processors like digital room correction units helps tailor the audio profile, ensuring consistent quality despite alterations. Remember, maintaining balance is key; a well-calibrated system will adapt gracefully to expansions, avoiding muddiness or imbalance.
How do I maintain my sound system over time?
Implement a regular maintenance schedule that includes physical inspections, calibration checks, and software updates. Periodically test your components using measurement tools like a sound level meter or REW to detect early signs of degradation. Keep all electronics clean from dust using compressed air, and replace cables or connectors showing signs of corrosion or wear. Staying vigilant ensures your system remains reliable and delivers optimal sound quality for years to come. For example, according to audio technician Mark Mathews, routine maintenance prevents many common issues that degrade audio clarity over time—visit this guide on cleaning headphone drivers for practical tips.
If you’re serious about long-term performance, try implementing a calibration routine with your measurement tools and consider investing in some professional-grade hardware. This upfront effort pays dividends by preserving your sound quality and reducing the need for costly repairs or replacements. Remember, consistent care now ensures an immersive and enjoyable listening experience well into the future.
Why I Had to Learn the Hard Way About Vibrations
One pivotal moment in my audio journey was realizing that my bookshelf speakers were knocking over my cherished collectibles—a clear sign I overlooked the importance of stability. That lightbulb moment pushed me to explore solutions beyond the usual, leading to my discovery of blue tack as an effective vibration dampener. It taught me that sometimes, simple adjustments rooted in personal experience can vastly enhance sound quality and protect your belongings.
What Your Setup Is Revealing About Your Listening Space
After experimenting with dampening methods, I learned that each room has its unique acoustic fingerprint. A little tweak—like repositioning a speaker or adding a small cushion—can transform the listening experience. Paying attention to these subtle cues allowed me to optimize my system and create an environment where clarity and immersion flourish. These insights emphasized that audio perfection isn’t just about gear—it’s about understanding and adapting to your space.
The Power of Hands-On Adjustments Over Expensive Gear
Early on, I believed investing in high-end equipment was the only way to achieve great sound. However, I discovered that addressing vibration issues with affordable tools like blue tack can achieve impressive results. This realization reminded me that innovation often comes from creativity and patience, not always from the wallet. It opened my eyes to the value of DIY solutions that deliver real impact without breaking the bank.
Turning Knowledge into Action in Your Home
Implementing these lessons in my setup has been transformative. Applying small, targeted fixes—like damping with blue tack—fostered a deeper understanding of acoustics. I now approach my listening space as an ongoing project, constantly fine-tuning and learning. My advice: embrace experimentation and trust your ears. Your ear for detail can be your best guide to elevating your home audio experience beyond expectations.
Curated Resources to Elevate Your Audio Game
For those eager to dive deeper, I recommend exploring this guide on making cheap earbuds feel like premium monitors—it highlights how small tweaks can make a big difference. Additionally, checking out rugged speakers that endure real-life conditions can inspire creative ways to protect your gear. Finally, understanding the differences between Class A and Class D amplifiers deepens your control over your system’s sound quality.
Your Journey to Superior Sound Starts Today
Empowering yourself with practical, personal insights can unlock a new level of enjoyment in home audio. Remember, the path to sonic perfection isn’t paved solely with expensive gear—it’s built through curiosity, experimentation, and a willingness to learn from your own setup. Take that first step today, and turn your listening space into the sanctuary you’ve always envisioned.
What small tweak have you tried that made a big difference in your audio experience? Share your story below!
,