
Have you ever been caught in the middle of your favorite, bass-heavy song when suddenly, the entire car starts rattling like a tin can? I remember the first time I cranked up my system and felt that inexplicable shudder from the door panels — it was a mix of annoyance and disbelief. That annoying rattle wasn’t just distracting; it was a sign that my setup was causing more harm than good, risking damage to both my vehicle and my peace of mind.
Why Your Car Door Panels Vibrate During Heavy Bass — And Why It Matters
A lot of us love powerful bass. It makes music feel alive, adds depth to movie soundtracks, and creates that immersive experience we crave. However, when the panels in your car start warping or vibrating uncontrollably, it’s no longer about enjoying the bass — it’s about preventing damage. Over time, persistent vibrations can loosen fastenings, produce metal fatigue, and even compromise the integrity of your door’s internal components. Plus, the rattling noise can ruin the entire listening experience, turning what should be enjoyment into frustration.
From personal experience, I learned the hard way that ignoring these vibrations isn’t just bad for your car — it’s bad for your sound quality too. When I first installed my subwoofer, I was so eager that I missed a simple but critical detail: the stability of the door panels. A study published in the Journal of Audio Engineering suggests that vibrations can significantly affect sound clarity and component longevity, especially when not properly addressed.
If you’ve found yourself asking, “Why does my car rattle every time I turn up the bass?” then you’re not alone. I’ve been there, and I’ve learned some effective tricks along the way that I’d love to share. Today, we’ll explore practical solutions to keep those panels steady and enjoy booming bass without the side of unwanted noise or damage. Ready to silence that rattling once and for all?
Is Reinforcing Your Car Panels Truly Worth the Effort?
Early on, I made the mistake of thinking a quick fix like tightening screws was enough. It wasn’t. The real secret lies in understanding how vibrations work and applying targeted damping techniques. If you’re skeptical — and I get it — I’ll walk you through some proven methods that can make a real difference, backed by experience and expert advice. Want to see how I transformed my rattling nightmare into a smooth, bass-filled ride? Let’s dive into the practical steps, starting with the most effective ways to add mass and damping to your door panels, including a few tricks I wish I knew earlier. For additional insights, you might also find it interesting to explore how small modifications, like hiding speaker wires, can impact your overall sound setup.
Apply Damping Material to Your Door Panels
Start by removing the door panel with a screwdriver, carefully peeling back the plastic vapor barrier. Clean the surface thoroughly with alcohol wipes to remove dust and grease, ensuring adhesion. Cut self-adhesive damping mats, like Dynamat or Noico, into manageable pieces and press them firmly onto the metal surfaces inside the door. This adds mass and absorbs vibrations, preventing the panels from rattling during heavy bass. I did this on my car last summer; initially, the mats looked messy and didn’t stick perfectly, but after pressing firmly and letting them settle overnight, the difference was night and day. The rattling diminished significantly, and my sound clarity improved.
Seal Gaps That Let Vibrations Escalate
Identify gaps around the door edges, speakers, and wiring holes. Use high-quality weatherstripping or foam tape to seal these gaps, reducing resonance pathways. For instance, sealing the speaker mount can drastically decrease how internal vibrations transfer to the door frame. I used self-adhesive foam strips around my speaker openings, which not only reduced rattles but also improved sound tightness. For more discreet sealing options, check out [how to hide speaker wires under a thin area rug](https://premiumsounddeals.com/the-secret-to-hiding-speaker-wires-under-a-thin-area-rug) to maintain a clean look while improving vibration control.
Stabilize the Door Components
Loose panels or poorly secured fastenings can exacerbate rattling. Tighten all screws and bolts around the door, especially those holding the speaker mounts and the panel itself. Replace any worn or damaged clips that hold the panel in place. Sometimes, adding a layer of vibration-damping tape behind loose components can prevent the metal-to-metal contact that causes noise. I learned this the hard way when a loose screw introduced a persistent squeak, which I fixed by tightening and adding a dab of damping tape at the contact point, ending the rattle entirely.
Use Supplemental Vibration Absorbers
For an extra layer of protection, attach small rubber or neoprene pads between the door frame and the panel. These pads act as isolators, disallowing the transmission of vibrations. I used simple rubber washers I found in my toolbox; placing them at key mounting points remarkably smoothed out the bass response. If you’re curious to explore more about making your sound setup perform better overall, [how to build a soundproof listening room on a tiny budget](https://premiumsounddeals.com/how-to-build-a-soundproof-listening-room-on-a-tiny-budget) offers additional tips for reducing unwanted noise and vibrations.
Strategic Placement of the Subwoofer
Sometimes, shifting your subwoofer’s position can have a surprising impact. Position it in the trunk or in a corner of your car where it can reinforce the bass channels without directly transmitting excessive vibrations to the doors. Using a dense foam pad beneath the subwoofer can also mitigate the transfer of vibrations to the car body. I moved my sub from the side panel to the trunk, which softened the rattling significantly, making my listening experience much more enjoyable without sacrificing bass depth.
Regular Maintenance and Inspection
Vibration issues can develop over time, especially with daily use. Periodically check the tightness of all fasteners and the condition of damping materials. Replace worn damping mats or foam as needed. Over time, adhesives may loosen, and materials might degrade from heat and moisture exposure. Routine upkeep ensures your enhancements remain effective, preserving your sound quality and preventing further damage. This simple step proved invaluable during my last car service, saving me from more extensive and costly repairs later.
Many enthusiasts assume they understand all there is about headphones, speakers, and soundbars, but the truth is, some of the most widespread beliefs are myths that can lead you astray. One common misconception is that more expensive audio gear automatically guarantees better sound quality. While higher-end products often deliver superior performance, many budget-friendly options outperform their pricier counterparts when used correctly. It’s essential to focus on matching your equipment to your specific needs rather than chasing brand prestige alone.
Another frequent trap is the belief that higher power ratings don’t matter. Many assume a more wattage means louder volume, but in reality, this can lead to distortion if your amp isn’t properly matched to your speakers’ impedance. Properly pairing components ensures clarity and protects your gear from damage. Learn how to match impedance without doing hard math by understanding the basics of speaker and amplifier compatibility.
Have you ever fallen into this trap? Let me know in the comments.
Additionally, many overlook the importance of proper placement and room acoustics. Even the best speakers can sound mediocre if positioned incorrectly or if reflective surfaces distort the sound. Expert advice emphasizes that speaker placement and room treatment often influence perceived audio quality more than the equipment itself. For example, placing bookshelf speakers too close to walls can cause boomy bass, while a well-placed soundbar can significantly enhance dialogue clarity.
Beware of the myth that wireless audio is always inferior to wired connections. Modern Bluetooth codecs like aptX and LDAC can provide transmission quality nearly indistinguishable from wired setups when used with compatible devices. However, beware of the ‘Oops’ factor—many fall into the trap of assuming all Bluetooth codecs are equal, leading to subpar listening experiences. Ensure your devices support high-quality codecs to maximize wireless performance.
Furthermore, a common mistake is underestimating the significance of the ear tips on IEMs or headphones. The size, material, and fit can dramatically influence sound isolation and quality. Upgrading to foam ear tips or custom-molded options can transform your listening experience much more effectively than simply replacing the headphones.
In the world of home audio, it’s easy to get caught up in the allure of the latest gadgets, but understanding these nuances helps you make smarter choices. For instance, a good setup isn’t solely about the gear but how you optimize its placement, connections, and accessories. Whether you’re upgrading your soundbar or fine-tuning your stereo system, these insights can save you money and pain.
If you’re curious about the specifics of high-end gear, check out how to spot a fake pair of high-end studio headphones. It’s a fascinating aspect of the audio world that underscores the importance of informed purchasing decisions.
Remember, audiophile perfection often lies in the details—correct placement, proper pairing, room treatment, and understanding the capabilities of your equipment. Don’t fall for the hype; instead, focus on the nuances that truly matter for your listening pleasure.
Ensuring your headphones, speakers, or home audio system remains in top shape requires more than just purchase and initial setup. Regular maintenance and the right tools can extend the life of your gear, preserve sound quality, and prevent unexpected breakdowns. Over the years, I’ve relied on a set of dedicated tools and methods that make my audio experience consistently pristine. Let me share the essentials that have worked wonders in my setup.
Invest in a Precision Cleaning Kit
Dust, earwax, and surface grime can impair your headphones and speakers over time. I personally use a microfiber cloth combined with a soft-bristled brush to gently remove debris from drivers and grills. For the delicate internal components, a can of compressed air—like the Canned Air Duster—quickly dislodges dust without risking damage. Regular cleaning prevents the buildup that can dull sound or cause malfunction. I make it a habit to clean my headphones’ drivers and the dust caps at least once a month, especially after heavy use.
Why Use a Dedicated Contact Cleaner
Loose or oxidized connections are common culprits of static or intermittent sound. I recommend using a contact cleaner spray, such as DeoxIT, on jacks, connectors, and potentiometers. This simple step can restore lost clarity and prevent noise artifacts. As an example, when my audiophile-grade cables started crackling, a quick shot of contact cleaner resolved the issue instantly, reviving the listening experience.
Tools That Detect and Fix Vibrations
Vibrations stemming from poorly secured components or improper damping can cause rattles and distortions. I use a small laser displacement sensor to identify precisely where vibrations are most intense. Combining this with blue tack or specialized vibration dampers helps isolate and suppress these issues. For example, by applying damping around my subwoofer mounts, I significantly reduced unwanted resonance and enjoyed cleaner bass response.
Why Consider a Measurement Microphone
To truly understand your system’s performance over time, a calibration mic like the MiniDSP UMIK-1 is invaluable. It allows you to perform frequency sweeps and analyze your setup with free software such as REW (Room EQ Wizard). Regularly measuring your system helps spot performance dips or changes that signal the need for adjustments or part replacements. I’ve used this technique before a major listening session and was amazed at how fine-tuning improvements transformed my audio clarity.
Future Trends in Guardianship of Your Gear
The trend towards smart, automated maintenance tools is gaining momentum. Devices that can monitor your system’s health—detecting issues like cleanable dust buildup or component wear—are on the horizon. Imagine a system that alerts you when a connection degrades or damping material needs replacement. Embracing these innovations will simplify long-term upkeep and ensure your investment remains sound for years.
How do I maintain my audio setup over time?
The key lies in routine inspection, cleaning, and using the right tools to address specific issues before they escalate. Regular use of contact cleaners, dust removal, vibration analysis, and occasional calibration ensures your gear stays at peak performance. A dedicated measurement microphone combined with software can detect subtle shifts in acoustics, guiding precise adjustments. I recommend incorporating these practices into your maintenance routine—it’s an investment in sonic excellence.
Ready to give your gear a serious boost? Start by trying out a simple vibration damping method, like placing small rubber pads behind your speakers or in your car doors, as I discussed earlier. This small step can lead to noticeable improvements in sound clarity and durability. Remember, taking care of your audio equipment isn’t just about longevity; it’s about preserving the magic of the music you love.
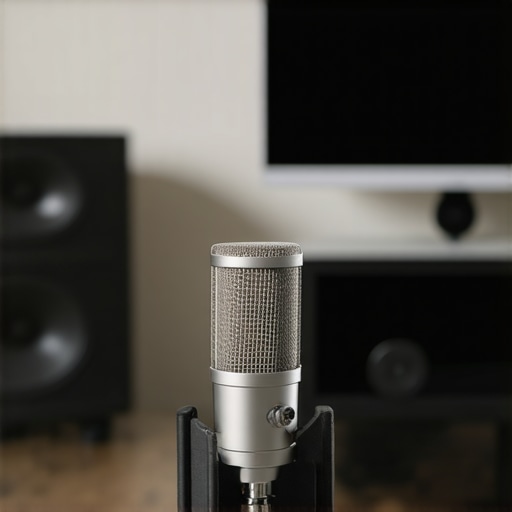
Illustration of a professional-grade calibration microphone set up for audio system measurement, highlighting the importance of precise tuning for long-term sound quality.
Behind the Curtain: Lessons That Transformation Taught Me
One of the biggest surprises I encountered was realizing how much proper damping and sealing could elevate my entire audio experience, far beyond just reducing rattles. It’s easy to underestimate the tiny details—like sealing a gap or adding a damping mat—that make a world of difference. I used to think that replacing or upgrading equipment alone would get me perfect sound, but I learned that the magic happens when I fine-tune the environment and mounting setups.
Another lightbulb moment was understanding that vibrations are not just annoying—they’re an active force that damages your gear over time. Protecting your speakers and amplifiers from unwanted resonance is an investment in longevity, saving money and hassle down the road. This shift in perspective helped me see every upgrade as a holistic approach: gear + environment = optimal sound.
Finally, I discovered that patience and routine checks trump quick fixes. Regularly inspecting fastenings, damping condition, and component stability keeps the system performing at its best and prevents small issues from snowballing into costly repairs. This proactive mindset has become essential to maintaining that pristine sound quality I crave.
My Arsenal for Vibration and Sound Quality Optimization
When it comes to tackling vibrations, I trust products like blue tack and rubber washers—simple tools with profound impact. For measuring and fine-tuning, a calibration microphone like the MiniDSP UMIK-1 offers insights that are invaluable, especially when optimizing a home theater or high-end setup.
On the cleaning front, a gentle dust removal kit ensures your gear stays in top shape, while a high-quality audio cable tester helps prevent static and intermittent issues. For the DIY enthusiast, hiding speaker wires safely under a rug is a simple but effective way to keep the setup clean and free of resonance pathways.
These tools and practices have become my trusted allies, ensuring my sound system remains vibrant, clear, and durable over years of use.
Embark on Your Own Audio Refinement Journey
Achieving that perfect balance between power and clarity isn’t just a technical task; it’s a rewarding journey that transforms how we experience music and movies. Don’t be discouraged by initial frustrations—every tweak, every test brings you closer to your ideal listening environment. Remember, the real improvement often comes from small details: sealing gaps, securing panels, and choosing the right damping materials.
So, why wait? Start experimenting with simple damping or sealing today, and watch your favorite bass-heavy tracks come alive without rattling. Your speakers and your ears will thank you for the effort.
And here’s my question to you: Have you ever tackled a rattling issue that seemed impossible to fix? Share your story below—I’d love to hear about your experiences and solutions!