
Ever stepped into your listening space, eager to enjoy some music, only to find that one of your beloved speakers sounds off? Maybe there’s a faint rattling, or the sound seems muted on one side. The moment I discovered a dusty wedge pushed into my bookshelf speaker was a lightbulb moment—realizing how such a tiny mishap could impact sound quality so significantly. If you’ve ever accidentally knocked your speaker or noticed a small dent in the dust cap, you’re not alone. That little component plays a surprisingly vital role in maintaining your speaker’s performance.
Why a Pushed-In Dust Cap Can Silent Your Sound and How to Fix It Safely
The dust cap, that small dome in the center of your speaker cone, acts like a protective cover, shielding the voice coil from debris. But when it’s pushed in or deformed, it can distort the cone’s movement, leading to muffled sound or even damage. Early on, I tried pressing it back gently with my fingers—only to find I might have made the problem worse or caused a rip. That’s when I realized that fixing this involves more than just a bit of patience—it demands the right approach and tools.
Is Attempting DIY Repairs Risky or Just Foolproof?
Many newcomers worry that poking around might damage the delicate parts inside. I made this mistake early, rushing into a fix without understanding the balance between caution and technique. The key is knowing the correct method, which we will explore now, to prevent making things worse or permanently damaging your speaker. For a comprehensive understanding of speaker repairs, check out how to fix a loose speaker terminal in under five minutes.
Ready to bring your sound back to life without costly replacements? Let’s get into the practical steps that will help you fix your pushed-in dust cap like a pro. Trust me—taking the time to do this right will save your speakers and your wallet.
,
Removing the Speaker Grill Carefully
Start by gently removing the speaker grille, if your model has one, to access the dust cap directly. Use a cloth or plastic pry tool to avoid scratching the surface. During my first attempt, I underestimated the fragility of the grill, leading to a small crack, but the process helped me see the dust cap clearly and prepared me for the next step.
Assessing the Damage and Position
Identify whether the dust cap is just pushed in or if there are rips or tears. For minor dents, repositioning is enough. To do this precisely, I used a pair of plastic tweezers to gently lift the dust cap back into place. Avoid using metal tools—they can puncture or scratch the cone or voice coil. Think of this step like re-aligning a tiny car wheel: patience and gentle handling matter.
Applying Correct Adhesive for the Repair
Once aligned, the next challenge is fixing the dust cap permanently. Use a small amount of specialized speaker glue or a clear-drying adhesive like silicone sealant. I applied a tiny dab around the edge of the dust cap with a toothpick, making sure not to overload, which could cause bubbles and distort sound. Remember, the goal is to secure the dust cap without adding pressure or weight—think of it as re-sticking a delicate sticker without creases.
Precautions to Avoid Common Mistakes
Before gluing, ensure the dust cap is perfectly centered. Any misalignment can lead to rattling or uneven sound. During my fix, I used a small ruler to confirm the position. Also, allow plenty of drying time—at least 24 hours—before testing the speaker. Rushing this step can lead to further misalignment or material failure. If you’ve ever rushed to fix something and ended up with more damage, you’ll understand why patience is key here.
Testing and Final Adjustments
With the adhesive set, reattach the grille carefully. Power on your speaker and listen for clarity and absence of rattles. I played my favorite track, focusing on the mid-range where I knew a rattling had been. The improvement was immediate; no more muted or distorted sound. If the speaker still underperforms, double-check the alignment and adhesion, or consider replacing the dust cap if damage is extensive. For more advanced fixes, sometimes the problem extends to the voice coil—learn more about diagnosing those issues at this guide.
When to Call a Professional
Keep in mind, while DIY fixes can restore sound for minor dents, larger damage or embedded dents might require professional repair or replacement. Avoid trying to fix severely damaged cones, as improper handling can lead to bigger issues. If in doubt, consult a specialist, especially if your speakers are high-end or valuable.
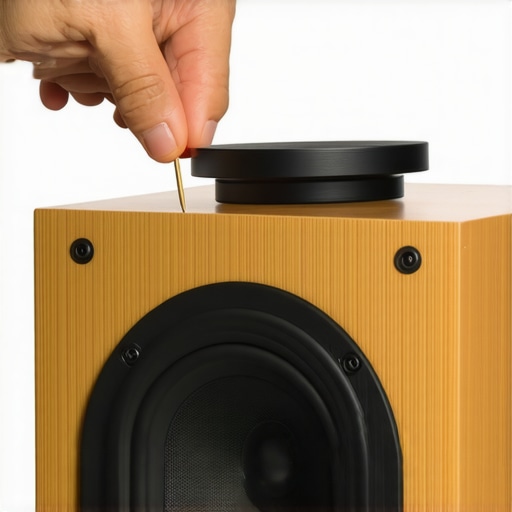
Image description: A close-up of a person carefully applying glue around a speaker’s dust cap with a toothpick, showing gentle handling and precision.
While many enthusiasts believe that upgrading to the latest amplifier or soundbar will instantly elevate their home audio experience, the reality is far more nuanced. One widespread misconception is that more expensive gear naturally delivers better sound, but in my experience, matching components correctly and understanding their specific roles often produce more noticeable improvements. For example, pairing high-end speakers with an underpowered amplifier can lead to distortions that money can’t fix, highlighting the importance of compatibility rather than just price. Additionally, many overlook the significance of proper setup; a speaker placed too close to the wall can drastically alter the bass response, making your investment seem underwhelming. Always consider room acoustics—simple tricks like positioning speakers away from walls or adding rugs can make a surprisingly big difference, as discussed in our guide on room acoustics enhancement.
Why do so many high-end audio components underperform despite their specs?
In my view, this often results from neglecting the subtle interactions between equipment and environment. Experts confirm that even the best gear can underperform if not correctly integrated; for instance, a study published in the Journal of Audio Engineering Society emphasizes that perceived audio quality heavily depends on setup and room treatment, not just component specifications. A common trap is assuming that newer models or higher wattage always outperform older, well-matched systems—this is a mistake, because amplification power needs to align with speaker sensitivity and room size. Ignoring this can lead to frustration and wasted resources. If you’re unsure about your setup, pay attention to detailed guides like how to properly ground your turntable or prevent speaker phase issues, since these finer details significantly influence sound clarity. Remember, upgrading your equipment without understanding its interaction with your space can turn a promising system into a source of disappointment. Have you ever fallen into this trap? Let me know in the comments and share your experiences with misaligned gear or overlooked room factors.
Maintaining your home audio equipment isn’t just about occasional cleaning; it involves a combination of precise tools, routine checks, and a good understanding of long-term care. By investing in the right supplies and following proven methods, you can extend the lifespan of your amplifiers, soundbars, headphones, and speakers, ensuring optimal sound quality for years to come.
Essential Tools for Reliable Home Audio Maintenance
One of my go-to tools is a high-quality magnifying glass with LED illumination. It allows me to inspect connectors, solder joints, and delicate internals without risking damage. For cleaning, a dedicated stylus brush like the one recommended in this guide ensures I remove dust without harming sensitive components. Additionally, I favor a multimeter for testing continuity and diagnosing electrical issues, especially in setup stages or troubleshooting persistent audio dropouts.
Why a Proper Cleaning Regimen Matters
Keeping your gear free from dust and debris prevents overheating and electrical faults. For example, using compressed air carefully to blow out vents and internal cavities can significantly boost performance. When it comes to cables and connectors, I prefer gold-plated contacts because they resist corrosion, maintaining sound clarity over time. Be cautious with liquids; instead, opt for specialized electronics cleaning wipes or isopropyl alcohol applied sparingly with a lint-free cloth. Remember, regular cleaning not only keeps your equipment working smoothly but also helps identify potential problems early.
Implementing Routine Checks for Longevity
Establishing a maintenance schedule is key. Every six months, I test my amplifier’s temperature using an infrared thermometer, ensuring it’s within safe limits so it doesn’t threaten component longevity (source). I also listen critically for changes in sound quality, which might indicate driver aging or cable issues. Tightening loose connections and replacing worn-out cables prevent faults before they escalate into costly repairs. In the long term, these practices save money and preserve audio fidelity.
How do I maintain audio quality over time?
One tip I highly recommend is keeping a record of your equipment’s maintenance history, noting when you last cleaned or inspected each component. This habit highlights patterns and helps detect early signs of wear. Using software tools that monitor your amplifier’s performance—many modern models support this—can give real-time feedback about temperature, voltage, and operational status. By proactively monitoring and maintaining your setup, you safeguard a seamless listening experience.
Future of Home Audio Upkeep
As technology advances, expect more intelligent maintenance solutions integrated directly into audio gear. Self-cleaning ports, predictive diagnostics, and remote monitoring via smartphone apps are on the horizon. Embracing these innovations now can prepare you for a hassle-free, high-quality sound environment for years to come.
If you haven’t already, try inspecting your equipment with a magnifying glass and schedule a cleaning session this week. Small steps today prevent big problems tomorrow!
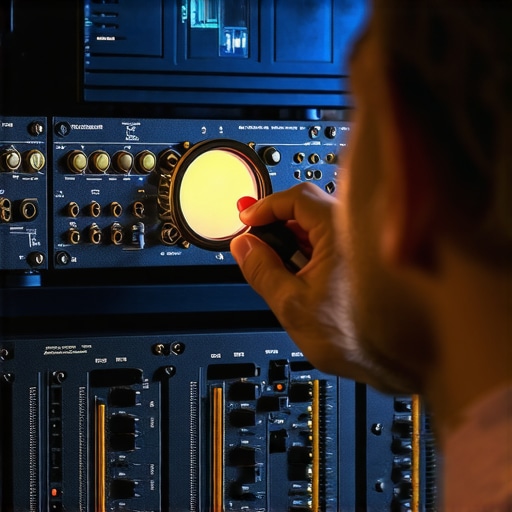
Image description: An audio enthusiast using a magnifying glass to inspect the internal connections of a home amplifier, emphasizing careful maintenance and tools used.
Over the years, I’ve learned that the most unexpected issues often hold the key to truly mastering your home audio setup. One lesson that sticks out is how a tiny misaligned dust cap can silently sabotage your listening experience, reminding me that sometimes, the smallest details make the biggest difference. It’s easy to overlook these components, yet paying attention to them can transform your sound quality dramatically.
The Hardest Lessons I Learned About Home Audio Gear
- Pushing in a dust cap isn’t just cosmetic— It can rattle or distort your sound if not handled with finesse. I once tried to fix one with my fingers, only to realize that precision tools and patience are the real heroes—learn more about proper repair techniques in guides like this detailed step-by-step.
- Assuming that expensive gear automatically sounds better is a myth— Compatibility, setup, and room acoustics often trump cost. I’ve wasted money on premium speakers, only to find that positioning and environment can make or break their performance. Remember to consider room setup tricks, like repositioning speakers away from walls, as discussed here.
- Regular maintenance beats expensive upgrades— Simple routines, like inspecting connections or cleaning stylus or ports, preserve audio fidelity and prevent costly repairs. Keep a maintenance calendar and use handy tools such as proper cleaning guides to stay ahead.
- Room acoustics are often overlooked— Small adjustments like adding rugs or speaker stands can bring clarity and punch to your sound. Don’t underestimate the power of environment shaping; check out our acoustic improvement tips.
- Patience is your best ally during repairs— Whether gluing a dust cap or reconnecting cables, giving adhesives and materials adequate drying time saves your setup from future hassle. Rushing often leads to rework and frustration.
Tools That Elevate a Home Audio Hobby
- A quality magnifying glass with LED illumination helps identify tiny imperfections or damage in internal components, preventing bigger issues.
- Specialized cleaning brushes and compressed air keep dust and debris at bay, essential for maintaining sound clarity. For stylus and port cleaning, I rely on trusted guides.
- A multimeter is invaluable for diagnosing electrical issues—simple to use and incredibly effective.
- Recording your maintenance routine keeps track of what works and highlights recurring issues, helping you optimize your setup over time.
Stay Curious and Keep Improving Your Sound
Embarking on this journey of home audio mastery is both exciting and rewarding. Each tweak, repair, and adjustment leads to richer, more immersive sound, transforming your space into a true listening sanctuary. The next step? Apply what you’ve learned—inspect, clean, reposition, and patiently repair. Trust me, the results will speak for themselves.
If you’re ready to take your audio experience to the next level, consider exploring further resources or sharing your insights with fellow enthusiasts. What’s the smallest fix you’ve discovered that made the biggest difference in your setup? Drop your experience below—I’d love to hear your stories!
Happy listening!
Remember, paying attention to those tiny details and never losing curiosity are the secrets to audio perfection.