
It was 3:00 AM, and the sound of thunder wasn’t just in my dream. I remember the panic—sliding across the wet deck in my socks, trying to grab my ‘pride and joy’ DIY bookshelf speakers before the downpour turned them into expensive sponges. I’d spent forty hours soldering, sanding, and staining those beauties. But by morning, the MDF had already started to bloom like a soggy flower. It was a total loss. That’s the thing about DIY audio; we spend so much time on the crossovers and the drivers, but we treat weatherproofing like an afterthought. Today, I want to save you from that middle-of-the-night sprint. I’m sharing the absolute easiest, most effective way to make your custom speakers survive the elements without losing that sweet, sweet fidelity. Trust me, if I can save a pair of thrift store drivers from a watery grave, you can do this too.
Why Standard Enclosures Are Just Waiting to Fail
Most of us start with wood because it’s easy to work with and sounds great. However, even the best marine plywood is essentially a stack of hungry layers waiting for humidity to find a gap. One of the biggest mistakes I made early on was assuming that a few coats of polyurethane would be enough. It’s not. Water is patient. It finds the screw holes, the terminal cups, and the seams. I once forgot to seal the back panel properly, and just like when you’re trying to safely remove the back of a sealed speaker cabinet, the moisture got in through the tiny gaps I couldn’t see. Before you know it, your portable speaker sounds thin when you take it outdoors because the cabinet is literally falling apart. According to the experts at Audioholics, moisture can significantly alter the resonant frequency of non-treated wood panels, meaning your speakers will literally start sounding worse before they even stop working.
Will All This Sealer Ruin My Sound?
This is the big one I always get asked. People worry that encasing their speakers in waterproof goop will make them sound like they’re playing from inside a plastic bucket. I’ll be honest: if you do it wrong, it can. But if you follow a few simple steps, you can actually improve the cabinet’s rigidity. Have you ever had a project ruined by a sudden storm, or are you just getting started with your first outdoor build? Let me know because I’d love to help you avoid my early disasters. We’re looking for that sweet spot where we use budget upgrades that make cheap speakers sound expensive while keeping the internals bone-dry.
Seal the Enclosure from the Inside Out
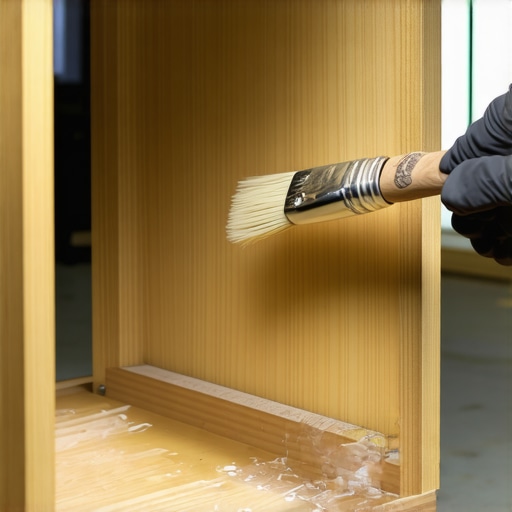
Think of your speaker cabinet like a tiny wooden boat that has to stay afloat in a monsoon. If you only paint the outside, the wood still breathes through the inside walls. I learned this the hard way with a set of patio monitors. I’d varnished the exterior to a mirror finish, but humidity crept in through the port tubes. Within a month, the interior MDF was soft enough to poke a finger through. Now, I always coat the internal walls with a thin layer of epoxy resin. It’s one of those budget upgrades that make cheap speakers sound expensive because it stiffens the walls, reducing unwanted vibrations while creating a literal plastic shell that water cannot penetrate.
Stop the Leak at Every Joint
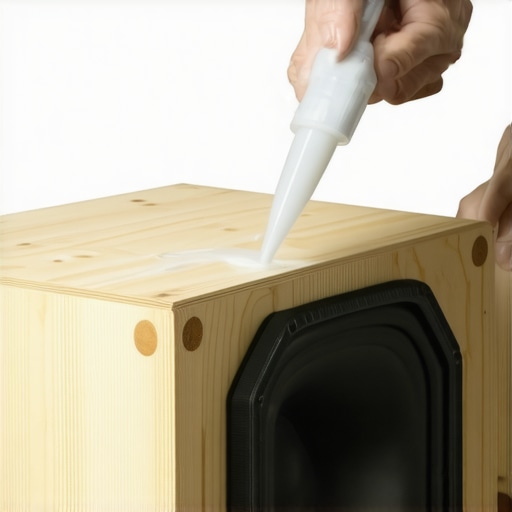
Don’t just trust your wood glue. Use a high-quality marine-grade silicone to run a bead along every internal corner. This acts like a gasket. I once built a custom subwoofer box for a Jeep, and because I skipped the silicone, the vibration eventually cracked the glue joints just enough for misty rain to get sucked in during a drive. It sounded like a wet cough every time the bass hit. If you ever have to go back in, knowing how to remove the back of a sealed speaker cabinet safely is vital, but ideally, you seal it so well you never have to.
Protect the Driver Without Killing the Tone
The actual speaker cone is the most vulnerable part. If it’s paper, it’s a sponge. If it’s poly, the surround can still rot. You can use a specialized hydrophobic spray—think of it like the stuff you put on your suede boots—but go light. A heavy coat adds mass to the cone, which lowers your efficiency and makes the speaker sound ‘dark.’ I once got over-enthusiastic with a can of clear coat and turned a crisp tweeter into a muffled mess. It’s better to use a fine mesh grill. If you notice a buzzing after install, you can fix a rattling speaker grill with a simple rubber band or a thin strip of butyl rubber.
Terminal Protection is Non-Negotiable
The back of the speaker is where most people fail. Those plastic terminal cups are notorious for leaking. Instead of using those, I prefer to run the wire directly through a small hole and then flood that hole with hot glue or silicone. If you prefer terminals, make sure they are gold-plated to resist corrosion, and yes, there is some truth about gold-plated audio connectors when it comes to preventing rust in humid environments. If your connection gets flaky, you’ll need to know how to repair a loose speaker terminal in under five minutes before the salt air eats the wire completely.
Defeat the Moisture in the Wires
Standard copper wire will ‘wick’ water. If the end of the wire gets wet, moisture can actually travel up inside the insulation, turning the copper green and brittle two feet away from the speaker. I always use ‘marine grade’ tinned copper wire for outdoor builds. It’s slightly more expensive, but it won’t fail when you’re halfway through a summer BBQ. Also, if you’re mounting these on a porch, remember that stop placing your speakers directly on the floor isn’t just bad for the bass—it’s where the puddles live. Use a stand or a wall mount to keep the ‘feet’ of your project dry.
Stop Overpaying for Shiny Connectors
We’ve all seen the flashy packaging at the big-box stores claiming that gold-plated terminals are the only way to prevent signal loss in high-moisture environments. But here’s the truth: for outdoor DIY builds, the mechanical integrity of the seal is ten times more important than the conductivity of the metal surface. I’ve seen enthusiasts spend hours debating is gold-plated hardware really worth the extra cash, while they leave the back of the cabinet completely exposed to the morning dew. In my experience, high-purity tinned copper with a marine-grade heat shrink will outlast a cheap gold-look terminal every single time. Most people don’t realize that why expensive speaker cables are mostly a marketing trick is especially relevant for outdoor setups where the cable’s resistance to oxidation is the real bottleneck, not its oxygen-free rating or brand name.
Can an Enclosure Be Too Well-Sealed?
This sounds like a trick question, but it is actually the biggest advanced mistake I see in custom audio builds. If you assemble your enclosure in a humid garage and seal it 100% airtight, you are effectively trapping a miniature cloud inside your speaker. When the sun hits that cabinet on a hot afternoon, the internal temperature spikes, the air expands, and that trapped moisture turns into a high-pressure sauna for your sensitive voice coils. I once opened a perfectly sealed marine box only to find the driver had developed a thick layer of internal mold. This is why some high-end manufacturers use specialized breathable vents that allow air pressure to equalize without letting liquid water in. If you’re hearing a weird noise during the first humid week of summer, it might not be the weather; sometimes the reason your subwoofer makes a humming sound when nothing is playing is due to moisture-induced shorting across the internal crossover terminals.
The Condensation Trap You Did Not See Coming
The biggest “Oops” factor in this hobby is ignoring thermal cycling. If your speakers are mounted in a spot that shifts from 50 degrees at night to 90 degrees in the direct sun, condensation will inevitably form on the coldest surface—usually the metal magnet of the driver itself. According to research by the Audio Engineering Society (AES) on environmental transducer testing, thermal cycling is often more destructive to adhesives and surrounds than direct rain or splashes. This is because constant expansion and contraction can micro-crack the seals you worked so hard to apply. To fight this, I always tuck a large desiccant pack—the kind used for shipping electronics—inside the cabinet before the final seal. It is a simple, low-cost hack, much like the 5-thrift store find that fixed my muddy guitar amp, but it works wonders for absorbing the internal humidity that external coats of paint simply can’t touch. Have you ever fallen into this trap where you over-engineered a solution only to have it backfire due to a simple physics problem? Let me know in the comments because I have definitely learned these lessons the expensive way.
Build a Maintenance Kit That Actually Saves Your Gear
Once you’ve conquered the moisture and the seals, the real battle shifts to internal longevity. I don’t care how expensive your components were; if you aren’t checking them periodically, they are on a countdown to failure. My number one recommendation for any DIYer is to keep a can of DeoxIT D5 handy. It is the gold standard for cleaning contacts. I’ve seen enthusiasts assume their equipment is dead when the easy way to fix a scratchy volume slider on your radio is literally a two-second spray of contact cleaner. When you are dealing with outdoor exposure, those sliders and potentiometers act like magnets for oxidation. Don’t wait for the sound to cut out; make a habit of cleaning your inputs every spring.
How do I maintain my custom audio builds over the seasons?
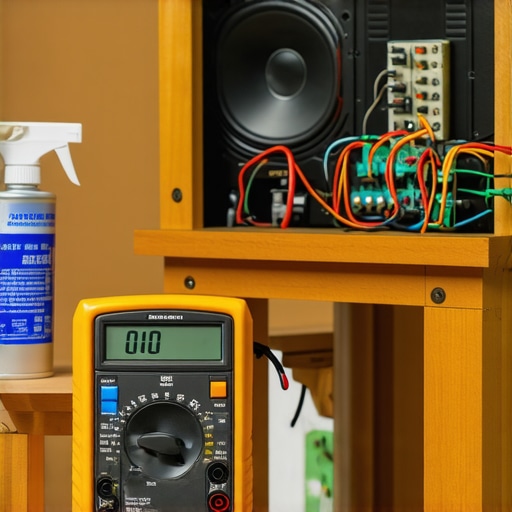
Maintenance isn’t just about cleaning; it’s about verification. Every six months, I pull my speakers down and perform a ‘health check.’ This starts with a simple multimeter to check for resistance. If your 8-ohm speaker is suddenly reading 4 ohms, you’ve got an internal short, likely from moisture or a failing crossover component. You can also how to use a 9v battery to check your speaker polarity to ensure that your wiring hasn’t become brittle or reversed due to heat cycles. If you hear a buzz, it’s time to investigate. Often, how to stop your speaker grills from rattling at high volume is as simple as tightening a few screws that have vibrated loose over a summer of heavy use.
The Software Advantage You Are Probably Ignoring
If you want to scale your DIY hobby into something that sounds professional, you need to stop guessing. I personally use Room EQ Wizard (REW) with a calibrated UMIK-1 microphone. It’s free software that gives you a visual representation of what your speakers are actually doing in your specific environment. When you take your project outside, the acoustics change drastically. There are no walls to reflect sound, which is why your portable speaker sounds thin when you take it outdoors. By using REW, you can identify exactly which frequencies are dropping off and adjust your crossover or EQ settings to compensate. According to the Klippel ‘Live Audio’ application notes on transducer reliability, consistent monitoring of the displacement (excursion) of your drivers can prevent 90% of mechanical failures before they happen.
The Future of DIY is Proactive and Smart
I predict that in the next few years, we are going to see a massive shift toward ‘Smart DIY’ enclosures. Imagine a build where a $5 moisture sensor inside the cabinet sends an alert to your phone the second a seal fails. We are already seeing this in high-end industrial audio, and the components are becoming cheap enough for us to integrate at home. Until then, stay vigilant about heat. If you’re pushing a small amp hard in the sun, the real reason your amp is getting hot to the touch might be a lack of airflow in your custom enclosure. If you notice the sound becoming distorted or the unit shutting down, you may need to learn why your surround sound receiver keeps clicking into protect mode and add a small 5V USB fan to your build. My advanced tip for the week? Go buy a basic digital multimeter today; it is the single most important tool for troubleshooting why one side of your setup is quieter than the other or why a driver has suddenly gone silent.
The Hardest Lessons I Learned from a Soggy Speaker Cabinet
Building for the outdoors taught me that humidity is like a ghost; it passes through walls you thought were solid. One major lightbulb moment was realizing that UV rays are just as destructive as water. If you do not protect your speaker surrounds, the sun will turn them into brittle crackers in one season. I also learned that when people ask is gold-plated hardware really worth the extra cash for outdoor use, the answer is only ‘yes’ if it prevents oxidation at the contact point—the rest of the terminal still needs a silicone shroud. Finally, never assume your seal is perfect. If you find your portable speaker sounds thin when you take it outdoors, check if moisture has expanded the cabinet walls and changed the internal volume. It is often a physical failure rather than an acoustic one.
My Essential Toolkit for All-Weather Sound
I swear by tinned marine-grade wire. It is the only way to avoid the green rot that travels up standard copper inside the insulation. For the enclosures, I always keep a stash of high-grade marine plywood sourced from specialty lumber yards. If you are looking for cheap drivers to experiment on before you commit to a big build, check out finding legitimate high-end gear at local thrift stores to get quality parts without the high-end price tag. I also highly recommend keeping a dedicated ‘audio first aid kit’ with DeoxIT and a few thick rubber bands, especially since you can fix a rattling speaker grill with a simple rubber band in about thirty seconds. #IMAGE_PLACEHOLDER_E#
Bring Your DIY Audio Projects Out into the Sun
Do not let the fear of a little rain keep you from enjoying high-fidelity sound on your patio. There is something incredibly rewarding about sitting through a light drizzle while your favorite tracks play perfectly from a box you built with your own two hands. Even if you start small with 3 budget upgrades that make cheap speakers sound expensive, the experience you gain is worth more than any pre-built system. The world of DIY audio is all about trial, error, and eventually, that perfect outdoor listening session. Go get your hands dirty, seal those seams, and turn the volume up. Have you ever lost a piece of gear to a sudden storm or a humidity mishap? Let me know your ‘horror stories’ in the comments below!