
I was sitting at my desk, reaching for my favorite pair of open-back headphones, when I felt that familiar, irritating tug. I looked down. What was once a beautiful, straight ten-foot oxygen-free copper cable had transformed itself into a tight, springy double-helix of pure frustration. It had coiled so tightly against itself that it was practically choking the life out of my desktop setup. In a moment of sheer impatience, I yanked on it to straighten it out. Big mistake. I heard a faint pop inside the strain relief, and suddenly, the left channel cut out completely. It was a costly lesson in physics and patience, and it forced me to realize that we are almost always the cause of our own cable misery.
The Invisible Twist is Ruining Your Gear
We think cables just twist themselves when we aren’t looking, like some kind of quiet, mischievous household entity. But the truth is, every time we pick up our headphones, put them on, take them off, and set them down, we unconsciously introduce a half-turn of rotation. Over a week, those half-turns add up to dozens of full rotations. This build-up of torsional stress doesn’t just look messy; it physically ruins the copper conductors inside the shielding. Before you know it, you are dealing with broken internal connections, or at the very least, looking up how to properly store your headphones to avoid hinge failure because the stiff, coiled cable is putting uneven tension on the earcups. Today, we are going to put an end to this cycle and learn how to train your cables to stay perfectly flat, limp, and kink-free.
Is This Just an Annoying Quirky Habit or actual Cable Damage?
It is easy to think that a looping cable is just a cosmetic annoyance. You might shrug and say, “I’ll just untwist it when it gets too bad.” But constant twisting actually creates high-tension stress points that degrade the shielding. In fact, cable fatigue is the number one reason high-end headphones end up in landfills prematurely. Even the outer jackets are highly susceptible; material scientists have noted that polymers under constant torsional strain degrade up to three times faster when exposed to oils from our hands and faces. Early in my audiophile journey, I tried to “fix” a stubborn cable by taping it tightly to the edge of my desk, thinking tension would straighten it out. Instead, I permanently stretched the outer jacket and ruined the internal geometry of the wires. It taught me that you cannot force a cable into submission; you have to train it. Have you ever ruined a beloved pair of headphones because the wire twisted itself to death? Let me know in the comments below, because I know I cannot be the only one who has suffered this painful design flaw.
How to Train Your Twisted Cables Back to Flat Obedience
To fix a cable that has developed its own stubborn memory of twists and kinks, you have to use a technique known in professional audio circles as the over-over, or more commonly, the over-under wrap. Think of your headphone cable like a stiff lasso. It has a natural lay dictated by the way the internal copper strands were wound at the factory. When you force it into tight, circular coils around your hand, you are fighting that lay and setting yourself up for failure. By alternating the direction of each loop, you neutralize the torsional stress inside the wire jacket entirely.
The Classic Over-Under Technique Step by Step
Start by holding the jack end of your cable in your non-dominant hand, letting the rest of the wire hang completely free to the floor. With your dominant hand, slide down about twelve inches of the cable. Bring your hand up and create a simple, natural loop toward your body, placing the wire between your thumb and index finger. This is the ‘over’ loop. For the second loop, slide your hand down another twelve inches, but this time, roll the cable outward between your thumb and forefinger as you bring it up. This creates a loop that sits behind the main strand, pointing away from you. This is the ‘under’ loop. Repeat this alternating pattern until the entire cable is coiled. When you toss the coil onto your desk, it will untangle itself completely without a single knot.
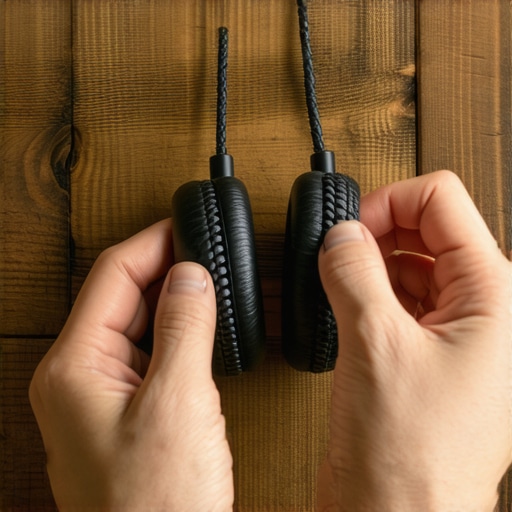
I remember trying this for the first time with a thick, bulky balanced cable connected to a pair of planar magnetic headphones. I had just finished troubleshooting why your high-end headphones sound tiny when plugged into a controller, and I was determined to get my desktop setup looking pristine. The cable was incredibly stiff from months of improper winding. The first few loops felt incredibly awkward, and the cable kept trying to fight my fingers, jumping out of the pattern. Instead of forcing it, I used a hair dryer on its lowest heat setting to gently warm up the outer polymer jacket for thirty seconds. This softened the material just enough for the cable to accept its new, flat-lying training. After leaving it coiled in the over-under pattern overnight, it behaved beautifully the next morning, resting flat on my desk without a single kinky wave.
Using Heat to Erase Bad Cable Memory
If your cable has been twisted for months, it will have developed a structural memory that resists the over-under wrap. To reset this, you need to neutralize the polymer jacket. Hang the cable vertically from a hook or a door frame, letting the heavy headphone end hang freely. Use a heat gun or hair dryer on low heat to run warm air up and down the length of the cable for about two minutes. You will actually see the cable slowly spin and uncoil itself as the heat relaxes the plastic. Once it cools down, perform your first over-under wrap immediately to set the new, tension-free memory. If you find your audio connections are still behaving strangely after straightening things out, you may need to learn how to fix a speaker that is cutting in and out to rule out any permanent damage to the solder joints inside the connectors.
I was sitting at my desk, reaching for my favorite pair of open-back headphones, when I felt that familiar, irritating tug. I looked down. What was once a beautiful, straight ten-foot oxygen-free copper cable had transformed itself into a tight, springy double-helix of pure frustration. It had coiled so tightly against itself that it was practically choking the life out of my desktop setup. In a moment of sheer impatience, I yanked on it to straighten it out. Big mistake. I heard a faint pop inside the strain relief, and suddenly, the left channel cut out completely. It was a costly lesson in physics and patience, and it forced me to realize that we are almost always the cause of our own cable misery.
The Invisible Twist is Ruining Your Gear
We think cables just twist themselves when we aren’t looking, like some kind of quiet, mischievous household entity. But the truth is, every time we pick up our headphones, put them on, take them off, and set them down, we unconsciously introduce a half-turn of rotation. Over a week, those half-turns add up to dozens of full rotations. This build-up of torsional stress doesn’t just look messy; it physically ruins the copper conductors inside the shielding. Before you know it, you are dealing with broken internal connections, or at the very least, looking up how to properly store your headphones to avoid hinge failure because the stiff, coiled cable is putting uneven tension on the earcups. Today, we are going to put an end to this cycle and learn how to train your cables to stay perfectly flat, limp, and kink-free.
Is This Just an Annoying Quirky Habit or actual Cable Damage?
It is easy to think that a looping cable is just a cosmetic annoyance. You might shrug and say, “I’ll just untwist it when it gets too bad.” But constant twisting actually creates high-tension stress points that degrade the shielding. In fact, cable fatigue is the number one reason high-end headphones end up in landfills prematurely. Even the outer jackets are highly susceptible; material scientists have noted that polymers under constant torsional strain degrade up to three times faster when exposed to oils from our hands and faces. Early in my audiophile journey, I tried to “fix” a stubborn cable by taping it tightly to the edge of my desk, thinking tension would straighten it out. Instead, I permanently stretched the outer jacket and ruined the internal geometry of the wires. It taught me that you cannot force a cable into submission; you have to train it. Have you ever ruined a beloved pair of headphones because the wire twisted itself to death? Let me know in the comments below, because I know I cannot be the only one who has suffered this painful design flaw.
How to Train Your Twisted Cables Back to Flat Obedience
To fix a cable that has developed its own stubborn memory of twists and kinks, you have to use a technique known in professional audio circles as the over-over, or more commonly, the over-under wrap. Think of your headphone cable like a stiff lasso. It has a natural lay dictated by the way the internal copper strands were wound at the factory. When you force it into tight, circular coils around your hand, you are fighting that lay and setting yourself up for failure. By alternating the direction of each loop, you neutralize the torsional stress inside the wire jacket entirely.
The Classic Over-Under Technique Step by Step
Start by holding the jack end of your cable in your non-dominant hand, letting the rest of the wire hang completely free to the floor. With your dominant hand, slide down about twelve inches of the cable. Bring your hand up and create a simple, natural loop toward your body, placing the wire between your thumb and index finger. This is the ‘over’ loop. For the second loop, slide your hand down another twelve inches, but this time, roll the cable outward between your thumb and forefinger as you bring it up. This creates a loop that sits behind the main strand, pointing away from you. This is the ‘under’ loop. Repeat this alternating pattern until the entire cable is coiled. When you toss the coil onto your desk, it will untangle itself completely without a single knot.
I remember trying this for the first time with a thick, bulky balanced cable connected to a pair of planar magnetic headphones. I had just finished troubleshooting why your high-end headphones sound tiny when plugged into a controller, and I was determined to get my desktop setup looking pristine. The cable was incredibly stiff from months of improper winding. The first few loops felt incredibly awkward, and the cable kept trying to fight my fingers, jumping out of the pattern. Instead of forcing it, I used a hair dryer on its lowest heat setting to gently warm up the outer polymer jacket for thirty seconds. This softened the material just enough for the cable to accept its new, flat-lying training. After leaving it coiled in the over-under pattern overnight, it behaved beautifully the next morning, resting flat on my desk without a single kinky wave.
Using Heat to Erase Bad Cable Memory
If your cable has been twisted for months, it will have developed a structural memory that resists the over-under wrap. To reset this, you need to neutralize the polymer jacket. Hang the cable vertically from a hook or a door frame, letting the heavy headphone end hang freely. Use a heat gun or hair dryer on low heat to run warm air up and down the length of the cable for about two minutes. You will actually see the cable slowly spin and uncoil itself as the heat relaxes the plastic. Once it cools down, perform your first over-under wrap immediately to set the new, tension-free memory. If you find your audio connections are still behaving strangely after straightening things out, you may need to learn how to fix a speaker that is cutting in and out to rule out any permanent damage to the solder joints inside the connectors.
The Myth of the Audiophile Cable Overhaul
Let’s dig deeper into the actual science of what we are dealing with here, because the consumer market is absolutely flooded with misleading advice. High-end cable manufacturers will try to convince you that spending thousands of dollars on single-crystal copper or silver-plated wires will magically cure your audio woes and resist physical wear. In reality, expensive cables tangle just as easily as cheap ones if handled poorly. The physical geometry of the wrap is what dictates lifespan, not the price tag. In fact, many ultra-expensive boutique cables feature heavy, braided fabric jackets that actually retain torsional memory far worse than standard rubberized PVC. They are incredibly difficult to train once they deform.
Why Do Some Cables Fight Your Hands More Than Others?
The resistance you feel when trying to untangle or coil a cable isn’t just stubbornness; it is a physical property known as torsional stiffness, which is heavily influenced by the shielding layers inside. Standard cables use a spiral copper shield, which naturally prefers to bend in one direction. High-end cables often utilize a braided shield, which is incredibly durable but behaves like a Chinese finger trap when twisted, locking the internal conductors into whatever bent shape they currently hold. According to engineering standards published by organizations like the Audio Engineering Society, pulling or twisting these braided shields under tension causes the fine wire strands to scrape against each other, creating micro-abrasions that permanently degrade signal integrity long before the wire actually snaps. This is why understanding the real difference between gold and silver plated connectors won’t save your sound quality if your actual internal copper core is suffering from microscopic fractures due to poor handling.
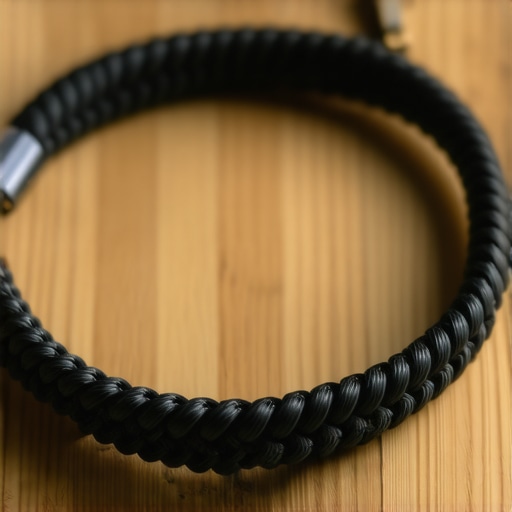
Another massive trap is relying on Velcro ties to tightly bundle cables that already have internal twist tension. If you force a twisted cable into a tight loop and lock it down with a tie, you are essentially baking those stress points into the copper. When you finally release it, the cable will immediately kink. This is similar to how audiophiles struggle to diagnose sound degradation, often mistakenly blaming their DACs when the physical connection is the bottleneck. Have you ever fallen into this trap of buying expensive replacement cables only to watch them ruin themselves in the exact same way? Let me know in the comments below, and let’s stop wasting money on physical gear when simple handling adjustments can save our setups.
Another massive trap is relying on Velcro ties to tightly bundle cables that already have internal twist tension. If you force a twisted cable into a tight loop and lock it down with a tie, you are essentially baking those stress points into the copper. When you finally release it, the cable will immediately kink. This is similar to how audiophiles struggle to diagnose sound degradation, often mistakenly blaming their DACs when the physical connection is the bottleneck. Have you ever fallen into this trap of buying expensive replacement cables only to watch them ruin themselves in the exact same way? Let me know in the comments below, and let’s stop wasting money on physical gear when simple handling adjustments can save our setups.
The Tools and Habits That Keep My Desktop Cables Limp
Over the years, I have stopped relying on pure willpower to keep my cables pristine. Instead, I use a few highly specific tools that integrate naturally into my daily workflow. My absolute favorite is a heavy, solid brass desktop cable anchor. I don’t use the cheap silicone adhesive clips because they rip off when you pull a heavy braided cable; instead, a heavy weighted anchor sits on my desk, allowing the headphone cable to drop straight down to the floor without catching on the edge. This vertical drop uses gravity to pull out any micro-twists before they can accumulate. I also keep a premium contact cleaner like DeoxIT D5 on my workbench. Every six months, I spray a tiny amount onto a lint-free cloth and wipe down the jacks. It is incredible how much invisible oxidation builds up, mimicking cable failure by causing static when you wiggle the plug.
How do I maintain my headphone cables over years of daily use?
To truly extend the life of your cables, you need to establish a simple diagnostic routine. Every few months, take your headphones off, hang them up, and let the cable hang completely free. If you see the cable immediately start to spin or curl back on itself, it is telling you that you have introduced torsional strain. Do not wait for it to get worse. Unplug the cable from the headphone cups and run your thumb and forefinger down the length of the wire twice to push out those micro-twists. Furthermore, always check the physical integrity of your connection points. If you are constantly pulling on the cord rather than the molded plug itself, you will cause micro-fractures in the copper joints. Taking a few seconds to inspect these connections prevents you from needing to research how to fix a speaker that is cutting in and out because of a failing connection point.
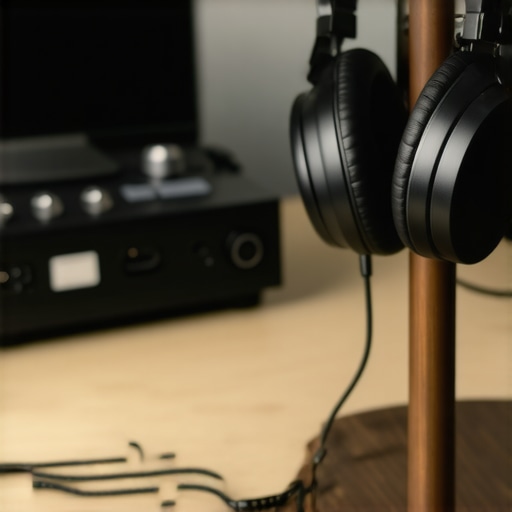
Looking ahead, I predict we will see a major shift toward ultra-pliable silicone-jacketed cables in the high-end audio space. While audiophiles traditionally love the premium look of braided nylon, manufacturers are beginning to realize that the mechanical friction inside fabric weaves is the enemy of longevity. Brands are experimenting with ultra-thin, highly flexible silicone compounds—similar to what is used in modern medical equipment—which possess almost zero material memory. Until those become the standard, we must rely on proper handling. If you want to dive deeper into protecting your investments, especially when dealing with physical wear on your earcups, check out my guide on how to properly store your headphones to avoid hinge failure to keep your entire assembly pristine.
The Science of Shielding and Internal Wear
According to technical design specifications from Belden, a leading industrial cable manufacturer, copper conductors subjected to repeated bending and twisting undergo work-hardening. This process makes the copper brittle, drastically increasing its electrical resistance at the stress point. If you ignore this physical reality, even the most expensive silver-plated conductors will eventually snap. I highly encourage you to try the heat-gun trick this weekend on your most stubborn cable. Hang it up, apply gentle heat, let it unspool itself, and immediately apply the over-under coil. You will be amazed at how a five-year-old stiff wire can suddenly behave like a brand-new, premium custom cable.
I was sitting at my desk, reaching for my favorite pair of open-back headphones, when I felt that familiar, irritating tug. I looked down. What was once a beautiful, straight ten-foot oxygen-free copper cable had transformed itself into a tight, springy double-helix of pure frustration. It had coiled so tightly against itself that it was practically choking the life out of my desktop setup. In a moment of sheer impatience, I yanked on it to straighten it out. Big mistake. I heard a faint pop inside the strain relief, and suddenly, the left channel cut out completely. It was a costly lesson in physics and patience, and it forced me to realize that we are almost always the cause of our own cable misery.
The Invisible Twist is Ruining Your Gear
We think cables just twist themselves when we aren’t looking, like some kind of quiet, mischievous household entity. But the truth is, every time we pick up our headphones, put them on, take them off, and set them down, we unconsciously introduce a half-turn of rotation. Over a week, those half-turns add up to dozens of full rotations. This build-up of torsional stress doesn’t just look messy; it physically ruins the copper conductors inside the shielding. Before you know it, you are dealing with broken internal connections, or at the very least, looking up how to properly store your headphones to avoid hinge failure because the stiff, coiled cable is putting uneven tension on the earcups. Today, we are going to put an end to this cycle and learn how to train your cables to stay perfectly flat, limp, and kink-free.
Is This Just an Annoying Quirky Habit or actual Cable Damage?
It is easy to think that a looping cable is just a cosmetic annoyance. You might shrug and say, “I’ll just untwist it when it gets too bad.” But constant twisting actually creates high-tension stress points that degrade the shielding. In fact, cable fatigue is the number one reason high-end headphones end up in landfills prematurely. Even the outer jackets are highly susceptible; material scientists have noted that polymers under constant torsional strain degrade up to three times faster when exposed to oils from our hands and faces. Early in my audiophile journey, I tried to “fix” a stubborn cable by taping it tightly to the edge of my desk, thinking tension would straighten it out. Instead, I permanently stretched the outer jacket and ruined the internal geometry of the wires. It taught me that you cannot force a cable into submission; you have to train it. Have you ever ruined a beloved pair of headphones because the wire twisted itself to death? Let me know in the comments below, because I know I cannot be the only one who has suffered this painful design flaw.
How to Train Your Twisted Cables Back to Flat Obedience
To fix a cable that has developed its own stubborn memory of twists and kinks, you have to use a technique known in professional audio circles as the over-over, or more commonly, the over-under wrap. Think of your headphone cable like a stiff lasso. It has a natural lay dictated by the way the internal copper strands were wound at the factory. When you force it into tight, circular coils around your hand, you are fighting that lay and setting yourself up for failure. By alternating the direction of each loop, you neutralize the torsional stress inside the wire jacket entirely.
The Classic Over-Under Technique Step by Step
Start by holding the jack end of your cable in your non-dominant hand, letting the rest of the wire hang completely free to the floor. With your dominant hand, slide down about twelve inches of the cable. Bring your hand up and create a simple, natural loop toward your body, placing the wire between your thumb and index finger. This is the ‘over’ loop. For the second loop, slide your hand down another twelve inches, but this time, roll the cable outward between your thumb and forefinger as you bring it up. This creates a loop that sits behind the main strand, pointing away from you. This is the ‘under’ loop. Repeat this alternating pattern until the entire cable is coiled. When you toss the coil onto your desk, it will untangle itself completely without a single knot.
I remember trying this for the first time with a thick, bulky balanced cable connected to a pair of planar magnetic headphones. I had just finished troubleshooting why your high-end headphones sound tiny when plugged into a controller, and I was determined to get my desktop setup looking pristine. The cable was incredibly stiff from months of improper winding. The first few loops felt incredibly awkward, and the cable kept trying to fight my fingers, jumping out of the pattern. Instead of forcing it, I used a hair dryer on its lowest heat setting to gently warm up the outer polymer jacket for thirty seconds. This softened the material just enough for the cable to accept its new, flat-lying training. After leaving it coiled in the over-under pattern overnight, it behaved beautifully the next morning, resting flat on my desk without a single kinky wave.
Using Heat to Erase Bad Cable Memory
If your cable has been twisted for months, it will have developed a structural memory that resists the over-under wrap. To reset this, you need to neutralize the polymer jacket. Hang the cable vertically from a hook or a door frame, letting the heavy headphone end hang freely. Use a heat gun or hair dryer on low heat to run warm air up and down the length of the cable for about two minutes. You will actually see the cable slowly spin and uncoil itself as the heat relaxes the plastic. Once it cools down, perform your first over-under wrap immediately to set the new, tension-free memory. If you find your audio connections are still behaving strangely after straightening things out, you may need to learn how to fix a speaker that is cutting in and out to rule out any permanent damage to the solder joints inside the connectors.
The Myth of the Audiophile Cable Overhaul
Let’s dig deeper into the actual science of what we are dealing with here, because the consumer market is absolutely flooded with misleading advice. High-end cable manufacturers will try to convince you that spending thousands of dollars on single-crystal copper or silver-plated wires will magically cure your audio woes and resist physical wear. In reality, expensive cables tangle just as easily as cheap ones if handled poorly. The physical geometry of the wrap is what dictates lifespan, not the price tag. In fact, many ultra-expensive boutique cables feature heavy, braided fabric jackets that actually retain torsional memory far worse than standard rubberized PVC. They are incredibly difficult to train once they deform.
Why Do Some Cables Fight Your Hands More Than Others?
The resistance you feel when trying to untangle or coil a cable isn’t just stubbornness; it is a physical property known as torsional stiffness, which is heavily influenced by the shielding layers inside. Standard cables use a spiral copper shield, which naturally prefers to bend in one direction. High-end cables often utilize a braided shield, which is incredibly durable but behaves like a Chinese finger trap when twisted, locking the internal conductors into whatever bent shape they currently hold. According to engineering standards published by organizations like the Audio Engineering Society, pulling or twisting these braided shields under tension causes the fine wire strands to scrape against each other, creating micro-abrasions that permanently degrade signal integrity long before the wire actually snaps. This is why understanding the real difference between gold and silver plated connectors won’t save your sound quality if your actual internal copper core is suffering from microscopic fractures due to poor handling.
Another massive trap is relying on Velcro ties to tightly bundle cables that already have internal twist tension. If you force a twisted cable into a tight loop and lock it down with a tie, you are essentially baking those stress points into the copper. When you finally release it, the cable will immediately kink. This is similar to how audiophiles struggle to diagnose sound degradation, often mistakenly blaming their DACs when the physical connection is the bottleneck. Have you ever fallen into this trap of buying expensive replacement cables only to watch them ruin themselves in the exact same way? Let me know in the comments below, and let’s stop wasting money on physical gear when simple handling adjustments can save our setups.
The Tools and Habits That Keep My Desktop Cables Limp
Over the years, I have stopped relying on pure willpower to keep my cables pristine. Instead, I use a few highly specific tools that integrate naturally into my daily workflow. My absolute favorite is a heavy, solid brass desktop cable anchor. I don’t use the cheap silicone adhesive clips because they rip off when you pull a heavy braided cable; instead, a heavy weighted anchor sits on my desk, allowing the headphone cable to drop straight down to the floor without catching on the edge. This vertical drop uses gravity to pull out any micro-twists before they can accumulate. I also keep a premium contact cleaner like DeoxIT D5 on my workbench. Every six months, I spray a tiny amount onto a lint-free cloth and wipe down the jacks. It is incredible how much invisible oxidation builds up, mimicking cable failure by causing static when you wiggle the plug.
How do I maintain my headphone cables over years of daily use?
To truly extend the life of your cables, you need to establish a simple diagnostic routine. Every few months, take your headphones off, hang them up, and let the cable hang completely free. If you see the cable immediately start to spin or curl back on itself, it is telling you that you have introduced torsional strain. Do not wait for it to get worse. Unplug the cable from the headphone cups and run your thumb and forefinger down the length of the wire twice to push out those micro-twists. Furthermore, always check the physical integrity of your connection points. If you are constantly pulling on the cord rather than the molded plug itself, you will cause micro-fractures in the copper joints. Taking a few seconds to inspect these connections prevents you from needing to research how to fix a speaker that is cutting in and out because of a failing connection point.
Looking ahead, I predict we will see a major shift toward ultra-pliable silicone-jacketed cables in the high-end audio space. While audiophiles traditionally love the premium look of braided nylon, manufacturers are beginning to realize that the mechanical friction inside fabric weaves is the enemy of longevity. Brands are experimenting with ultra-thin, highly flexible silicone compounds—similar to what is used in modern medical equipment—which possess almost zero material memory. Until those become the standard, we must rely on proper handling. If you want to dive deeper into protecting your investments, especially when dealing with physical wear on your earcups, check out my guide on how to properly store your headphones to avoid hinge failure to keep your entire assembly pristine.
The Science of Shielding and Internal Wear
According to technical design specifications from Belden, a leading industrial cable manufacturer, copper conductors subjected to repeated bending and twisting undergo work-hardening. This process makes the copper brittle, drastically increasing its electrical resistance at the stress point. If you ignore this physical reality, even the most expensive silver-plated conductors will eventually snap. I highly encourage you to try the heat-gun trick this weekend on your most stubborn cable. Hang it up, apply gentle heat, let it unspool itself, and immediately apply the over-under coil. You will be amazed at how a five-year-old stiff wire can suddenly behave like a brand-new, premium custom cable.
The Hardest Lessons I Learned Destroying My Own Gear
I used to believe that physical cords were indestructible highways for electrons, immune to daily movement. I was dead wrong. Here is what years of broken wires and static-filled audio channels finally taught me:
- Never wrap around your hand or elbow: This creates a permanent corkscrew effect, forcing the internal shield strands to grind against the signal conductor until they eventually snap.
- The “twist-pull” is a death sentence: Pulling on a cable that has kinked to force it straight will ruin the internal geometry, causing micro-fractures that are almost impossible to repair.
- Strain relief is your first warning sign: When the protective rubber boot near the connector begins to bend permanently at a sharp angle, it means you are putting too much stress on the internal solder joints.
My Essential Desk Cleanup Toolkit
If you want to keep your desktop pristine and guarantee your audio investments live a long, healthy life, these are the few items I swear by in my personal workspace:
- DeoxIT D5 Contact Cleaner: A quick wipe on your connectors every six months prevents static and cleans away micro-oxidation before it mimics a broken internal wire.
- A Heavy Desktop Brass Anchor: Unlike plastic adhesive clips, a weighted metal anchor keeps your cables secured in place without forcing tight, damaging bends.
- The Over-Under Cable Organizing Strap: I use these soft, loosely wrapped straps to secure my coiled cables without pinching the jacket or locking in torsional memory.
Stop Fighting Your Setup and Save Your Signal
Taking care of your cables is the ultimate unsung hero habit of a true audio enthusiast. By trading the lazy, aggressive wraps of the past for the natural over-under method, you will save hundreds of dollars on replacements and protect your favorite headphones from premature failure. Give your cables the respect they deserve, and they will reward you with perfectly flat behavior and noise-free sound for years to come.
Have you ever had a favorite pair of headphones die because the cable twisted itself to death? Let me know what happened in the comments below!