
You settle into your favorite chair, put on a pristine record, and reach over to turn up the volume. Instead of a smooth rise in sound, your speakers emit a harsh, static-filled crunch that makes you wince. I know that exact cringe-inducing moment. Years ago, I acquired a beautiful vintage silver-face receiver, plugged it in, and nearly blew my speakers because a simple turn of the dial sent a massive spike of static through the woofers. It is a common frustration, but you do not need to replace your gear. Today, we are going to dive into exactly what causes that irritating noise and how you can get your audio controls gliding smoothly again. If you are also dealing with older gear, you might even be wondering why your vintage receiver makes a loud pop when switching inputs, which often stems from similar age-related component wear.
The primary culprit behind a scratchy knob is not a broken amplifier, but rather a tiny buildup of dust, oxidation, and microscopic debris inside the potentiometer (the variable resistor behind the knob). Every time you turn the dial, a small metal wiper scrapes across a resistive strip. If dust gets trapped in there, it breaks the electrical contact, creating that awful crackle. Early in my audio journey, I made the mistake of thinking my amplifier was permanently broken and nearly sold it for pennies. I learned the hard way that a quick cleaning is usually all it takes. If you have a classic setup, you might also want to learn how to clean a sticky volume knob on a vintage amp to restore that satisfying, premium tactile feel. According to audio engineering studies on contact degradation, over 90% of analog control noise is caused by simple environmental contamination rather than actual component failure.
Is my expensive amplifier permanently ruined?
It is completely normal to panic and think your precious receiver has bit the dust when you hear that loud static. However, in almost every case, the internal components are completely fine. The issue is purely mechanical and localized to the control pot. It is a simple matter of maintenance, much like cleaning dust out of a keyboard. Have you ever jumped out of your seat because your volume knob made a sudden, deafening static noise? Let me know in the comments below, because we have all been there. Once we clear out the microscopic debris, your system will sound as clean as the day it was built.
Step-by-Step Restoration of Your Volume Controls
Cleaning a scratchy potentiometer is not difficult, but it does require patience and a precise touch. Think of a potentiometer like a watch mechanism; forcing the components or using the wrong lubricants will only attract more dust, turning a minor crackle into a sticky, unresponsive mess. Over the years, I have worked on dozens of vintage solid-state amplifiers, and I once made the absolute mistake of using WD-40 on a rare Japanese receiver. The WD-40 initially killed the noise, but within three months, it turned into a sticky goo that trapped every stray dust particle in the room, forcing me to completely de-solder and replace the entire control block. Do not make that mistake. Stick to dedicated, residue-free electronic contact cleaners.
Disconnect Power and Open the Chassis
First and foremost, unplug the unit from the wall. Working on live electronics is incredibly dangerous. Once the power is disconnected, you need to gain access to the back of the volume pot. This usually means removing the top cover of the amplifier or, in some cases, the bottom metal plate. If you are also running your audio from a computer, you might want to look into the simplest way to connect your PC to a vintage hi-fi once you have completed the cleaning process to test your newly quiet signals.
Identify the Spray Access Ports
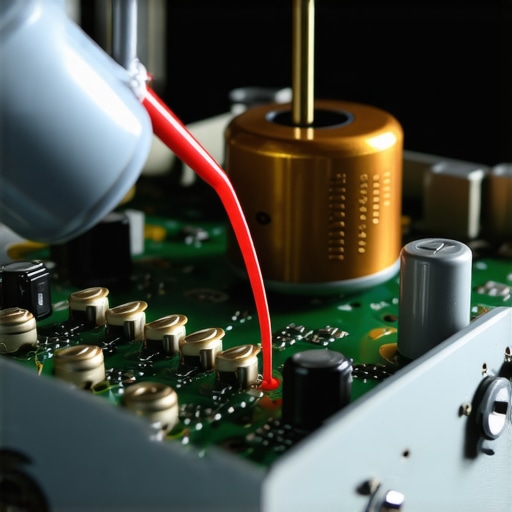
You cannot simply spray cleaner on the outside of the front metal knob and hope it works. You must look inside the chassis, behind the front panel. The potentiometer is typically a small metal box with three or more solder pins. Look closely at the sides or back of this metal housing. You will see a tiny notch, slot, or hole. This is your access port. If your gear is highly sensitive, remember that you should never use a power strip for your high-end amplifier when powering it back up; direct wall outlets provide much cleaner power delivery and prevent noise issues.
Spray the Contact Cleaner and Work the Knob
Attach the straw to your can of contact cleaner. Insert the straw directly into the small port of the potentiometer and give it two quick, short bursts. You do not need to flood the unit. Immediately turn the volume knob back and forth from zero to max at least thirty times. This friction wipes the loosened oxidation off the resistive strip. If your system sounds dead quiet after this but you notice a hum, you may need to learn how to get rid of that annoying hum in your turntable setup to isolate grounding issues from control noise. Let the solvent dry completely for about fifteen minutes before plugging the unit back in to test your work.
When we discuss fixing scratchy volume knobs, most enthusiasts stop at spraying contact cleaner. They believe that once the crackle is gone, the job is complete and their amplifier is permanently restored. However, after years of repairing vintage gear, I have realized this is where the real nuance begins. Many hobbyists do not realize that while contact cleaner dissolves immediate oxidation, it also strips away the factory-applied damping grease. This grease is responsible for that heavy, luxurious resistance you feel when turning high-end dials. Without it, your control pot feels loose and cheap, and it becomes far more susceptible to future dust buildup. If you are also running your audio from a computer, you might want to look into the simplest way to connect your PC to a vintage hi-fi to test your newly quiet signals.
Why does the crackle return so quickly after cleaning?
Many audiophiles find themselves cleaning the exact same volume knob every six months because they omit the final, critical step of lubrication. Standard contact cleaner evaporates completely, leaving the internal metal wiper and resistive track completely dry and vulnerable to friction. Over time, this metal-on-metal scraping permanently wears down the carbon track, turning a simple maintenance task into a physical failure. A study by the American Society of Lubrication Engineers highlights that micro-contacts under sliding friction require a protective barrier to prevent localized micro-welds and rapid oxidation. To protect your equipment long-term, you must follow up your flushing cleaner with a specialized electrical lubricant designed specifically for carbon potentiometers. Have you ever fallen into this trap of over-spraying your gear only to have the static return? Let me know in the comments below.
Another common mistake is confusing a dirty volume knob with an electrical layout issue. If you apply cleaner and the crackles do not change in tone or volume, you might actually be dealing with a leaky coupling capacitor leaking direct current (DC) voltage into the potentiometer. When DC voltage passes through a variable resistor, it creates an unmistakable, severe scratching sound whenever the wiper moves, regardless of how clean the metal is. If you suspect this is happening, you may need to learn the difference between gain and volume on your amplifier to understand how signal levels behave before diving into a capacitor replacement project.
Avoiding these subtle traps is what separates a temporary quick-fix from a professional-grade restoration. Always use residue-free flushers first, follow up with a dedicated carbon-safe lubricant, and make sure you test the circuit for stray DC voltage if the noise refuses to fade away.
Now that we understand the delicate balance of cleaning and preserving the factory-applied damping grease, we must look at long-term prevention. In my own audio workshop, I have tried every gadget and shortcut imaginable to keep airborne dust out of my analog gear. What I have found is that passive maintenance is far more effective than constantly opening up your chassis. If you keep your gear clean from the start, you will rarely have to reach for a screwdriver or a can of chemical spray. In fact, keeping the dust away also prevents broader issues, such as having to learn how to fix a speaker that is cutting in and out due to oxidized terminal switches.
How do I maintain my analog control knobs over time?
The secret to keeping your potentiometers noise-free is surprisingly simple: regular physical exercise. When an amplifier sits unused for months, microscopic dust settles directly onto the internal contact path, and humidity accelerates the oxidation process. I make it a habit to turn every dial on my equipment from zero to maximum about ten times every single week, even when the system is completely powered off. This simple movement wipes away minor surface dust before it has a chance to bond to the metal wiper. Additionally, using a simple fitted nylon dust cover over your receiver when it is not in use can block up to 95% of airborne particulate matter, saving your controls from early failure.
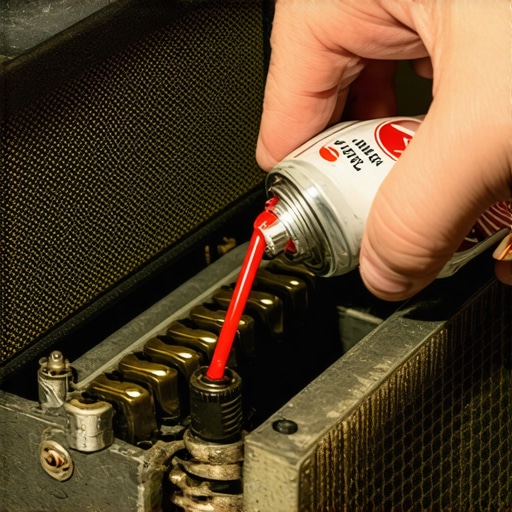
When it comes to the actual tools for this job, do not settle for bargain-bin hardware store chemicals. Personally, I only trust CAIG DeoxIT D5 for heavy oxidation removal, followed up by DeoxIT Fader F5 (or FaderLube) specifically for carbon-track potentiometers. The Fader series is formulated specifically to recreate that silky, high-end mechanical resistance while protecting the delicate conductive plastic and carbon elements inside. According to technical bulletins from the vintage audio restoration specialists at AudioKarma, using a standard aggressive degreaser without a plastic-safe lubricant can permanently strip away the carbon track in less than two years of regular use. If you are serious about maintaining your setup, invest in these dual-stage solutions.
Looking toward the future, the market is shifting. We are seeing a massive resurgence in analog gear, but replacement parts for vintage potentiometers are becoming incredibly rare and expensive. Preserving your original hardware is no longer just a matter of convenience; it is a financial necessity if you want to retain your equipment\’s value. To test your newly restored system and ensure your signals are perfectly balanced, I highly recommend checking out the easy way to test if your speakers are out of phase. For your next step, I encourage you to unplug your amplifier tonight, gently give each dial ten full rotations, and feel the difference that consistent maintenance makes.
What Vintage Restorers Won’t Tell You About Volume Pots
Over decades of working on vintage audio gear, I have noticed three major misconceptions that trip up even experienced audiophiles. First, a dirty potentiometer does not mean the silver lining on your carbon track is gone. It usually just means it is buried under layers of microscopic household debris. Second, turning the knob while the unit is completely off is actually your best defense. Physical friction wipes away new oxidation before it can chemically bond to the metal parts. Lastly, many hobbyists overlook the physical strain placed on internal parts. If you are experiencing dropouts, you might want to learn how to tell if your speaker is blown or just loose before blaming your volume controls entirely. Regular mechanical action and correct chemical application will keep your receiver quiet and fully functional for another thirty years.
My Essential Restoration Toolkit for Vintage Audio
I never start an amplifier restoration project without a dedicated selection of high-grade chemicals and mechanical tools. For flushing out old grease and heavy dust, CAIG DeoxIT D5 is my absolute favorite choice because of its unique metal-deoxidizing properties. To restore that heavy, premium feeling to the knobs, I always follow up with DeoxIT Fader F5. This specialized lubricant is designed not to harm delicate carbon tracks or plastic housings. If you also enjoy hunting down classic hardware to clean, I highly recommend reading up on the trick to finding high-end receivers at estate sales for pennies. Having these specific tools ready keeps you from making costly mistakes with generic hardware store sprays.
Get Your Smooth Analog Sound Back
Do not let a scratchy volume control keep you from enjoying your favorite physical media. Taking the time to properly clean and lubricate your amplifier controls is a rewarding weekend project that restores both the tactile and auditory magic of classic hifi gear. When you treat your equipment with the proper care, it rewards you with pristine, noise-free music. Now that you have the right steps down, it is time to bring your classic system back to life. Have you ever encountered a stubborn scratchy volume knob that required multiple cleanings to fix? Let me know in the comments below!