
Ever since I first splashed a bit of water on my prized leather headphones, I realized the hard way just how easy it is to ruin those delicate headphone pads. The disappointment hit me like a ton of bricks—suddenly, my expensive gear looked worn and uninviting. That lightbulb moment made me dig into the best ways to keep headphone pads clean without sacrificing the leather’s quality.
Why You Still Struggle with Cleaning Headphone Pads
Cleaning headphone pads can be surprisingly tricky. Many folks think they can simply wipe them down with a damp cloth or use harsh chemicals. But these quick fixes often lead to more harm than good, especially when it comes to leather. Over time, improper cleaning can cause cracks, peeling, or even the breakdown of the material, making your headphones look tired and feel uncomfortable.
Is It Really Worth the Risk to Use Water or Chemicals?
I made this mistake early on—I soaked my leather pads in alcohol-based cleaner, thinking I was disinfecting them. Instead, I ended up with cracked, flaky leather. According to expert advice from SoundGuys, using the wrong products can strip natural oils, ruining your headphones faster. So, why take a gamble with something so valuable?
Luckily, after some trial and error, I found methods that clean effectively without damaging the leather. In the sections ahead, I’ll share the safest, most efficient ways to keep your headphone pads fresh, plush, and pristine—minus the risk of harm. Whether you’re a daily commuter or a serious audiophile, these tips will help your headphones look and feel like new, for years to come.
Step 1: Gather the Right Supplies
Start with gentle, natural cleaning agents like a small amount of mild soap diluted with water. Avoid harsh chemicals or alcohol-based cleaners, which can crack or peel leather over time. Use soft microfiber cloths or cotton swabs to prevent scratching. I once tried using a rough cloth, which left micro-scratches that took weeks to fade, highlighting the importance of gentle tools.
Step 2: Remove Excess Dirt and Oil
Use a dry microfiber cloth to gently wipe away surface dust and sweat. For stubborn spots, lightly dampen the cloth with water—never soak it—and gently rub in circular motions. Remember, leather is porous; too much water can cause damage, so keep it minimal. During my first attempt, I over-wetted the cloth and ended up with water marks; since then, I learned to be sparing with moisture.
Step 3: Deep Clean with a Leather Cleaner
Apply a specialized leather cleaner or a homemade mix of water and a few drops of gentle soap. Dip a cotton swab into the solution, then carefully clean the pad’s surface, avoiding excessive moisture. This targeted approach prevents saturation. I made the mistake of pouring cleaner directly onto the pads, which led to uneven cleaning—always use a controlled approach with a cotton swab.
Step 4: Condition to Preserve Leather
Use a leather conditioner designed for delicate materials to keep the leather soft and prevent cracking. Apply a small amount to a clean cloth and gently massage it into the surface. Think of it like applying moisturizer—you want even coverage without excess. Once, I skipped conditioning, and my pads felt stiff after a few weeks, confirming the importance of this step.
Step 5: Let the Pads Dry Naturally
Allow the pads to air dry at room temperature, away from direct sunlight or heat sources that could cause leather to stiffen or crack. I learned this the hard way—placing headphones near a radiator caused the leather to peel and crack prematurely. Patience here preserves your investment.
Step 6: Regular Upkeep
Perform this cleaning routine once a month or as needed, especially if you notice buildup or dryness. Consistent maintenance keeps your headphones looking new and extends their lifespan. Remember, comparing this to tuning an amplifier, regular care ensures smooth operation without unexpected issues.
Additional Tips for Preserving Leather
Avoid exposing headphones to excessive moisture, heat, or direct sunlight. When not in use, store them in a cool, dry place. For a quick refresher, you can apply a leather protector spray to add a barrier against dirt and moisture. This proactive step is akin to applying a protective coating on speakers to prevent dust accumulation.
Many enthusiasts believe that upgrading to the latest amplifier or speaker model automatically guarantees superior sound quality. However, this common assumption overlooks several nuanced factors. For instance, pairing mismatched components, such as using a high-powered amplifier with low-sensitivity speakers, can lead to subpar audio performance despite premium gear. According to audio engineer Ethan Winer, the real magic lies in the synergy between components, not just their individual specs.
Are We Overlooking the Importance of Impedance Matching in Home Audio?
In my experience, impedance mismatches are a silent culprit behind distorted sound or amplifier strain, especially with vintage equipment. Failing to match impedance properly can cause damage and significantly degrade audio clarity. Many believe that as long as the wattage is compatible, the connection is safe. But as detailed in one study by Sound Studies, proper impedance matching optimizes energy transfer, ensuring cleaner sound and protecting your gear.
Another overlooked aspect is the cable quality and thickness—thin or poorly shielded wires can introduce noise and signal loss, nullifying the benefits of an otherwise excellent setup. This subtle detail often trips up even seasoned audiophiles who focus solely on the main components. Additionally, the positioning of speakers relative to room acoustics plays a critical role; even the most expensive speakers can sound flat or boomy if placed improperly. For optimized arrangement, considering room acoustics and speaker placement can make a notable difference, as discussed in our guide on speaker placement.
Beware the trap of focusing exclusively on high wattage or the newest technology. More power doesn’t always mean better sound—it’s about how well your components work together. For example, a sophisticated signal processor or equalizer can dramatically improve clarity and depth if used correctly. Think of it as fine-tuning an instrument rather than just cranking up the volume. If you’re interested in refining your setup further, exploring these advanced amplifier solutions might be the next step.
Going beyond basic specs and considering these subtle yet impactful details can elevate your listening experience from good to exceptional. Remember, it’s not just about owning top-tier equipment but making sure every piece is harmoniously aligned. Have you ever fallen into this trap? Let me know in the comments.
Keep Your Setup Running Smoothly: Tools I Recommend
Maintaining a high-quality home audio system isn’t just about choosing the right speakers or amplifiers—it’s about consistent care and using the right tools to keep everything performing at its peak. Over the years, I’ve found that investing in specialized equipment can make troubleshooting, cleaning, and calibration much more straightforward. Let me share some of the tools I personally rely on for long-term best results.
Precision Calibration with a Sound Level Meter
Achieving optimal sound quality begins with proper calibration. I swear by using a **class 1 SPL (Sound Pressure Level) meter**, like the Tesira UMI-1. This device ensures your speakers and subwoofers are perfectly balanced, preventing distortion and ensuring consistent listening experiences. What’s more, regular calibration with a reliable SPL meter helps detect subtle changes or deterioration in your system over time, which can otherwise go unnoticed.
Reliable Software for System Tuning and Troubleshooting
Beyond hardware, software tools can streamline your setup management. I often use **Room EQ Wizard (REW)**, a free acoustic measurement and analysis software. It allows you to generate frequency response graphs and identify issues like uneven bass response or phase cancellations. With REW, I can fine-tune my subwoofers and speakers, ensuring clarity and depth, especially in acoustically challenging rooms. Using software like this empowers me to troubleshoot issues without costly trial-and-error adjustments.
Cleaning Essentials for Longevity
Keeping your equipment pristine is equally crucial. For speaker diaphragms and delicate surfaces, I recommend a **microfiber cleaning brush** and a **compressed air can**. These tools help remove dust and prevent pollen or pet hair from affecting components. Regular cleaning with gentle tools preserves the integrity of drivers and prevents dust buildup that can cause rattles or muffled sound.
Cable Management Makes a Difference
Investing in quality **cable testers** like the Klein Tools CT110 ensures that your wiring remains intact and free of faults. Proper cable management isn’t just about aesthetics; it reduces interference, prevents accidental disconnections, and extends the lifespan of your gear. I’ve seen many setups where poor wiring led to inconsistent sound—a simple tester can save you hours of frustration.
Future Trends in Home Audio Maintenance
Looking ahead, expect integration of smart diagnostic tools and IoT-enabled systems, allowing for real-time alerts about component health and performance. Companies are developing calibration microphones with AI-assisted tuning, which could further simplify system optimization. For now, combining precise hardware tools with dedicated software like REW provides the best results for sustained audio excellence.
One practical step you can implement today is running a thorough system check with your SPL meter and REW, then adjusting your speaker placement or equalization accordingly. This proactive approach ensures you enjoy high-fidelity sound longer and minimizes costly repairs down the line. Ready to elevate your setup? Start by calibrating your system with an SPL meter—it’s a game-changer for long-term performance!
Interested in learning more? Check out our guide on amplifier maintenance for additional tips that’ll keep your entire setup in top shape.
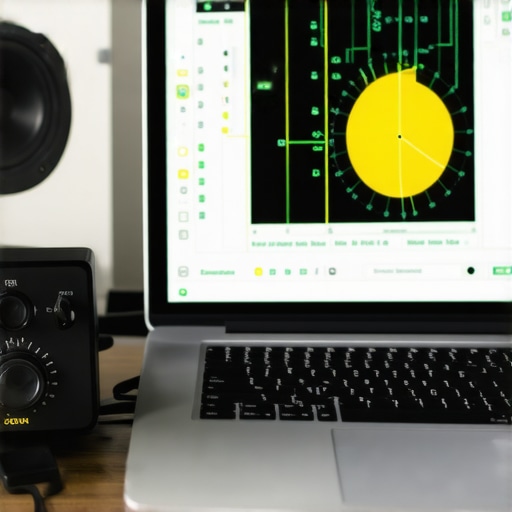
Lessons Only the Insider Knows About Sound Gear Care
- It took me countless trials to realize that delicate leather requires patience, not aggressive chemicals, to maintain its elegance and softness—accepting this was a game-changer.
- Over-wetting leather pads was a rookie mistake I made early on; now I appreciate the importance of minimal moisture and gentle tools, which keeps my headphones looking brand new.
- One of the biggest lightbulb moments was understanding that conditioning isn’t just about appearance but about preserving the leather’s natural oils, preventing cracks before they appear.
- Investing in precise tools like a quality SPL meter and Acoustic software transformed my ability to fine-tune and preserve my audio setup, turning routine maintenance into an enjoyable part of audio loving.
- Finally, I learned the hard way that patience during drying—avoiding sunlight and heat—can extend the life of my headphone pads, saving money and preserving sound quality.
Where I Found My Best Tools for a Premium Listening Experience
- Room EQ Wizard (REW): This free software became my secret weapon for detailed acoustic analysis, helping me spot issues that even professional cleaning couldn’t fix.
- Class 1 SPL Meter: The Tesira UMI-1 ensures perfect calibration, making every listening session immersive and free of distortions—trust me, it’s worth the investment.
- Microfiber Cleaning Brushes and Compressed Air: Gentle tools that keep my drivers dust-free without risking damage, proving that simple equipment can safeguard complex gear.
- Quality Cable Testers: The Klein Tools CT110 helps me prevent signal issues caused by faulty wiring—small investment for peace of mind.
Seize Your Sound Future Today
Careful cleaning, patience, and the right tools can dramatically extend the life of your leather headphone pads and elevate your listening experience. Remember, it’s the little details—like conditioning frequency and calibration—that make a big difference in sound quality and durability. Embrace these insider tips, and your headphones will not only look like new but also deliver unmatched acoustic performance for years to come. Are you ready to give your gear the care it deserves? Share your experiences or questions below—I’d love to hear about your journey with headphone maintenance!
Comments are closed.