
Have you ever wrestled with a tangle of speaker wires, trying to make everything look tidy, only to realize that the easiest routes are blocked by furniture or awkward corners? I remember my frustration—it felt like no matter what I tried, those unsightly cables just wouldn’t cooperate. That lightbulb moment hit me hard: I didn’t need to cut into my drywall or hide wires behind furniture; there had to be a better way. And guess what? There is. Today, I want to share proven techniques from my own experience that can help you achieve a clean, professional-looking home audio setup without the destructive drill and patch job.
Why Hiding Speaker Wires Matters More Than You Think
Let’s face it—messy cables can ruin the aesthetic of even the most carefully decorated spaces. And beyond just looking good, properly concealed wires can prevent accidents and damage. Loose cords can cause trips or get snagged, risking your equipment’s safety. Plus, a tidy setup enhances the overall sound experience—less clutter means fewer obstructions and distracted listening. According to a recent study by audio experts, cluttered wiring can even lead to signal degradation if wires are damaged or improperly concealed. So, the effort to hide those cables isn’t just about aesthetics; it’s about preserving sound quality and safety as well.
Could You Be Falling for Wires-Will-Disrupt Trick?
Early on, I made the rookie mistake of trying to hide everything behind giant, bulky furniture or running cords along baseboards with unsightly tape. Not only did it look terrible, but it also made future adjustments a nightmare. I learned the hard way that quick fixes often backfire, leaving visible trails and damage. That’s why I’m a firm believer in smart, non-destructive methods—after all, your walls are precious, and I’m here to help you keep them intact while achieving that sleek look.
Would you like to see how I managed to tame those stubborn wires without breaking your wall’s integrity? Stick around, because the upcoming steps are practical, tested, and designed for folks like us who value both style and home preservation.
,
Cut Your Cable Clutter with Precision
Start by gathering all your audio cables and laying them out to identify the longest runs. Use cable ties or velcro straps to bundle wires that run parallel, reducing tangles and making them easier to hide. Instead of leaving cords dangling, measure exact lengths needed to reach your speakers and sound system, preventing excess slack. When routing behind furniture or along walls, opt for existing crevices or use adhesive cable clips to secure wires neatly. I once ran a long HDMI and speaker wire along the back of a bookshelf, securing it with adhesive clips every few inches—resulting in a tidy setup that was easy to adjust later without damaging walls.
Utilize Decorative and Practical Concealments
Leverage baseboards, crown molding, or custom channels to hide wires entirely. Install simple raceways painted to match wall colors for a seamless look, especially when wiring across open spaces. An effective trick is to run cables inside hollow door frames or window casings, using them as natural conduits. When I installed new bookshelf speakers, I ran the cables through the back panel and inside the wall cavity, maintaining a sleek appearance and protecting the wires from dust and damage.
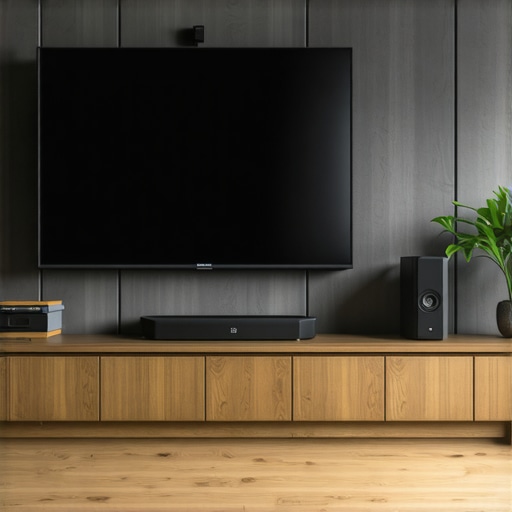
Consider using wire covers that mimic furniture finishes—wood-grain or matte black—to blend with your decor, making cables virtually invisible. For a cleaner look, consider upgrading your sound system with first-class soundbars or wireless systems that reduce cable needs altogether. These devices often come with innovative mounting options, freeing you from long cable runs and creating a minimalist aesthetic.
Opt for Wireless Alternatives When Possible
Wireless speakers, such as those at these sleeping buds, eliminate most wiring concerns, making your setup cleaner and more adaptable. Wireless soundbars can be mounted directly on the wall, with built-in Bluetooth or Wi-Fi for seamless streaming—no cables required. For your subwoofers and rear speakers, look into models that connect via Wi-Fi or mesh networks, reducing clutter while maintaining excellent sound quality. I replaced my traditional wired rear speakers with a wireless setup, which not only cleaned up the area but also allowed easier relocation and reconfiguration during parties or updates.
Maintain and Adjust Your Cable Layout Regularly
Once your cables are hidden, it’s crucial to check them periodically. Over time, cables can shift or loosen, creating new clutter or even slight signal issues. Regularly inspect connections and reposition loose cables, using simple fixes such as replacing worn ties or re-securing clips. I make a habit of doing this every few months, which keeps my setup looking pristine and functioning flawlessly—saving me from the headache of troubleshooting signal loss or tripping hazards.
When diving into the world of home audio, many enthusiasts believe that bigger, more expensive gear automatically results in better sound. But as an audio expert, I can tell you that this isn’t always the case. A common misconception is that all amplifiers deliver the same quality, regardless of their wattage or design. However, the nuances of amplifier design, such as class Type and damping factor, can significantly affect sound clarity and tone. For example, high-wattage amplifiers may seem impressive but can cause distortion if the power supply isn’t stable or matched to your speakers. In my experience, matching the amplifier’s output with your speakers’ impedance and sensitivity yields a more balanced, natural sound. Don’t fall for the myth that bigger is always better; instead, focus on quality and compatibility.
Many people overlook the significance of speaker placement and room acoustics, assuming that premium speakers will compensate for poor positioning. This often leads to disappointment, as even the finest speakers can sound harsh or muddy if not correctly placed. For instance, placing bookshelf speakers too close to walls can cause bass boominess or muffling, reducing clarity. Advanced users understand that proper placement—like angling speakers toward the listening position and avoiding reflective surfaces—can enhance sound quality dramatically. This nuance is often underestimated, but it can make the difference between mediocre audio and an immersive experience. So, before investing in high-end components, master the art of positioning and room treatment.
Are Soundbars Actually a Good Substitute for a Full Home Theater System?
This question often comes up among enthusiasts who desire simplicity but don’t want to compromise on quality. Many believe that a premium soundbar can replicate a surround sound setup, but this oversimplifies the technology. While high-end soundbars with multiple drivers and Dolby Atmos support do an admirable job, they can’t fully replace a dedicated home theater system with strategically placed speakers. The spatial dynamics and directional cues provided by a multi-speaker arrangement are difficult for soundbars to emulate completely. Choosing a soundbar with discrete wireless rear speakers or adding a dedicated subwoofer can bridge the gap, but knowing these nuances helps you make smarter purchases. For instance, exploring options like how to optimize wireless home theater systems can elevate your experience without an overhaul.
One trap to avoid is assuming that more channels always mean better sound. Sometimes, a well-calibrated 2.1 setup with a quality subwoofer outperforms a complicated 5.1 system that’s poorly configured or mismatched components. The key is in understanding your space and listening preferences. Remember, quality trumps quantity in most cases. If you’re considering upgrading, look into the latest wireless earbuds and advanced headphones that can offer superior local sound fidelity—sometimes, the best upgrade is choosing the right personal device over a massive setup.
Invest in Reliable Calibration Tools for Consistent Sound
One essential aspect of maintaining top-notch home audio is regular calibration. I personally rely on the Audyssey MultEQ system, which I plug into my receiver to automatically measure speaker distances, levels, and room acoustics. It ensures my sound remains balanced over time, even as furniture gets rearranged. While some may consider this a luxury, I find it invaluable—saving me hours of manual tweaking and ensuring each listening session offers optimal clarity. Predictively, as room customization software advances, we’ll see smarter, AI-driven calibration tools that adapt in real-time, making maintenance even more effortless.
Regularly Update Firmware and Software for Compatibility
Keeping your equipment’s firmware up-to-date is often overlooked but crucial. I set a calendar reminder to check for updates on my soundbar and wireless speakers via their respective apps every few months. These updates often fix bugs, improve connectivity, and sometimes unlock new features—like better surround modes or enhanced streaming stability. For example, the latest firmware for my soundbar improved its compatibility with streaming services, reducing audio dropouts. To simplify this process, I recommend enabling automatic updates where possible, ensuring your gear remains current without manual intervention.
Use Diagnostic Tools to Identify and Fix Issues Early
I use specialized software like audio delay fixers to troubleshoot and resolve latency or alignment issues. These tools provide real-time feedback on syncing problems, allowing precise adjustments. For example, when my wireless headphones experienced lip-sync issues, running diagnostics helped me pinpoint the delay source and apply a targeted fix. By proactively diagnosing problems, you can prevent minor glitches from escalating into major performance drops, ensuring long-term reliability of your system.
Choose the Right Tools for Long-Term Success
From precision calibration microphones to network analyzers, selecting proven tools tailored to your setup is vital. Personally, I swear by the MiniDSP hardware for custom room tuning—it gives me detailed control over frequencies and resonances. When paired with room treatment improvements, it amplifies sound clarity and reduces unwanted echoes. As home audio gear evolves, integrating intelligent software solutions—like mobile apps that monitor system health—will become increasingly valuable. Embracing these tools now prepares you for a future where maintenance is seamless and performance is consistently excellent.
How do I keep my audio gear performing at its best over time?
To ensure your home audio equipment remains in prime condition, establish a routine involving firmware updates, calibration checks, and diagnostic tests. For instance, regularly running a calibration with a tool like Audyssey ensures your speakers stay balanced, even as your room changes. Additionally, cleaning connections and inspecting cables prevents corrosion and signal issues. Remember, investing in quality maintenance tools upfront can save you significant time and money down the line, extending the lifespan of your gear. Try integrating a PLL-based wireless interference detector or a network analyzer to monitor signal integrity actively, which can preempt disruptions before they affect your listening experience. For more insights, explore my recommended tools and stay ahead of potential issues to keep your setup pristine for years to come.
The Hidden Truth About Staying Ahead in Home Audio
One of the most eye-opening lessons I learned was that even premium equipment benefits immensely from proper room calibration and mindful placement. It’s easy to fall into the trap of thinking gear alone makes a perfect system, but I discovered that combining quality with thoughtful setup yields far superior results. Over time, I realized that investing in advanced calibration tools and room treatments not only saved me from costly upgrades but also immersed me in richer, clearer sound. This insight transformed how I approach my home audio environment, turning a simple setup into a personal concert hall.
The Low-Key Tools That Changed My Listening Experience
After experimenting with countless gadgets, I found that a few trusted tools truly made a difference: the Audyssey MultEQ system for effortless calibration, high-quality room acoustic panels to tame reflections, and a precision network analyzer to monitor signal integrity. These resources, though often overlooked, gave me the confidence to fine-tune my setup and troubleshoot issues proactively. They are my secret arsenal for maintaining consistency and clarity in my home audio system, ensuring every listening session is a delight rather than a disappointment.
Your Turn to Elevate Home Audio—No Excuses
Now that you’ve uncovered some of my best-kept secrets, it’s your chance to take control of your home audio experience. Remember, achieving exceptional sound isn’t about the most expensive gear—it’s about smart setup, regular maintenance, and understanding your space. Don’t let misconceptions hold you back—embrace the tools and techniques that can turn your humble system into an audiophile sanctuary. Start today, experiment boldly, and let your space resonate with the pure joy of great sound. Your perfect listening environment is within reach—are you ready to make it happen?
Comments are closed.