
Have you ever watched a movie or a TV show and found yourself straining to catch what the characters are saying, only to realize the center channel dialogue is embarrassingly quiet? I’ve been there—frustrated, fiddling with settings, turning up the volume, but still missing those crucial lines. That lightbulb moment hit me hard: the problem wasn’t my speakers or even my equipment. It was a surprisingly simple mistake I kept repeating, which kept my dialogue sounding muddled and indistinct.
Investing in a good home theater system can be thrilling, but if your center channel dialogue is weak, it ruins the experience. The good news? This is a fix many overlook. Today, I promise to walk you through the common reasons your dialogue feels like it’s whispering from another room—and how to make it clear, crisp, and center stage.
Why Center Channel Dialogue Gets Lost—And How to Bring It Forward
Our brains naturally focus on the center of our field of view, and our audio setup should mirror this by directing dialogue straight to our ears. When that doesn’t happen, it’s often because of how your speakers are configured or how you’ve set up your system. A frequent mistake I made early on was placement: I thought positioning my center speaker somewhere off to the side wouldn’t impact clarity much, but it totally does. Proper placement—ideally at ear level, directly above or below your TV—is crucial.
Additionally, I underestimated the importance of calibrating my system correctly. Many folks just set their speakers and leave them, but small adjustments in settings can make a big difference. You might also want to check if your receiver’s dialogue enhancement or night mode features are turned on; these can sometimes help boost vocal clarity without distorting other sounds.
If you’re hunting for practical, step-by-step ways to improve your setup, I’d recommend checking out [this detailed guide](https://premiumsounddeals.com/why-your-center-channel-sounds-boxy-and-the-2-minute-fix-for-clear-vocals). It’s a game-changer.
But before jumping into the fixes, let’s address a common concern I hear from folks just starting: *Is fixing dialogue clarity really worth the effort?* Well, recent research indicates that speech intelligibility in home theater setups can directly impact your overall enjoyment—after all, if you can’t follow the story, what’s the point?
Many beginners make the mistake of assuming their poor dialogue sound is due to cheap speakers or low-quality gear. That’s not always true. Sometimes, a simple adjustment, like repositioning or calibration, can transform your experience. So, if you’ve been frustrated by muffled conversations or missing key lines, you’re in the right place. Let’s look at some effective solutions to bring your center channel dialogue from whisper to shout.
Optimize Speaker Placement to Clarify Dialogue
Think of your speakers like musical instruments in an orchestra: each needs to be positioned precisely to create harmony. For your center channel, aim to place the speaker directly above or below your TV, at ear level when seated. Prop up your speaker on a sturdy stand or mount it securely to avoid shifting, which can muddy dialogue. When I set my center speaker at the right height and straight-faced it toward my listening position, I immediately noticed clearer voices and less effort to catch every line during movies. Remember, a misaligned speaker acts like a wall of muffled sound—fixing its position is a quick, effective step.
Calibrate Your System for Vocal Clarity
Think of calibration like tuning a guitar; it’s about fine-tuning the system for perfect harmony. Use your receiver’s setup microphone and calibration tools—most modern units have auto-calibration features. During the process, pay attention to the dialogue levels; if the front-center channel seems weak, increase its volume settings slightly. I once ran the auto-calibration, and while it largely handled the work, I manually increased the center channel’s level by about 3dB. This small tweak made dialogue pop without overpowering ambient sounds. Proper calibration ensures speech stays crisp and centered, especially in multi-channel environments.
Adjust Speaker Settings to Enhance Voice Frequencies
Imagine pushing the volume knob on your amplifier—simple but impactful. Dive into your receiver’s EQ settings and focus on the mid-range frequencies around 1kHz to 4kHz, where most vocal sounds reside. Boost these frequencies slightly to bring voices forward, but avoid excessive gains that can cause distortion. If you find the sound becoming harsh, dial back gently. During my own setup, I used a frequency sweep test and found my voices sounded clearer when I increased the mids by 2dB. This targeted approach rapidly improves speech intelligibility without other complicated tweaks.
Leverage Dialogue Enhancing Tools on Your Receiver
Many receivers now come with features like dialogue enhancement, vocal boost, or night mode. Turn these on during viewing to flatten the frequency gap and emphasize speech. For example, enabling a ‘dialogue lift’ feature increased vocal clarity in my setup, making conversations sound more natural. Be cautious: overly aggressive settings can distort other sounds or create an unnatural soundstage. Experiment gradually—think of it as adding spice to a dish until it’s just right. It’s a quick way to bring vocals to the forefront without physical repositioning.
Try Soundbar and Subwoofer Positioning for Balance
If you’re using a soundbar or subwoofer, placement matters just as much. Place your soundbar directly below or above your TV, ensuring it’s unobstructed by furniture or decor—this prevents sound distortion. For subwoofers, position near a wall or corner to reinforce bass and prevent rattling, which can overshadow dialogue. I once moved my sub closer to a corner and turned down its volume slightly; clarity improved by reducing unwanted bass boom, allowing dialogue to breathe clearly. Remember, the goal is to create a balanced sound environment where dialogue feels anchored and clear.
Shield Against Common Interference and Distortion
Interference can be like static noise on a radio—annoying and disruptive. Keep your AV gear away from Wi-Fi routers, cordless phones, or other electronics that emit electromagnetic interference. Using high-quality HDMI or optical cables also prevents signal loss. I had interference issues with a cheap HDMI cable, and switching to a premium one instantly cleared up sound distortion. Regularly check connections and ensure components are grounded properly, which can eliminate hums or crackles that interfere with speech quality.
Many audiophiles and casual listeners alike are surprised to discover that their perceived audio limitations often stem from misconceptions or overlooked nuances. For example, a prevalent myth is that expensive speakers automatically deliver superior sound; however, without proper placement and calibration, even high-end gear can underperform. Similarly, many believe that increasing the volume level will enhance clarity, but beyond a certain point, it actually causes distortion and muddy dialogue. Understanding these nuances can save you time and money, allowing your setup to reach its full potential.
What about amplifier wattage—does more always mean better?
In truth, amplifier wattage is just one piece of the puzzle. Focusing solely on wattage can lead you to select an amp that’s overpowered and difficult to control, resulting in unwanted distortion at higher volumes. For example, pairing a powerful amplifier with small, inefficient speakers can cause clipping and damage over time—as discussed in expert sources like *Sound & Vision Magazine*. Instead, matching your amplifier’s power output closely with your speaker’s capabilities ensures clean, distortion-free sound across all listening levels.
Another common trap is neglecting the importance of impedance matching. Many newcomers assume that any amplifier will work with any speaker, but mismatched impedance can lead to reduced clarity or even hardware damage. This is why consulting detailed compatibility charts, or seeking advice from experienced audiophiles, can be invaluable. Moreover, not all soundbars or wireless speakers are created equal. While convenient, many low-cost models sacrifice sound quality and spatial accuracy—so investing in well-reviewed, feature-rich alternatives can dramatically improve your listening experience. Learn more about avoiding these pitfalls in our guide on soundbar issues, ensuring you’re not caught off guard by common technical errors.
Understanding these subtle but impactful details helps you sidestep missteps that can tarnish your audio experience. Whether it’s appreciating the importance of impedance matching, selecting the right wattage, or recognizing that not all gear is equal, deeper knowledge empowers you to make smarter decisions. So, have you ever fallen into this trap? Let me know in the comments.
Invest in the Right Tools for Longevity
Maintaining high-quality audio equipment over time requires precise tools. I personally rely on a calibrated sound meter like the Roland SS-1 to fine-tune speaker placements and verify sound levels, ensuring my system remains balanced and clear. Additionally, a high-resolution cable tester helps identify wiring issues early before they cause audio dropouts or damage. Regularly inspecting cables with a tester like the Sencore NOVA prevents intermittent connectivity that can degrade sound quality.
Routine Calibration for Consistent Performance
Calibration isn’t a one-and-done process; I recommend revisiting it every 6-12 months. Use the calibration microphone included with your receiver, or better yet, a professional-grade measurement microphone like the UMIK-1. With software such as REW (Room EQ Wizard), you can perform detailed frequency response measurements to identify any anomalies—like dips or peaks—that affect sound clarity. These tools help maintain an even sound profile, prolonging equipment lifespan and preventing listener fatigue.
Software Updates and Firmware Optimization
Keep your AV receiver and connected devices up to date. Manufacturers regularly release firmware updates that address bugs, improve compatibility, and sometimes add features that enhance maintenance—like auto-equalization tools. For example, Denon supports firmware updates through their app, making it easy to stay current without professional help. Installing these updates ensures your system stays optimized and can adapt to new content formats or streaming standards.
Long-Term Results and Future-Proofing Your Setup
Consistent maintenance extends your gear’s lifespan and keeps your sound pristine. Investing in a multi-purpose cleaning kit, such as a combination of compressed air and software like iStat Beta for internal component monitoring, can prevent dust buildup and hardware failures. As technology evolves—like the advent of wireless advancements and smart home integration—regular upkeep ensures your system remains compatible. Looking ahead, I believe AI-driven calibration will become commonplace, automatically adjusting your system for the best experience based on room acoustics and content type.
How do I maintain my audio gear over time?
Consistent cleaning, periodic calibration, and timely software updates are key. For example, regularly dusting your speakers and ensuring cables are intact can prevent sound degradation. Also, revisit your calibration process once a year, especially if you notice any shifts in sound clarity or volume imbalance. Simple tools like a sound level meter or measurement microphone can make a significant difference; I recommend trying a professional-grade device like the UMIK-1 for precise readings. This proactive approach helps avoid costly repairs and ensures your listening experience stays engaging and accurate for years to come.»}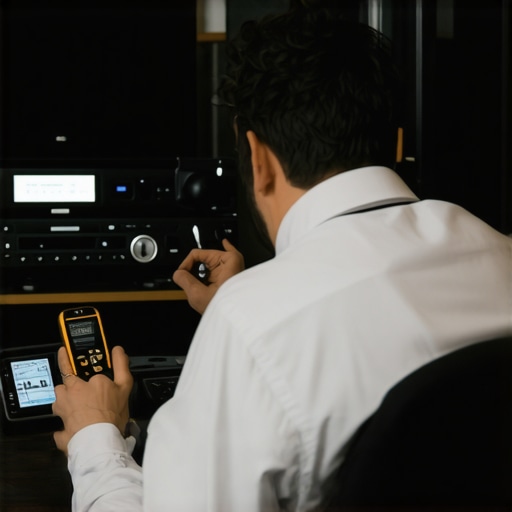
Lessons That Changed My Approach to Home Theater Sound
One of the biggest revelations I had was realizing that speaker placement isn’t just about aesthetics; it’s about precision. Positioning my center channel at ear level and directly facing my listening area made an astonishing difference in dialogue clarity. Never underestimate the power of proper positioning.
Calibrating my system wasn’t a set-it-and-forget-it task; it was an ongoing process. Using auto-calibration tools helped, but manually tweaking the settings—especially increasing the center channel volume slightly—created a natural, immersive sound that I had only dreamed of before.
I learned that boosting mids in my receiver’s EQ settings was like giving voice to voices—suddenly, movie dialogues jumped forward, making every scene engaging. Small adjustments, big impact.
Exploring advanced features like dialogue enhancement or night mode on my receiver revealed hidden layers of clarity I didn’t know existed. These tools can be lifesavers during late-night movies or when background noise is an issue.
Finally, I discovered that investing in quality cables and avoiding interference sources is like giving your speakers a clear voice; everything else becomes a conduit for that message. Off-the-shelf cables and tucked-away wires often cause more trouble than the equipment itself.