
Have you ever pulled out your headphones, only to be met with a wild, twisted mess of cables? I remember the exact moment. I was rushing out the door, headphones in hand, trying to escape the chaos of my morning, when I finally gave up untangling a snarled knot that seemed to have a life of its own. It was frustrating, a total time sink, and honestly, it made me question whether the convenience of wired earphones was worth the constant battle against tangles. And that lightbulb moment? I realized that this seemingly minor annoyance was actually a sign of a bigger issue—and I was determined to find a fix that would stick.
The Frustration of Tangled Cables and Why It Matters
Anyone who uses wired headphones knows the dread of pulling them out of your pocket or bag, only to be greeted by a tangled nest. It’s more than just an annoyance; it’s a productivity killer and can even damage your headphones over time. Plus, a tangled cable can be a real safety risk, especially if you’re walking or commuting and suddenly need your earbuds. While some folks dismiss it as just a minor inconvenience, a tangled, knotted cable is actually a symptom of a deeper design flaw—poor cable management and usage habits—something I learned the hard way early on.
The good news? There are straightforward, effective solutions that can eliminate this mess for good. I’ve tested plenty of hacks and gadgets, and I can confidently say that breaking the cycle of tangles is easier than you think. In fact, a simple technique I’ll share shortly changed the way I manage my headphones—and it might do the same for you. So, if tangled cables have been your constant nemesis, stick around—I’m about to show you a permanent fix, backed by personal experience and a dash of expert insight.
Is This Really Worth It? The Skeptic’s Viewpoint
I’ll admit, I was skeptical at first—believing that no matter what tech I tried, tangles would always come back. Early on, I made the mistake of buying those fancy $20 cable clips or wrapping my cables in elaborate knots—only to find the mess reappeared within a day or two. Trust me, I learned that some solutions are just temporary patches. The real fix requires understanding how cables behave and adopting a method that works with, not against, their natural tendencies. Want to avoid the same pitfalls? Read on, and I’ll guide you through the method that finally stuck for me, and many others.
If tangled headphone cables have been driving you nuts, you’re not alone. And yes, there is a way to end this forever. Want a quick tip before we dive in? Check out how proper cable winding can actually prevent this mess from forming in the first place, just like it does for premium gear (see more on channel dialogue calibration). Next, I’ll walk you through the method I swear by—simple, practical, and built on real-world testing. Let’s get started!
Choose the Right Carrying Method
During a hectic morning, I once shoved my tangled headphones into my pocket without thinking. Later, when I reached for them, I was greeted by a snarled mess that took five minutes to untangle. To avoid this, start by selecting a consistent way to store your headphones. Using a small pouch or dedicated case keeps the cables contained and reduces the risk of tangling. Think of it like packing your cables tightly like a silk scarf—smooth, neat, and ready for easy deployment.
Implement the Classic Over-Under Technique
This method is a game-changer. I vividly remember my first attempt in my bedroom, meticulously winding my headphones using the over-under method. It involves creating loops with a natural twist, which prevents the cable from twisting and tangling later. To do it, hold the connector in one hand, create a loop, then twist it before making the next loop, repeating until the cable is coiled. This technique mirrors how professional audio engineers handle cables during setup, ensuring longevity and tangle resistance. Once you get the hang of it, you’ll find it’s faster than crumpling your cables randomly.
Secure the Loop Properly
After winding, securing the cable is crucial. I recommend using a simple twist tie or a velcro strap—think of it as giving your cable a gentle hug. Be cautious not to tighten too much, which can damage the internal wires. In my experience, a loose but firm hold maintains the coil shape and prevents the cables from unraveling in your bag, just like seasoned travelers keep their luggage neat. For an extra layer of protection, some swear by small rubber bands or specialized cable clips, but the velcro strap is my go-to for convenience and reliability.
Store Cables in a Consistent Spot
Consistent storage reinforces good habits. I dedicated a small drawer for my headphones, where I always place the coiled cables. It’s like returning to a designated parking spot—your cables know where they belong, reducing the temptation to toss them haphazardly. Moreover, storing cables properly during periods of non-use increases their lifespan, ensuring they won’t develop internal breaks or lose sound quality over time.
Practice Regular Maintenance and Rewinding
Even with proper wrapping, cables need periodic attention. Every couple of weeks, I unwind and inspect my headphones, replacing worn sections or re-coiling them with care. Think of this like a gardener pruning branches—it keeps everything healthy and tangle-free. Developing this habit prevents the buildup of knots and ensures your headphones are always ready for action, without the dreaded morning delay.
Leverage Helpful Accessories When Needed
If you’re still struggling, consider investing in accessories like cable winders or retractable cords. For instance, I’ve tried portable cable reels that neatly spool and unspool at the push of a button. These gadgets are like having a personal assistant for your cables—keeping them tidy and ready whenever you need them. For more tech-savvy options, some companies now design magnetic cable management clips that hold excess cable in place, reducing slack and tangles. Incorporating such tools can turn a messy routine into a quick, satisfying process.
Recognize the Power of Habit
Finally, routine is everything. Every time I pick up my headphones, I consciously repeat the winding and storing process. Over time, it became second nature—much like how musicians develop muscle memory. This habitual approach not only minimizes tangles but also extends the life of your cables, saving you money and frustration. Remember, small, consistent actions compound into significant improvements when it comes to cable management.
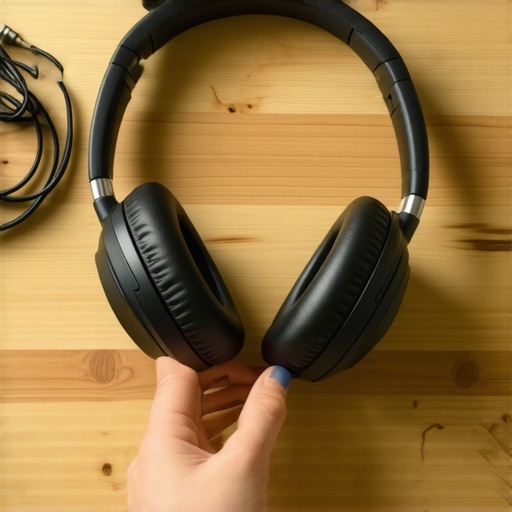 When it comes to home audio, many enthusiasts and first-timers alike share common misconceptions that can hinder their listening experience. One widespread myth is that purchasing the most expensive speakers automatically guarantees premium sound quality. While high-end gear can deliver exceptional audio, studies show that room acoustics and proper setup are often more critical factors—so investing in good placement and calibration should be a priority. Additionally, many overlook that different genres of music or movie content benefit from specific speaker characteristics; a bookshelf speaker with limited bass might struggle with orchestral music but excel in dialogue clarity, underscoring the importance of matching equipment to your usage. An advanced mistake is assuming that more watts or a higher power rating always translate into better sound. In reality, a mediocre amplifier with high wattage can distort at high volumes, and pairing an underpowered amp with large speakers leads to muddled sound and potential damage. As speaker expert Ethan Winer emphasizes, “amp wattage isn’t the be-all and end-all—quality, matching, and calibration matter more.” Be cautious of the trap of buying flashy cables or sound-enhancing gadgets, which often deliver little value for their price and can even degrade audio quality if not applied correctly. External copper cables might seem superior, but a well-made but inexpensive digital cable can outperform a costly gold-plated one, especially when the core audio signal is digitized. For advanced listeners, understanding room modes and speaker placement is vital. Even the best audio gear can sound flat or boomy if placed poorly. A practical rule is to keep speakers at ear level, avoid corners, and experiment with angles—triggering a noticeable improvement in clarity and depth. Still, many forget these nuances, leading to subpar sound despite their investments.
How does room acoustics influence high-end audio clarity, beyond just choosing the right equipment?
Room acoustics dramatically affect how sound waves interact within your space. Reflective surfaces like glass and bare walls cause echoes, muddying the clarity of even the most expensive speakers. Conversely, absorptive and diffusive treatments can enhance soundstage, making your audio feel more immersive. Even experts agree that neglecting room treatment can nullify the benefits of high-end gear. Investing in bass traps, diffusers, or even simple rugs can transform your listening experience in ways that equipment upgrades alone cannot match. Don’t just focus on the hardware—consider the environment. If you’re interested in how to get your home setup to excel, check out the essential checklist for buying used audio gear and optimizing room acoustics.
Essential Tools for Optimal Sound System Maintenance
Keeping your sound gear in top shape isn’t just about cleaning—it involves using the right tools that protect and preserve your investment. I personally swear by a non-abrasive microfiber cloth for regular wipe-downs, which prevents dust buildup that can compromise sound clarity. For deeper cleaning of connectors and ports, I use a high-quality contact cleaner like DeoxIT D100L, which effectively removes oxidation without damaging delicate components. Additionally, a digital multimeter helps me verify cable integrity and detect subtle wiring issues, ensuring everything functions as intended. Having these tools at hand means I can perform quick checks or routine maintenance without complications, prolonging the lifespan of my equipment.
Implementing Effective Software Solutions
Beyond physical maintenance, software calibration plays a vital role. For example, I rely on REW (Room EQ Wizard), a free frequency analysis tool, to measure how my speakers interact with my room. By analyzing frequency response and identifying issues like room modes, I can apply targeted equalization that dramatically improves sound quality. Regular room and system calibration ensure that my home setup adapts to changing conditions—important as furniture or decor shifts over time. Tech like Dirac Live and Audyssey MultEQ are user-friendly options that automate this process, but I prefer doing manual tweaks with REW for granular control. This combination of hardware checks and software fine-tuning keeps my setup performing at a professional level.
How do I maintain amplifier and speaker performance over time?
Maintaining your amplifiers and speakers involves periodic inspection of cables, ensuring proper ventilation, and monitoring device temperatures. I make it a rule to check connections monthly, looking for corrosion or loose fittings, which can cause distortion or signal loss. Using a thermal gun helps me verify that my amplifier doesn’t overheat during extended use—excessive heat can degrade internal components long-term. Additionally, applying a few drops of contact lubricant on connector ports prevents corrosion, especially in humid environments. For speakers, I verify that the mounting hardware isn’t loosening and that the drivers move freely without obstruction. By being proactive and attentive, I ensure that my gear delivers consistent, high-quality sound every time I press play.
In the future, I believe smart maintenance systems integrated with IoT sensors could notify us of issues before they impact performance, making home audio preservation even smarter. For now, sticking to proven tools and routines, like regularly cleaning connections with contact cleaner and verifying cable integrity, is a reliable strategy. If you’re serious about keeping your sound system working flawlessly, I recommend trying a contact cleaner like DeoxIT along with a measurement tool like a multimeter — small investments for big gains in longevity. To learn more about cable and connection quality, check out this detailed guide on cables.
What I Learned From My Headphone Tangle Fiasco That Changed Everything
The biggest lesson was realizing that proper cable management isn’t just about neatness—it’s about preserving sound quality and extending the lifespan of my gear. I discovered that consistent winding techniques and smart storage habits prevent damage to internal wires, ultimately saving me money and frustration.
How I Transformed My Audio Setup with Simple Habit Changes
Incorporating routine checks using basic tools like contact cleaner and a multimeter dramatically improved my system’s reliability. These small actions pay off by ensuring peak performance and avoiding costly repairs, turning maintenance into a rewarding part of my audio journey.
Why Room Acoustics Are Often Overlooked—and How They Make All the Difference
I found that optimizing room placement and adding affordable acoustic treatments can unlock a new level of clarity. It’s a game-changer that many audiophiles neglect, yet it offers the most significant upgrade for your listening experience without buying new gear.
The Hidden Cost of Ignoring Your Gear’s Health
Regular maintenance, like inspecting connections and avoiding heat buildup, extends your system’s lifespan. These proactive steps resemble preventive healthcare—saving you from unexpected failures and ensuring consistent quality over years of enjoyment.
Curated Gems That Elevated My Audio World
- Room EQ Wizard (REW): A free tool that demystified my room’s acoustics, allowing precise calibration.
- DeoxIT Contact Cleaner: Trusted by professionals for cleaning connectors without damage.
- Basic Multimeter: An essential for verifying cable integrity and troubleshooting.
- Books like "The Audio Expert" by Ethan Winer: They provided insights that transformed my understanding of sound setup.
Your Journey to Better Sound Starts Now
You don’t need to spend a fortune or become an audio engineer to enjoy exceptional sound at home. By applying these lessons and staying curious, you’ll discover that improving your setup is both rewarding and achievable. Embrace the process—your ears (and wallet) will thank you.
What’s the first step you’re excited to try in elevating your home audio experience? Share your thoughts below!
,