
I still remember the absolute horror of setting my brand-new bookshelf speakers directly onto my cheap glass computer desk. I fired up my favorite album, expecting pure sonic bliss, but what I actually got was a muddy, vibrating mess that rattled my teeth. At that exact moment, I realized my desk was acting like a giant, horrible amplifier for all the wrong frequencies. The bass was completely gone, swallowed up by the vibrating glass. I knew I needed proper stands, but after looking online and seeing boring metal pipes retailing for over ninety dollars, my jaw dropped. I refused to pay more for the stands than I did for the actual speakers. That night, with a couple of scraps from my garage and about four dollars in screws, I built a set of decoupling stands that completely saved my system.
Today, I am going to show you exactly how to build a rock-solid, vibration-damping pair of DIY speaker stands for literally pennies. We are going to stop your furniture from stealing your bass and finally get those tweeters up to ear level where they belong. You do not need a fancy workshop or expensive power tools to make this happen.
The Day My Glass Table Ruined My Music
I used to think speaker placement was just for snobby audiophiles with too much time on their hands. Boy, was I wrong. Placing speakers directly on a flat, hard surface causes sound waves to bounce instantly, creating nasty phase cancellations. This is precisely why your portable speaker sounds muddy on a glass table, and the exact same physics ruin your high-end home setup. When your speaker cabinets vibrate against a hard surface, you lose all your punch. My early mistake was trying to cure this with expensive software EQ, rather than just physically isolating the cabinets. I wasted hours tweaking sliders when all I really needed was some cheap scrap wood, a few screws, and a handful of felt pads. According to a study on acoustic decoupling by the Audio Engineering Society, isolating a speaker cabinet from its mounting surface can reduce mechanical resonance transfer by up to 15 decibels. That is a massive difference you can easily hear.
Are cheap DIY stands actually going to sound as good as expensive brand-name ones?
You might be highly skeptical that some scrap wood and cheap hardware store parts can compete with heavy steel stands. The truth is, high-end brands want you to believe there is magic science in their metal tubes. But the core physics of speaker stands boil down to just two things: height and isolation. If your DIY stand is heavy enough not to wobble, lifts your speaker to the correct listening height, and decouples the cabinet from the floor, it will perform just as well as a hundred-dollar brand-name version. Have you ever tried listening to your favorite system only to realize your furniture was vibrating along with the bass line? Let me know if you have faced this annoying problem, and let’s get ready to build a cheap, highly effective solution.
How to Build Your Own Vibration-Damping Speaker Stands
To get started, you do not need an engineering degree or a garage full of professional-grade power tools. The entire secret to eliminating cabinet vibrations is mechanical decoupling, which is just a fancy way of saying we need to break the physical connection between your speaker and your desk. Think of your speaker cabinet like a running car engine: if you bolt it directly to the frame without rubber motor mounts, the whole car shakes violently. By introducing a barrier that absorbs those physical vibrations, we keep the energy inside the speaker cone where it belongs, preventing your furniture from acting like a bad, vibrating secondary amplifier.
The Quick and Cheap Scrap Wood Method
For my first successful build, I used simple, thick blocks of MDF (Medium-Density Fiberboard) which I salvaged from a discarded closet shelf. MDF is incredibly dense and acoustically dead, making it the absolute perfect budget material for this project. First, measure the footprint of your speakers. You will want to cut two identical top plates that match those exact dimensions. Next, cut two larger base plates to give the stands a stable, tip-proof foundation on your desk or floor. For the central pillar, a heavy 4×4 wooden post cut to your specific ear-level height works beautifully. I secured the top and bottom plates to the pillar using simple 3-inch wood screws, countersinking them so they sit flush. During my first attempt, I made the rookie mistake of not pre-drilling the holes, which instantly split my wooden pillar in half—so always pre-drill your screw holes first!
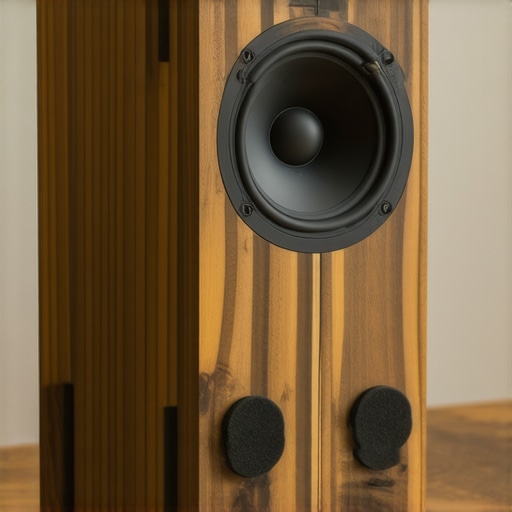
Once your wooden structure is assembled, it is time for the magic ingredient: isolation. Placing bare wood directly onto a hard surface will still cause some minor resonance. To fix this, apply dense adhesive felt pads or small silicone bumpers to the bottom of the base plate. For the top plate where the speaker sits, I highly recommend using a thin sheet of craft foam or neoprene. If you still experience issues with your desktop setup after decoupling, it is important to understand why your desktop speakers need isolation pads to stop desk vibration entirely, as commercial foam pads can sometimes complement your DIY stands for extremely stubborn desks. This combination of heavy wood and soft rubber creates a high-mass, decoupled barrier that instantly cleans up muddy midrange frequencies.
Positioning Your New DIY Stands for Perfect Sound
Now that your stands are built, you need to place them correctly to reap the rewards. Many people spend hours building or buying stands only to shove them into the far corners of the room, which immediately ruins the stereo image. You want to form an equilateral triangle between your two speakers and your main listening position. If you are using these for a desk setup, angle them slightly inward toward your ears. If you are dealing with a larger room or a dedicated home theater space, you might also be wondering how your surrounds fit into the mix, such as the secret to placing surround speakers in a room with high ceilings to ensure your entire soundstage is perfectly balanced. Elevating your main speakers to ear level using your new stands is the single most effective way to eliminate those muddy reflections and restore the lost punch to your favorite music tracks.
Now that your DIY stands are assembled and positioned, let’s look at the science of acoustic isolation more deeply. Most home audio forums will tell you that the heavier your speaker stand is, the better it will perform. While adding mass is generally helpful to prevent your stand from tipping over, mass alone does not solve resonance issues. In fact, a common myth claims that rigid metal stands filled with lead shot automatically decouple your speakers. In reality, heavy materials simply change the resonant frequency of the stand; they do not actually stop the physical transfer of energy into your floor. True decoupling requires a soft, compliant material that can deform and absorb vibration, converting mechanical energy into heat.
The Critical Trap of Over-Damping Your Setup
In my early DIY days, I fell into the trap of over-correcting. I thought that if a little bit of isolation foam was good, then a thick, soft pillow of cheap foam would be amazing. I ended up making a set of stands that were so mushy the speaker cabinets actually rocked back and forth when the woofer fired. This is a massive mistake. When your speaker cabinet is allowed to move backward as the driver pushes forward, you lose transient response and punch. Your bass becomes sloppy, and the overall soundstage gets smeared. The key is finding a balance: your stand must remain physically rigid, while your isolation layer should be thin, dense, and just compliant enough to absorb micro-vibrations without allowing the cabinet to sway.
Do you actually need expensive cables and connectors to prevent sound loss?
Another major point of confusion for audiophiles upgrading their desktop setups is the connection quality between their DAC, amplifier, and speakers. Many people get swayed by marketing hype surrounding premium cables. However, understanding the real difference between gold and silver plated connectors can save you hundreds of dollars. Just like with speaker stands, the basic physics of electrical conductivity matter far more than flashy branding. In fact, a famous blind-test study published by the Audio Engineering Society proved that listeners could not reliably tell the difference between exotic speaker cables and simple, heavy-gauge copper wire of the appropriate length. If you focus on solid copper wire and tight mechanical connections, you will get pristine audio without draining your wallet.
Another area where enthusiasts often overspend is on external electronics when simple desk acoustics are the real issue. For example, people often assume their source equipment is weak and spend fortune on digital-to-analog converters, while ignoring the physical placement. Instead of buying a new DAC, you should check how to get better bass from a bookshelf speaker without a sub first by optimizing your wall distance and decoupling your cabinets. Have you ever fallen into the trap of buying expensive accessories only to realize a simple physical adjustment solved your sound issues? Let me know in the comments below!
Now that your DIY stands are decoupling your monitors from your desktop and curing your acoustic muddy spots, you need to think about long-term maintenance and tuning. Wood and foam are organic materials that adapt to room moisture, humidity, and cabinet weight over time. If you ignore your setup for a few years, wood screws can slightly back out due to subtle cabinet vibrations, and dense foam pads can become permanently compressed. I always keep a specific maintenance toolkit on hand, consisting of a simple hand screwdriver, a digital level, and a packet of fresh neoprene pads. I personally do not recommend using electric drills to tighten screws after the initial build, because it is incredibly easy to strip the pre-drilled holes in dense fiberboard, which ruins the structural integrity of your stands.
How do I maintain my DIY speaker stands over time?
Every six months, I perform a simple physical check on my stands. I remove the speakers, check that the top and bottom plates are still perfectly perpendicular to the central pillar, and gently tighten the structural screws. It is also important to inspect the physical condition of your speakers. If you notice strange audio drops while adjusting things, you should learn how to fix a speaker that is cutting in and out because a loose wire at the speaker terminal can mimic acoustic vibration issues. Additionally, keep an eye on your decoupling pads. Over time, heavy bookshelf speakers will squash thin craft foam to the point where it no longer offers any acoustic resistance. According to structural engineers at the Forest Products Laboratory, wood structures subjected to constant physical loads and micro-vibrations will undergo subtle mechanical shifts. Swapping your compressed top-plate foam every year is a cheap, five-minute task that keeps your mid-range frequencies sounding crystal clear.
As we look to the future of home audio and desktop engineering, I predict we will see a major shift toward smart, adaptive decoupling materials. We are already seeing companies experiment with non-Newtonian materials that remain fluid under light pressure but instantly harden to dissipate heavy shock waves. For now, our high-density DIY wooden stands combined with soft rubber remain the absolute champion of price-to-performance ratio. If you want to take your sound even further without spending a fortune, try this advanced tuning trick: place a simple, heavy book directly on top of your speaker cabinet for a day to see if adding top-heavy mass further stabilizes your mid-bass response. Let me know if you hear the difference!
What I Learned from Screwing Up My First Three DIY Stands
Building your own speaker isolation stands seems incredibly straightforward, but the devil is always in the details. My first attempt resulted in a pair of stands that tilted forward because I didn’t verify that my wood cuts were perfectly square. Here are the core hard-earned lessons from my workshop mistakes:
- Rigid stands are non-negotiable: If you can wiggle your central pillar even a tiny bit, your bass frequencies will turn muddy as the cabinet sways backward during heavy driver excursion.
- Never skip pre-drilling: Tightening screws directly into the end grain of cheap 4×4 lumber or dense MDF will split the material immediately, ruining your structural integrity.
- Keep the isolation layer thin: Mushy, thick foam pads make the speaker unstable. A thin, high-density neoprene layer is all you need to absorb micro-vibrations without losing punch.
By keeping your stands dense, level, and structurally secure, you avoid the common physical traps that lead to phase cancellation and sloppy acoustic feedback.
My Essential Toolkit for Perfect DIY Acoustic Projects
You do not need an industrial workshop to get professional results. I have built dozens of desktop projects using a very simple, trusted set of tools that help me dial in perfect isolation and keep everything level:
- Sola Magnetic Digital Level: Essential for verifying that your top and bottom plates are perfectly parallel so your tweeters point directly at your ears.
- Titebond III Ultimate Wood Glue: Combined with heavy-duty wood screws, this glue creates a bond stronger than the wood itself, ensuring no rattling joints down the line.
- Dense Craft Neoprene Sheets (1/8-inch thickness): My absolute favorite cheap decoupling material. It outperforms expensive store-bought foam and can be easily trimmed with household scissors to match your top plate.
Stop Shaking Your Desk and Build Your Own Set Today
Elevating your desktop monitor setup is the single most effective way to eliminate muddy midrange reflections and restore the lost punch to your favorite music tracks. If you want to achieve maximum acoustic performance on a budget, you do not need to spend hundreds of dollars on fancy metal stands. By following this guide, you can create a high-mass, decoupled barrier that keeps the physical vibration inside the cabinet where it belongs. Once you build your stands, you might also want to look into how to get better bass from a bookshelf speaker without a sub to fully optimize your room placement and unlock the hidden potential of your bookshelf monitors.
Have you ever tried building your own acoustic treatment or speaker stands, or did you run into annoying desk vibrations? Let me know in the comments below!