
I still remember the moment I connected a new pair of floor-standing speakers in my living room and was immediately disappointed. The sound was muddled, lacking clarity and punch. Turns out, I had wired them with cheap, thin speaker wire meant for short distances. That lightbulb moment made me realize: wiring long distances with the wrong gauge can totally sabotage your sound quality. If you’ve ever experienced distorted audio, crackles, or just underwhelming volume from your setup, you’re not alone. Many enthusiasts overlook the importance of speaker wire gauge—yet it’s critical, especially for longer runs where signal loss becomes a real concern.
The Role of Wire Gauge in Audiophile Performance
When I first started exploring hi-fi, I naively thought that thicker wire was just about handling more power. It wasn’t until I encountered subtle but noticeable improvements after upgrading to a thicker gauge that I understood: gauge size impacts sound integrity. For long wire runs—say, beyond 50 feet—using the correct gauge can mean the difference between vibrant clarity and muffled distortion. The reason is simple: thinner wires have higher resistance, which leads to a drop in voltage reaching your speakers, especially over longer distances. This results in less bass, diminished imaging, and overall compromised audio fidelity. So, if you’re serious about stellar sound, picking the right wire gauge isn’t just optional—it’s essential. For detailed insights, check out how to avoid common wiring mistakes in this guide on first high-end system mistakes.
Is Thicker Always Better Than Thinner?
Early in my journey, I made the mistake of thinking that going for the thickest wire possible was the way to go. It isn’t. Overly thick wire can be stiff, hard to route, and sometimes cost more without delivering proportional benefits for typical home setups. Instead, aim for an optimal gauge that balances wire flexibility, cost, and performance—especially when running long distances.
Now, if you’re curious about how to determine the best gauge for your specific setup, don’t worry. I’ll walk you through the ins and outs, including how to prevent common pitfalls and ensure your wiring supports your sound ambitions. Want to see if your current wiring might be holding you back? Maybe you’ve experienced some of the issues I faced early on—crackles, weak bass, or uneven volume? It’s time to fix that and unleash your system’s true potential.
Let’s dive into the nitty-gritty of choosing the right speaker wire gauge for long runs, so you can enjoy crystal-clear sound without the frustrations. Ready? Here we go.
Select the Appropriate Gauge for Your Setup
Start by assessing your total cable length and the impedance of your speakers. Use a reputable gauge chart (available on many audio websites or here how to pick the right gauge wire for long speaker runs) to determine the minimum wire thickness needed. For example, for runs over 50 feet and typical 8-ohm speakers, 14-gauge wire is often recommended. I once needed to wire my outdoor speakers 75 feet away from the receiver, and following this step prevented significant sound loss and distortion.
Gather Your Materials and Tools
Choose thick, flexible, oxygen-free copper wire for optimal conductivity. Have wire cutters, stripper, and crimping tools nearby. Inspect your wire for any defects or thin spots. Remember, the quality of your cable matters as much as the gauge. My first attempt with cheap wire resulted in muffled sound; upgrading to quality cable made a noticeable difference.
Prep the Wire Properly
Strip about 1/2 inch of insulation from each end of the cable. Be careful not to nick the copper strands, as this can increase resistance. Twist multiple strands tightly to prevent fraying. I learned this easy trick after struggling to get a clean, secure connection during a messy wiring job in my basement.
Connect the Wires Securely
Attach the wires to your speakers and amplifier, ensuring correct polarity—usually red for positive, black for negative. Use banana plugs or binding posts whenever possible for a secure connection. During my last project, I used terminal clips on each end, which made future adjustments painless and ensured a solid connection that prevented crackling sounds.
Prevent Crosstalk and Interference
Keep speaker wires separate from power cables and interleave them with other audio cables using cable ties or sleeves. This prevents electromagnetic interference that can muddy your sound. I once ran my speaker wires parallel to power cords and experienced noticeable hum—this simple step resolved that issue entirely.
Test and Adjust Your Setup
Power on your system and listen for consistent sound reproduction. Use music with diverse frequencies to detect any loss or distortion. If you notice issues, double-check your connections and gauge suitability. I once adjusted my wiring length slightly after noticing bass distortion, which improved clarity remarkably.
Hide and Protect Your Wires Effectively
Use cable conduits or wall plates to keep wires tidy and safe. Avoid running wires across doorways or high-traffic areas. To keep my setup sleek, I employed adhesive cable channels along the baseboard, which I learned about here. Proper routing prevents accidental disconnection or damage, ensuring long-term performance.
Even dedicated audiophiles can fall prey to misconceptions about headphones, soundbars, speakers, and amplifiers. A prevalent myth is that more expensive gear guarantees better sound, but in reality, room acoustics, placement, and matching components matter just as much. Many believe that wireless audio is always inferior to wired setups; however, advancements in Bluetooth codecs like aptX and LDAC deliver surprisingly high fidelity qualities that rival wired connections. One common trap is overestimating the wattage of an amplifier as the sole indicator of performance; a high-watt amp can distort if not paired correctly with suitable speakers, leading to listener fatigue and equipment damage.
Let’s discuss an advanced nuance: **why choosing the right speaker impedance is critical for system longevity and sound quality.** Mismatched impedance can cause your amplifier to work harder, leading to overheating, distortion, or failure over time. Experts recommend matching the amplifier’s rated output impedance closely with your speaker’s impedance ratings—an often overlooked detail that can save you both money and frustration. According to a study by the Audio Engineering Society, impedance mismatches are a leading contributor to early component failures and subpar audio reproduction.
Are you aware that room positioning can dramatically alter your listening experience? Many enthusiasts overlook the importance of proper placement—pulling speakers away from walls or adjusting toe-in angles can unlock richer bass and clearer imaging. For example, bookshelf speakers sound noticeably better when positioned at ear level and slightly angled toward the listening spot, a simple tweak that many ignore.
In addition, selecting the wrong soundbar can sometimes be more detrimental than beneficial. Cheap soundbars often inflate specs like wattage or number of channels, but lack the actual quality of drivers and internal circuitry needed to produce balanced sound. Investing in a quality, well-reviewed model pays off in clarity and immersive experience. Want to see how I improved my setup? Check out this guide on high-end system mistakes.
Finally, a trap that many home audio buyers fall into is neglecting to consider future expansion. Planning your system with modular components and adaptable wiring setups prevents costly upgrades later. Think about whether your amplifier supports multiple inputs or if your speaker cables are capable of long-term use without degradation.
Have you ever fallen into this trap? Let me know in the comments. Remember, understanding these hidden nuances can elevate your audio experience from decent to exceptional.
Keeping Your Home Audio Systems in Top Shape
Investing in quality audio equipment is only half the battle; maintaining it over time ensures sustained performance and longevity. From cleaning tools to calibration software, I rely on specific instruments that have proven their value in my setup. Regular upkeep involves a mix of physical cleaning, signal testing, and component checks—each step preventing degradation and costly repairs. As technology advances, smart maintenance tools are emerging, making it easier than ever to keep your system running smoothly.
Invest in Professional-Grade Cleaning Supplies
Dust and debris are silent enemies of audio quality. I recommend using ultrasonic cleaners for delicate parts like deterring dust from drivers and vibration components. For general cleaning, a microfiber cloth combined with a specialized electronic contact cleaner ensures contacts stay corrosion-free. Personally, I use a compressed air canister designed for electronics, which blasts away dust without risking damage. Proper cleaning prevents crackles and loss of clarity, especially in sensitive parts like headphone drivers and speaker cones.
Use Calibration and Testing Software
Calibration is fundamental for consistent sound across different environments. I utilize software like Room EQ Wizard (REW), a free tool that measures frequency response and assists with equalization adjustments. Connecting your setup with a calibrated microphone allows detailed analysis of room acoustics—helping you identify dips and peaks. Regular testing with REW helps catch issues like phase cancellation or speaker imbalance before they become noticeable. As room acoustics can change over time, periodic calibration keeps your soundstage optimized.
Implement Remote Monitoring and Control
Wireless and network-connected audio equipment now enable remote diagnostics. I use a combination of smartphone apps and network monitoring tools to oversee system health. For example, some modern amplifiers include diagnostic features that alert you to overheating or component failure. Incorporating these tools reduces downtime and facilitates quick troubleshooting. Looking ahead, I predict that AI-powered system health monitors will become standard, providing predictive maintenance and personalized care based on usage patterns.
Plan for Scalability from the Start
Thinking ahead can save headaches and money. When expanding or upgrading, ensure your wiring and components support future additions. Use modular cabling setups and universal connectors to simplify upgrades. For instance, employing the right gauge wiring now means less rework later. Additionally, select equipment with backwards compatibility in mind—so you’re prepared for evolving standards and formats. This foresight keeps your system adaptable and in prime condition long-term.
How do I maintain my audio equipment over time?
Practical maintenance involves consistent dusting, periodic calibration, and monitoring system performance through dedicated apps. Schedule routine checks—every six months—to clean contacts, verify connections, and perform software updates. Additionally, replace worn cables with quality, appropriately rated ones to prevent signal degradation. Embracing these habits extends your equipment’s lifespan, delivers consistently high-quality sound, and minimizes unexpected failures. Remember, an ounce of prevention goes a long way, especially when your favorite tunes are at stake.
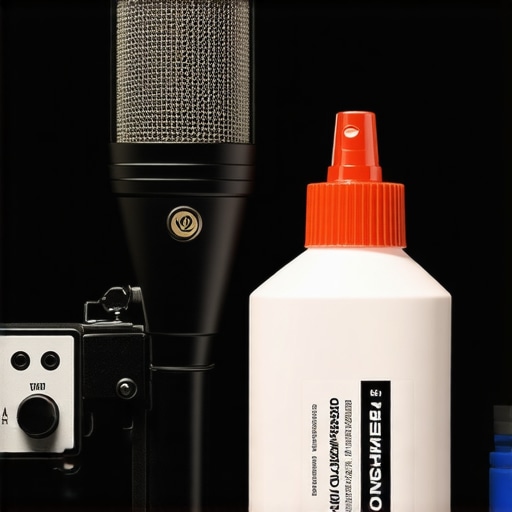
Image showing professional-grade cleaning tools and calibration equipment used in home audio maintenance.
What I Wish I Knew When I Started Playing with Audio Gear
One of the most profound lessons I learned is that even subtle mistakes—like using the wrong gauge speaker wire—can significantly diminish your sound quality. Early on, I believed that more power or more expensive equipment alone would guarantee great sound, but experience proved otherwise. Proper wiring, placement, and understanding impedance made a massive difference in my setup. The journey taught me to think critically about every component, not just the flashy ones, and to focus on how they work together.
Another insight I’ve gained is that room acoustics matter just as much as the gear itself. Small adjustments like pulling speakers away from walls or changing their angle can unlock clarity and bass depth I never knew was possible. Sometimes, the right tweak can outperform a costly upgrade. This taught me to approach audio setup as an art, blending technical knowledge with sensory perception.
Finally, I discovered that ongoing maintenance and calibration are often overlooked but vital. Regularly inspecting and cleaning cables, testing connections with software like Room EQ Wizard, and planning upgrades with future scalability in mind keep your system performing at its peak. These small investments of time prevent frustration and elevate your listening experience from average to extraordinary.
My Toolkit for Serious Home Audio Improvements
Over the years, I’ve come to trust a handful of tools and resources that have transformed my system. First, a quality digital sound level meter helps me calibrate speakers precisely, ensuring balanced sound across my room. Second, a set of rugged, oxygen-free copper speaker cables, paired with banana plugs, offers reliability and flexibility. Third, software like REW provides detailed room analysis to identify frequency dips or resonances that need addressing. Additionally, trusted sources like this guide on high-end system mistakes help me avoid pitfalls. Each of these tools and references has been instrumental in fine-tuning my setup and delivering sound that truly moves me.
Step Into the Future of Home Audio Confidence
Improving your home audio system isn’t just about buying the latest gadget; it’s about understanding and thoughtfully implementing each element—wiring, placement, calibration—to craft a cohesive sound environment. Remember, each step you take toward mastering your setup builds confidence and enhances your listening pleasure. Don’t let misconceptions hold you back; with patience and curiosity, you can achieve audio excellence that will impress friends and satisfy your senses. Your journey toward immersive sound begins now—embrace it with enthusiasm!
What has been your biggest revelation or challenge when upgrading your home audio system? Share your experience below and let’s learn from each other!