
I’ll admit it—there was that one unfortunate moment when I was mid-run, earbuds securely in place, music pumping through my favorite playlist. Suddenly, I trip over a stray pebble, and before I know it, my earbuds land face-down in a patch of dirt. That flash of panic hit me hard. I thought, “Great, now I have to buy new ones!” But what I didn’t realize then was that a little careful cleaning could bring them back from the dead. If you’ve ever had a similar experience, you know how frustrating it is to have earbuds that look like they’ve been through a mudslide, yet still somehow work—or sometimes don’t. So today, let me share the secrets I learned on how to clean your earbuds after they’ve taken a dirt nap and keep that crisp sound quality intact.
Why Cleaning Your Earbuds After a Dirty Fall Matters
Our earbuds are tiny marvels of technology—miniature speakers, microphones, and wires packed into a small case. When they fall in the dirt, debris can infiltrate tiny openings, clogging mesh screens, muddying the drivers, and even affecting sound clarity. If ignored, this dirt buildup can lead to distorted sound, rattling noises, or even damage to delicate components. Plus, dirt, sweat, and oil from our skin can cause bacteria buildup, which isn’t just unsanitary but can also impact the longevity of your gear. Cleaning them properly isn’t just about looks; it’s about protecting your investment and getting the best audio experience every time you plug in.
In fact, according to audio experts, regular cleaning of your headphones and earbuds can extend their lifespan and maintain sound quality. A simple cleaning routine can save you from costly repairs or replacements down the line. And trust me, I learned the hard way—early on, I made the mistake of ignoring dirt and using aggressive cleaning methods that damaged my earbuds. Now, I approach cleaning with a gentle touch and the right tools, ensuring my earbuds stay fresh and function flawlessly. Curious about how to do this without accidentally breaking your favorite pair? Stick around—I’ve got you covered.
Will cleaning ruin my earbuds or affect sound quality?
This is a common concern. Many assume that cleaning involves harsh chemicals or destructive scrubbing, which can damage delicate parts or strip away protective coatings. I once tried using alcohol-based wipes without realizing it could harm the mesh screens, leading to muffled sound. The key is using gentle, targeted cleaning methods and appropriate materials. I recommend checking out expert tips, like those on how to keep your headphones balanced and sounding perfect, which emphasize gentle cleaning for maintaining sound integrity.
So, if you’ve faced that heart-sinking moment when your earbuds hit the dirt, don’t despair. The next sections will walk you through proven steps to clean your earbuds safely and effectively—no fancy equipment required. Let’s get your earbuds looking and sounding like new again!
.
Gather the Right Tools
Start by collecting gentle materials: a soft microfiber cloth, a small soft-bristled toothbrush, isopropyl alcohol (70%), and some cotton swabs. Avoid harsh chemicals or abrasive tools that can damage your earbuds’ delicate mesh and components. I once tried using a metal needle to dislodge dirt, but it tore the mesh—since then, I stick solely to soft, non-abrasive items.
Power Off and Disassemble
Before cleaning, turn off your earbuds or disconnect them from any device. If your model allows, gently remove the tips or covers. This helps access hidden areas where dirt and oil accumulate, much like how you might remove speaker grills to clean behind them—similar to cleaning speaker grills.
Clean the Ear Tips and Exterior
Lightly dampen a microfiber cloth with water or isopropyl alcohol and wipe down the exterior surfaces. For ear tips, soak them in a mixture of warm water and a few drops of mild soap for a few minutes, then rinse and dry thoroughly. This step removes sweat, oil, and dirt, restoring both hygiene and sound clarity. I often found that neglecting this step led to muffled audio—akin to muffled sound from a clogged speaker grille.
Clear Out Debris from Mesh and Ports
Use a dry cotton swab to gently clean the mesh surfaces, applying light pressure to dislodge debris without damaging the delicate fabric. For stubborn dirt, dip a cotton swab in isopropyl alcohol, press lightly, and rotate. Be gentle—think of it as fine-tuning a speaker’s diaphragm, where too much force could distort sound. Avoid inserting sharp objects like needles—this can puncture or tear the mesh, which is a costly mistake.
Address Microphone and Charging Ports
If your earbuds have microphones or charging contacts, inspect and clean them with a dry brush or a compressed air can. These areas are often overlooked but are critical for maintaining sound quality and connectivity. Regularly cleaning these prevents issues like dropouts or poor microphone pickup, similar to cleaning the contact points on a vintage AV receiver to ensure clear signal transfer—this vintage tip.
Dry and Reassemble
Let all parts air dry completely before reassembling. Avoid using heat or direct sunlight, which can warp or degrade materials. Once dry, reattach the tips and test your earbuds. You should notice improved clarity and bass response—comparable to how cleaning head-to-head with your soundbar’s bass output can significantly enhance your audio experience.
Prevent Future Buildup
Perform this cleaning routine weekly if you use your earbuds daily. Store them properly in a case when not in use, avoiding exposure to dust and moisture. Regular maintenance keeps dirt from settling deep into the mesh, much like how a battery in your car stereo benefits from regular checks to prevent issues. Consistent cleaning preserves sound quality and prolongs the lifespan of your investment, ensuring each workout or commute remains enjoyable and hassle-free.Many enthusiasts and casual listeners alike fall into misconceptions about soundbars, amplifiers, speakers, and headphones that can hinder their audio experience. One of the most prevalent myths is that bigger, more expensive equipment always equals better sound. However, in my experience, equipment size doesn’t necessarily correlate with quality—sometimes, smaller high-end speakers outperform large, budget-friendly setups. An even bigger trap is believing that upgrading to the newest model guarantees improved audio. Often, manufacturers add features that make marketing headlines but don’t significantly enhance sound clarity or fidelity. Instead, focus on proven specs like frequency response and impedance for a more accurate assessment.
Beware of the misconception that all cables are created equal. Many assume that premium-priced cables deliver superior audio, but according to audio engineers, the difference is often negligible unless your setup involves extremely sensitive equipment or long cable runs. Ensuring proper connections and avoiding interference are more effective for sound quality than investing in overpriced cables.
What advanced considerations should audiophiles prioritize beyond basic specs?
For seasoned listeners, paying attention to room acoustics and speaker placement can make a substantial difference. Studies show that even high-end gear can sound dull or muddy if the environment isn’t conducive to proper sound reflection and absorption. Additionally, understanding the concept of speaker phase alignment can prevent issues like sound cancellation, which many overlook. Incorrect phase wiring can cause frequencies to clash, resulting in a hollow or echoing sound. Experts suggest testing for phase alignment with simple tools like a smartphone app—an overlooked step that preserves clarity. For a detailed explanation of how to test your phase setup, check out this article.
An essential but often ignored nuance involves digital processing settings, such as equalization (EQ) and room correction. Over-adjusting EQ to boost bass or treble can distort the natural tone, leading to listener fatigue. Conversely, proper calibration using room correction tools can optimize sound distribution without altering the audio’s natural balance. This is especially relevant in home theater systems where speaker placement isn’t ideal. Regularly revisiting these settings ensures your system remains tuned over time.
Lastly, avoid the trap of believing more channels automatically mean better surround sound. A common mistake is adding extra speakers without considering their placement and crossover settings, which can cause phase issues and muddy the audio field. Instead, a focused setup with correctly calibrated speakers delivers more immersive sound than a crowded, unbalanced arrangement. For insights on optimal speaker placement and calibration, this guide is invaluable.
Remember, the key to mastering home audio isn’t just in the hardware but also in understanding the intricate physics and human perception of sound. Have you ever fallen into this trap? Let me know in the comments.
Ensuring your home audio equipment continues to deliver crisp, vibrant sound over time requires the right set of tools and a disciplined maintenance routine. From specialized cleaning supplies to calibration software, having the correct gear can make all the difference in preserving sound quality and extending the lifespan of your gear. One essential tool I personally rely on is a high-quality microfiber cloth—preferably one designed for electronics—to gently wipe down speakers and headphones without scratching delicate surfaces. Over the years, I’ve found that pairing this with a soft-bristled brush, like a dedicated electronics cleaning brush, helps dislodge dust from ports and mesh coverings, preventing buildup that can muddy your audio. For electronic components with stubborn dirt or grease, I recommend using 70% isopropyl alcohol applied via a lint-free cloth, ensuring the cleaning is thorough yet gentle, much like experts advise on protecting sensitive circuitry.
When it comes to calibration and optimizing sound, I recommend using smartphone apps such as free room calibration apps. These tools guide you through measuring your listening environment’s acoustics, allowing you to fine-tune your soundbar or speaker setup without expensive professional equipment. Regular calibration—say, every few months—ensures your system compensates for room changes or furniture rearrangements, keeping your audio projection accurate and immersive.
In terms of long-term results, investing in quality components like protective covers for headphones or speaker grilles helps prevent accidental damage. Additionally, employing cable management solutions, such as velcro straps or routed conduits, minimizes wear and tear, reducing the risk of connection issues over time. For example, I frequently use cable organizers to prevent stress on connectors, which can lead to intermittent sound or complete failure.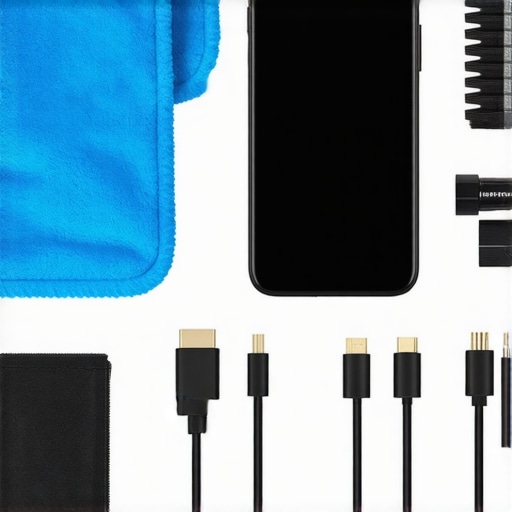
Looking ahead, the trend in home audio maintenance is shifting towards smart tools. Future devices may incorporate AI-driven diagnostics that alert you to component degradation before failure, much like how modern cars warn of engine issues. Meanwhile, software-based solutions like firmware updates will continue to improve sound clarity and resolve bugs remotely, reducing downtime and service costs. To stay ahead, I recommend regularly checking your equipment manufacturers’ websites for firmware upgrades and adopting apps that monitor your system’s health.
How do I maintain my audio setup over time?
Regular cleaning with soft, non-abrasive tools and scheduled calibration sessions are the foundational habits. Additionally, storing your gear properly—keeping headphones in protective cases and speakers away from humidity—prevents long-term damage. Consistent cable management also plays a vital role; unkempt cables are prone to stress and breakage. For a quick boost in performance, try using a dedicated cleaning kit with brushes and wipes designed for electronics—I’ve seen remarkable improvements in clarity and bass response after just a few minutes of dedicated care. Why not pick one advanced tip from this list today and make it part of your maintenance routine? Your ears will thank you.
What I Wish I Knew When I Started Cleaning My Audio Gear
Years ago, I believed that simply wiping my speakers with a damp cloth was enough to keep them sounding pristine. It wasn’t until I faced distorted sound and rattling that I realized my assumptions were flawed. The biggest lesson I learned is that attention to detail and patience in cleaning can prevent costly damage later. I also discovered that gentle tools and specific techniques—like using soft brushes and alcohol-based wipes—make a significant difference in preserving sound quality. This insight transformed my approach and helped me avoid the mistakes many beginners make, such as over-aggressive scrubbing or using unsuitable chemicals.
My Top Picks for Maintaining a Sound System That Lasts
Over time, I’ve curated a toolkit that ensures my audio setup remains in top shape: a microfiber cloth from a trusted source for gentle cleaning, a soft-bristled electronics brush for ports and grills, and a bottle of 70% isopropyl alcohol for stubborn grime. These tools have become indispensable because they are safe, effective, and affordable. Additionally, I rely on calibration apps to fine-tune my setup periodically, ensuring consistent sound clarity. My advice is to invest in quality tools and always prioritize gentle cleaning routines—your gear’s longevity depends on it.
Keep Your Passion Alive with Ongoing Care and Calibration
Healthy, vibrant sound isn’t just a matter of initial setup; it’s an ongoing journey. Regular cleaning, routine calibration, and mindful storage—like using protective cases for headphones—are essential. I’ve found that scheduling a quick maintenance session every few weeks keeps my system performing at its best and prevents minor issues from becoming major problems. Embracing this proactive attitude not only prolongs the lifespan of your equipment but also renews your appreciation for high-quality audio. Remember, the effort you put in today will reward you with richer, more immersive listening experiences for years to come. Don’t settle for mediocre sound—invest in its preservation, and enjoy every note to the fullest.