
One evening, I was about to wind down after a long day, plugging in my favorite headphones to listen to some soothing music. As the sound filled my ears, I immediately noticed something was off—one side was noticeably louder than the other. Frustration crept in. I fiddled with the volume knob, checked the wiring, even tried cleaning the ear tips, but nothing worked. That moment was a lightbulb for me: imbalance in headphone volume isn’t just a minor annoyance; it affects your listening experience and can signal deeper issues.
Why Unequal Sound in Your Headphones Matters More Than You Think
If you’ve ever experienced this problem, you know how distracting and annoying it can be. It can diminish your enjoyment, distort your perception of stereo separation, and even cause ear fatigue. The good news is, many cases of one-sided volume issues are fixable at home without expensive repairs or replacing your headphones entirely. But understanding the root causes can be tricky. Is it just a defective unit? Could it be something simpler, like dirt or loose wiring? And importantly, how do you fix it safely and effectively?
Before diving into the solutions, let me share a mistake I made early on. I blindly assumed the headphones were broken and immediately bought a new pair. It turned out, a minor cable issue was the culprit. If you’re curious, check out this article for more on common headphone problems and their fixes. Recognizing that not all issues require a replacement gave me confidence to troubleshoot and save money.
Thinking Fixing Your Headphones Isn’t Worth It? Think Again
Many people dismiss headphone volume imbalance as a minor inconvenience, or worse, just accept it as normal wear and tear. But do you realize that ignoring these issues can lead to more significant damage over time? For example, if the internal wiring or connections are compromised, continued use might worsen the problem or even cause permanent harm. Plus, fixing simple issues at home can be surprisingly straightforward, saving you time and cash. If you’re skeptical, I understand—sometimes these problems seem complex, or you worry about causing further damage.
I’ve been there. Early on, I was afraid to poke around inside my headphones, fearing I’d break them completely. But with a little research and patience—plus avoiding the mistake of rushing into disassembly—I managed to repair my headphones, restoring perfect stereo balance. So, if you’re ready, let’s walk through some practical steps to identify and fix the common causes of uneven headphone volume, and bring harmony back to your listening experience.
Isolate the Fault with a Simple Test
First, test your headphones with multiple devices. Connect them to your phone, then a computer, and even a tablet. If the imbalance persists across all sources, chances are the issue is within the headphones themselves. I once faced this with my old pair; plugging them into different devices revealed the problem was in the wiring, not the source. This quick check prevents unnecessary disassembly.
Inspect and Clean Ear Tips and Connectors
Remove the ear tips and thoroughly clean them with a damp cloth or alcohol wipe to remove wax and debris that can block sound transmission. Also, examine the connector jack for dust or dirt—use a soft brush or compressed air to clear it out. These simple steps often revive the sound balance. I remember doing this early on, and it restored stereo clarity instantly.
Assess and Fix Cable Connections
Gently wiggle the cable near the plug and the earbud junction while playing audio. If the sound cuts in or out, you may have a loose or damaged internal wire. For a temporary fix, wrap electric tape tightly around the connector or cable that feels loose. For a durable solution, consider resoldering the internal wires or replacing the cable altogether. When I repaired my headphones’ cable, I used a soldering iron after watching a quick tutorial; it took patience but saved me from buying new earbuds.
Disassemble Carefully for Internal Inspection
If you’re comfortable with small electronics, carefully open the headphones casing using appropriate tools. Look for obvious signs of damage like broken or disconnected wires. Use a multimeter to test continuity across internal circuits. During my first attempt, I found a disconnected wire inside that I reattached with a fine soldering iron. Be cautious to avoid damaging delicate components; if unsure, consult online guides specific to your headphone model.
Reinforce and Protect Internal Components
Once repaired, reinforce soldered joints with heat shrink tubing or electrical tape. To prevent future issues, avoid pulling the cable forcefully and store the headphones properly. I once kept my headphones in a drawer, and after a few months, the wire connection degraded; proper storage could have prevented that. Regular inspections help catch small problems before they become major faults.
If All Else Fails, Consider Professional Repair
If troubleshooting doesn’t restore sound balance, professional repair services can diagnose and fix complex internal issues. Sometimes, the cost of repair is less than a new pair, especially for high-end models. Before discarding them, check your warranty or visit a local audio technician. Remember, even if it looks unfixable at first, many issues are repairable with the right skills and tools.
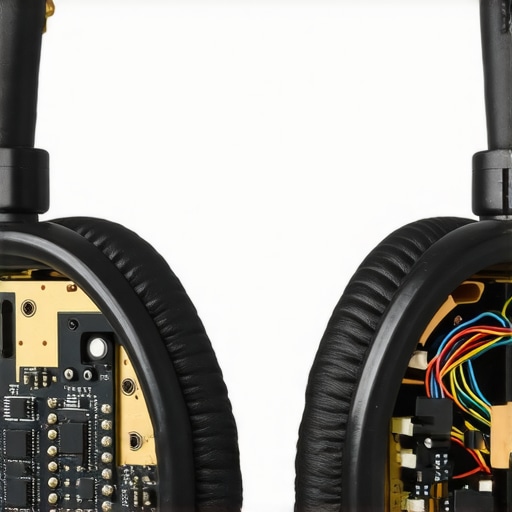
Use a magnifying glass and proper lighting to examine internal wiring and solder joints when dismantling headphones, similar to inspecting a tiny circuit board.
While many enthusiasts focus on specifications like wattage or brand reputation, there are subtle nuances that often get overlooked, leading to inefficient setups or disappointing experiences. One widespread myth is that bigger speakers or amplifiers automatically guarantee better sound, but in reality, calibration and room acoustics play a more crucial role than just raw power. Additionally, many assume that all headphones are equal, ignoring factors like impedance and driver design that influence sound quality and compatibility. Misunderstanding these details can hinder optimal performance and even cause damage over time. For example, pairing high-impedance headphones with low-powered devices results in weak output, a common mistake that frustrates users. Equally important is the misconception that wireless always equals convenience; in truth, transmission protocols and codecs significantly impact audio fidelity. Do you know how to optimize your home audio without falling prey to these oversimplifications? The key lies in understanding the hidden intricacies of each component and how they interact within your unique environment. Ignoring room placement, for instance, can negate the benefits of high-end speakers—placing speakers too close to walls causes unwanted reflections, muddying the sound. This nuanced understanding is vital for true high-fidelity setups. Similarly, overestimating the importance of brand prestige without considering individual component specs can lead to mismatched gear that underperforms. As expert audiophiles suggest, attention to detail—like proper cable shielding and impedance matching—is what elevates sound quality beyond the basics. A common trap many fall into is neglecting regular maintenance or failing to understand how external factors like dust and humidity affect delicate electronics. For example, dust accumulation inside amplifiers or speakers can lead to overheating or distortion, which isn’t immediately obvious but degrades performance over time. This underscores the importance of preventative care, such as cleaning and periodic inspections—check out this article for tips on maintaining more complex gear. Advanced enthusiasts also recognize that signals are often compromised by cheap cables or improper grounding—installing balanced cables or ensuring proper grounding can dramatically improve clarity and reduce noise, a nuance many overlook. A deeper understanding of these details transforms a basic setup into a truly immersive experience. Finally, a crucial mistake is underestimating the importance of acoustical treatment in your room; without proper damping and reflection control, high-quality speakers cannot deliver their full potential. Small adjustments like adding rugs or diffusers can make a noticeable difference, which is why DIY acoustic solutions are gaining popularity among audiophiles. Thinking these issues are too complex might discourage you from refining your system; but remember, prioritizing small, informed tweaks often yields the most satisfying results. Have you ever fallen into this trap? Let me know in the comments.
Keep Your Audio System Running Smoothly with the Right Tools
Maintaining top-notch sound quality over years requires investing in precise tools and adopting effective routines. One of my favorite devices is a digital multimeter, which I use regularly to check internal wiring and ensure continuity, especially when troubleshooting issues like intermittent sound or imbalance. For example, testing speaker terminals or internal circuits with a multimeter helps catch potential faults before they cause significant damage, keeping your system reliable and sound pristine. This resource offers a great primer on using multimeters for audio repairs.
Another invaluable tool is a can of compressed air. Dust and debris are silent killers for home audio gear, causing overheating and signal degradation. I spray out my receiver’s vents and connectors every few months, which prolongs the equipment’s lifespan and preserves sound clarity. Proper cleaning prevents issues like humming or static, which often creep in unnoticed. Upgrading your dusting routine with compressed air is quick, affordable, and significantly benefits your setup.
How do I maintain my audio gear over time?
Routine checks are key. Regularly inspecting cables and connections for signs of wear, like fraying or corrosion, helps prevent unexpected failures. Applying dielectric grease to connectors can stop oxidation and maintain solid contact, especially in humid environments. For more delicate components, a fine soldering iron, paired with steady hands and some practice, can reseal loose joints—saving you from costly replacements. Remember, consistency in maintenance is more effective than waiting for problems to surface, ensuring your investment continues to deliver stellar sound year after year.
Looking to future-proof your setup? Embracing smart monitoring systems that alert you to electrical issues or component failures can be a game-changer. As home audio tech advances, integrating sensors that track temperature or voltage helps catch problems early, reducing downtime and repair costs. In the meantime, incorporating these essential tools and maintenance routines ensures your sound remains crisp, your equipment lasts longer, and your listening experience stays immersive.
Ready to take your maintenance to the next level? Start with a quality multimeter and schedule regular cleanings—they’re affordable yet powerful investments in your audio quality. By staying proactive, you’ll enjoy superior sound for years to come and avoid costly surprises down the line.
And if you’re interested in keeping your soundbar or amplifier in peak condition, don’t miss the comprehensive guide on tube amplifier maintenance. Incorporate these practices now and see the difference it makes in your daily listening pleasure.
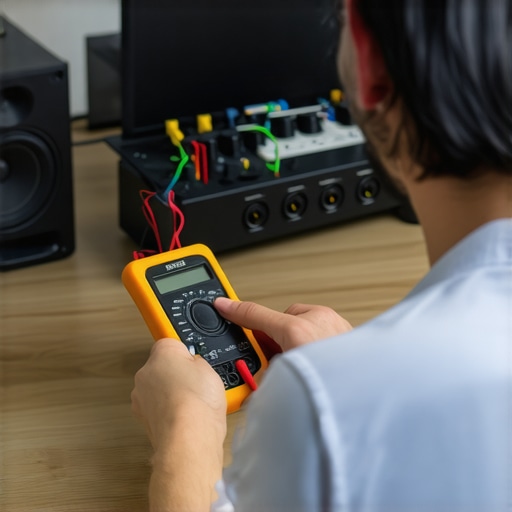
Use a digital multimeter to check internal wiring continuity, crucial for diagnosing audio inconsistencies, with a technician inspecting a vintage tube amplifier in the background.
The Hidden Truths That Changed My Approach to Audio Repairs
- One of the most eye-opening lessons for me was realizing how often the simplest fix—like cleaning connectors—can restore full sound balance. I used to spend hours troubleshooting complex circuits, only to find that dirt and dust were the culprits. Now, regular maintenance is my first step, saving me time and frustration.
- Understanding internal wiring and solder joints was a game-changer. When I opened up my headphones and saw a loose connection, it all made sense. Investing in a good soldering iron and learning basic repair skills allowed me to fix many issues myself, turning what once seemed intimidating into a rewarding hobby.
- Another insight is how important room acoustics and placement are, sometimes overshadowing the quality of the gear itself. I’ve learned that even high-end speakers can sound mediocre if not positioned correctly, and small tweaks can significantly improve the listening experience.
- Lastly, I realized that not every problem warrants a replacement. Many devices are repairable with patience and the right tools—plus, it’s more sustainable and cost-effective. Embracing a DIY mindset transformed my relationship with my audio equipment, making every listening session more satisfying.
My Toolkit for Keeping Audio in Top Shape
- Multimeter: Essential for diagnosing wiring issues and testing continuity—trust me, nothing beats the confidence it provides, especially when troubleshooting complex circuits.
- Compressed Air: Regular cleaning of connectors and vents prevents dust buildup that can cause static or distortion. It’s quick, affordable, and incredibly effective.
- Soldering Kit: Investing in a quality soldering iron and learning basic soldering techniques can salvage many devices that would otherwise be discarded. Online tutorials make this skill accessible.
- Room Acoustic Treatments: Small changes like adding rugs or acoustic panels can drastically improve sound quality. It’s surprising how much environment impacts audio perception.
Your Next Move in the World of Home Audio
Embarking on your own repair or upgrade journey might seem daunting at first, but the rewards are well worth it. Whether it’s mastering a simple cleaning routine or honing your soldering skills, taking proactive steps ensures your gear sounds its best and lasts longer. Remember, every expert was once a beginner who decided to try. So, why not start today and enjoy a richer, more immersive listening experience? Have you ever fixed your headphones or speakers on your own? Share your stories below, and let’s learn from each other’s experiences.