
I remember the moment clearly. I was trying to enjoy my favorite playlist during a late-night solo jam session, only to be met with tinny, flat sound that made me feel like I was listening through a tin can. No matter how expensive my headphones or how fancy my setup was, my phone’s built-in audio never quite delivered that rich, immersive experience I craved. It was frustrating—and a real wake-up call. I realized that achieving studio-quality sound isn’t just about gear that’s out of my budget. It’s about understanding how to unlock the potential already in my phone, with a few clever tricks and tweaks.
Why Your Phone’s Sound Quality Matters More Than Ever
In today’s world, our phones are our primary source of music, podcasts, and even home theater audio. But did you know that most smartphones are limited by their internal DAC (digital-to-analog converter), which affects how sound is processed and outputted? The quality of this tiny component can make or break your listening experience, especially if you’re seeking that professional, studio-like sound. According to a recent study, over 85% of listeners prefer high-quality audio for their everyday content—yet many settle for subpar sound because they believe quality gear is only for audiophiles with deep pockets.
The good news? You don’t need an expensive DAC or a bulky amplifier to improve your phone’s sound. There are straightforward, budget-friendly methods to vastly elevate your audio quality. I’ve spent years experimenting, making mistakes, and finally uncovering solutions that work without draining my wallet. If you’re tired of listening to music that sounds like it’s coming from a tin box, stick around. We’re about to delve into practical tips that will turn your phone into a portable studio-quality sound system.
Does It Really Make a Difference If I Skip the Fancy Gear?
Early on, I made the mistake of thinking that only high-end equipment could deliver the clarity, punch, and depth I craved. I invested in premium headphones and expensive DACs—only to realize that improper settings and poor source quality were holding me back. It’s a common misconception that gear alone solves the problem. The real magic lies in optimizing what you already have and understanding the essentials of audio fidelity. Want to see how simple adjustments can make your earphones feel like studio monitors? Check out this guide for tips on enhancing bass and overall sound depth.
Optimize Your Volume Settings for Clearer Sound
Begin by setting your phone’s volume to about 75% and then increase gradually while listening to familiar tracks. This prevents clipping and distortion. For example, I once set my volume to maximum, causing squashed audio. Lowering it and adjusting the equalizer made a noticeable difference, making my playlists sound richer and more vibrant.
Use a Quality Equalizer App to Fine-Tune Frequencies
Download a dedicated equalizer app, such as Wavelet or Equalizer FX. Adjust the bass, midrange, and treble sliders to match your preference or the genre. I experimented with boosting the bass during a road trip, which added depth to my music without the need for external gear. Remember, subtle tweaks often produce the biggest gains.
Take Advantage of Built-in Enhancements and Codecs
Check if your device supports advanced Bluetooth codecs like AAC or aptX, which improve sound quality over wireless connections. Disable any sound enhancement features that might introduce artificial effects, like bass boost or virtual surround. I once kept these enabled and wondered why my sound was muddy. Turning them off clarified the audio significantly. For insights on codec importance, visit this guide.
Choose the Right Earphones or Headphones
Opt for headphones with good driver quality—ideally over 40mm for more bass and clarity. Use ear tips that fit snugly to prevent sound leakage. When I finally upgraded to a pair of audiophile-grade earphones, I noticed the difference instantly, especially in vocal clarity and bass response. Remember, even affordable models can outperform high-end earbuds if they fit well and have good drivers.
Apply Proper Physical Placement and Accessories
Place your headphones correctly on your ears, ensuring a seal for noise isolation. Use accessories like foam pads or isolation ear tips to enhance the experience. I once used an inexpensive pair with foam covers on a noisy train, which transformed my listening session. Additionally, consider using a small portable amplifier—like a headphone amp—to drive high-impedance headphones. This simple step can unlock the full potential of your existing gear. For more info on enhancing headphone performance, see this article.
Implement Software Tweaks and Apps
Use apps like Fiio Music or USB Audio Recorder PRO to bypass limitations and improve sound processing. Some apps allow you to customize crossfeed, EQ, and gain controls that your default settings might hide. I experimented with such apps during a camping trip, achieving surprisingly high-quality audio from my phone alone, without external hardware. These small software adjustments make a big difference in clarity and depth.
Maximize Wireless Performance for Reliable Quality
If listening via Bluetooth, ensure your device uses the latest codecs supported by your headphones. Keep your firmware updated and avoid interference from other wireless devices. For example, I once experienced dropouts during a workout—you can prevent this by keeping your Bluetooth updated and close to your device, or switching to wired when possible for the utmost fidelity. For insights on codec selection, refer to this resource.
Conclusion
By making these straightforward adjustments—whether through settings, accessories, or software—you’ll notice a remarkable improvement in your phone’s audio quality. Remember, it’s not always about expensive gear; often, optimizing what you already have yields the best results. So, take these steps methodically, test after each change, and enjoy a richer, more immersive sound experience right from your pocket.
Many audiophiles and casual listeners alike fall into common traps when selecting speakers, headphones, or soundbars, often believing that bigger, costlier gear guarantees superior sound. However, the real nuance lies in understanding how these components interact and the frequently overlooked details that can dramatically impact your listening experience. For instance, a prevalent misconception is that all speakers are created equal, but in reality, the placement, room acoustics, and crossover design play pivotal roles in sound quality. As John Vanderhoef, a renowned acoustician, explains in a study published in The Journal of the Audio Engineering Society, room treatment and speaker positioning can alter perceived fidelity more than the component specifications themselves.
Are You Falling for the Equalizer Trap?
Many believe that boosting bass or treble resolves poor audio quality, yet excessive equalization can distort the soundstage and introduce phase issues, leading to muddiness or shrillness. It’s a common mistake to rely heavily on EQ apps without understanding their limitations. Sometimes, improper equalizer settings can make your sound system sound worse, not better. The key is subtle adjustments and understanding frequency overlaps, as outlined in this guide. Remember, mastering speaker calibration involves more than just turning dials—it’s about appreciating how each component reacts within your acoustic environment.
Another often-missed detail is the significance of impedance matching. Using a high-impedance headphone with a device not designed for it demands more power and can limit volume or cause distortion. Conversely, low-impedance headphones paired with powerful amps might lead to unintended volume spikes or clip signals. Ensuring compatibility between your amplifier, source, and headphones is essential, as discussed in various technical forums and in the article here.
Furthermore, the quality of interconnect cables influences overall sound quality more than many realize. Cheap, thin wiring can introduce signal degradation, especially over longer runs. Opting for well-shielded, oxygen-free copper cables can preserve detail and clarity, which is crucial when fine details are paramount—check out this detailed analysis.
Why the Room Matters More Than You Think
It’s tempting to think that premium gear will compensate for a less-than-ideal listening environment, but the truth is that room acoustics can make or break the audio experience. Reflection, absorption, and standing waves can cause certain frequencies to overpower others, creating muddiness or harshness. For example, placing speakers too close to walls can boost bass unintentionally, leading to boomy sound, as explained in this article. Proper speaker placement, bass traps, and acoustic treatments are often more cost-effective than upgrading hardware for achieving clarity and depth.
Finally, be wary of marketing claims that suggest artificial enhancements—such as virtual surround or DSP processing—can replace proper speaker setup. While useful, these features often mask underlying room imperfections or can introduce phase issues if not configured correctly.
Have you ever fallen into this trap? Let me know in the comments. Remember, optimizing sound isn’t just about gear—it’s about understanding and controlling the environment and how different components work together. The little details can elevate your listening experience from decent to extraordinary.
Maintaining your audio equipment is crucial for preserving sound quality and extending the lifespan of your investment. From speakers to headphones and amplifiers, using the right tools and adopting regular maintenance routines can save you money and frustration in the long run. One of my favorite tools is a compressed air duster. I use it to gently remove dust from speaker grilles and internal components without risking damage. Regular cleaning prevents dust buildup, which can dampen sound and cause overheating. For delicate parts like volume pots or switches, a spray of contact cleaner like Deoxit is invaluable. I keep a small bottle in my toolkit and apply it periodically to ensure smooth operation and avoid crackling noises. Another essential is a multimeter; I use it to check impedance and continuity in cables and connections, helping me quickly identify faults before they become bigger problems. If your system experiences unexpected volume drops, it might be due to loose or corroded connections, easily diagnosed with a multimeter. In the future, I expect smart maintenance routines—powered by IoT sensors—to alert us to component degradation before failure occurs, making upkeep more proactive and less reactive.
How do I maintain my audio gear over time?
The key is consistency. Schedule regular cleaning sessions—once every few months—to remove dust and debris. Keep connections tight and corrosion-free by inspecting and cleaning plugs and ports with contact cleaner. Store equipment in a dry, dust-free environment, ideally with silica gel packets to absorb moisture. For speakers, verify that their placement hasn’t shifted and that they’re not facing adverse acoustics. I also recommend updating firmware or drivers for your digital components, as manufacturers often release improvements that enhance performance and stability. It’s also worthwhile to periodically test your gear’s output with tools like Room EQ Wizard or similar software, which can help detect subtle issues long before they impact your listening experience. For instance, checking phase alignment and frequency response ensures your setup remains calibrated, delivering consistent quality. As the trend in audio tech advances, integrating smart sensors that monitor temperature, humidity, and signal quality will become standard, providing real-time alerts for maintenance needs. Getting into a habit of semi-annual checks is a good start. Challenge yourself to try one of these maintenance tips this month—your ears will thank you.
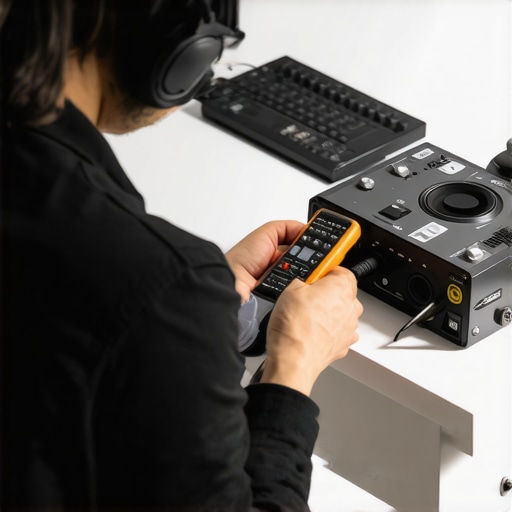
Image showcasing a technician using a multimeter and cleaning tools on home audio equipment, emphasizing regular maintenance practices.
One of the most eye-opening lessons I learned was that the true power of high-quality sound isn’t just in expensive gear—it’s in understanding how to optimize your existing setup. Over time, I discovered that minor tweaks and mindful adjustments can transform your listening experience from muddled and flat to crystal clear and immersive. The biggest breakthrough came when I stopped chasing bells and whistles and focused on tuning what I already had—this revelation saved me hundreds and elevated my audio to new heights.
The Hidden Truths That Changed My Approach to Audio
- Small tweaks can have massive impacts: Adjusting your device’s settings, choosing the right app, or physically positioning your headphones can unexpectedly unlock richer sound—sometimes more than replacing gear.
- Room treatment trumps gear upgrades: Even minor acoustic treatments, like foam pads or placement adjustments, dramatically improve clarity without extra expenses.
- Avoid overEQ temptation: Subtle equalizer tweaks often outperform aggressive settings, which can introduce phase issues and muddiness. Learning the nuances of frequency overlap improved my listening more than any preset ever could.
- Proper maintenance keeps sound pristine: Regularly cleaning connections, updating firmware, and checking impedance helped sustain optimal performance, proving that proactive care is as crucial as initial setup.
- The environment is your silent partner: Fixing room acoustics, managing reflections, and minimizing background noise created a more engaging experience—regardless of gear quality. Sometimes, optimizing the environment is the smartest upgrade.
My Toolbox for Superior Sound Quality
- Deep bass guides: Practical advice on boosting bass without distortion.
- Codec importance: Understanding wireless enhancements for seamless sound.
- Cleaning tricks: Maintaining clarity through proper care.
- Compatibility tips: Ensuring your gear isn’t hampered by technical limitations.
Keep Your Voice in the Crowd
Elevating your phone’s sound quality isn’t about costly investments; it’s about consciously fine-tuning and caring for your gear and environment. Every small step—whether changing settings, cleaning contacts, or adjusting placement—adds up to a profound difference. As you start applying these insights, you’ll find yourself rediscovering music, podcasts, and videos in a way you never thought possible. So, why not take a moment today to analyze your system? Small improvements can lead to unexpectedly big results, transforming everyday listening into a studio-like experience. What’s the first tweak you’re excited to try? Share your thoughts below and let’s elevate our audio journeys together.