
Ever cranked up your home or car stereo only to hear that nasty, distorted sound that ruins the mood? It hits hard — that dreadful clipping noise that sneaks in when your amplifier is pushing beyond its safe limit. I remember the lightbulb moment when I first realized that my own aggressive tuning was silently murdering my precious tweeters. Turns out, that screeching distortion is a sign you’re clipping your amp, and if left unchecked, it can cause costly damage. Today, I promise to show you simple, practical ways to tell if your amp is clipping *before* it does permanent harm, so you can protect your speakers and enjoy your music loud and clear.
Why You Need to Keep an Ear on Your Amp’s Clipping Level
Clipping happens when your amplifier is driven into its maximum output, but instead of pushing a clean signal, it starts to distort. Think of it like pushing a garden hose to the limit — eventually, the pressure becomes too much, and the spray turns uneven or even bursts. For audio gear, this distortion turns into harsh, unpleasant sound, and at worst, it can melt your tweeters and ruin that perfect high-frequency sparkle you’ve paid for. According to a report by Sound & Vision, clipping can cause a 20- to 50-percent decrease in speaker lifespan if ignored, making it a crucial problem to tackle early.
Many audiophiles, including myself, have made the mistake of ignoring that telltale distortion, assuming it’s just the music or a bad recording. But I learned that the warning signs are real — and early detection is the best defense. If you don’t learn how to recognize the signs, you risk shelling out for new tweeters, or worse, losing your favorite gear altogether.
So, how can you tell if your amp is clipping without fancy equipment? Well, that’s what we’re about to explore. But first, let me ask — have you ever pushed your volume too high and heard that awful crackle, only to realize too late that your gear took a hit? If yes, stick around. We’ve all been there, and there’s no shame. The key is becoming aware of the signs and taking action — which I’ll help you do now.
Set Your Volume Levels Carefully
Start by gradually increasing your volume while listening for distortion. Dial up your volume slowly—think of it like filling a glass of water: don’t pour it in all at once, or you’ll spill. When you hear that harsh screech or a crackling sound, you’ve likely hit clipping territory. I recall turning my car stereo all the way up during a drive, and suddenly, the high notes sounded icy and harsh. I immediately backed off before any damage occurred, learning to trust my ears over a meter.
Learn to Recognize the Sound of Clipping
Understanding what clipping sounds like is crucial. It’s a harsh, grinding noise that feels out of place compared to the music’s normal tone. Imagine rubbing your fingernails on a chalkboard—that uncomfortable screech. When I used my home theater, I noticed that once the bass got heavy, the treble started to distort. If you detect this, turn down the volume or adjust your gain settings.
Use a Smartphone App for Visual Clipping Detection
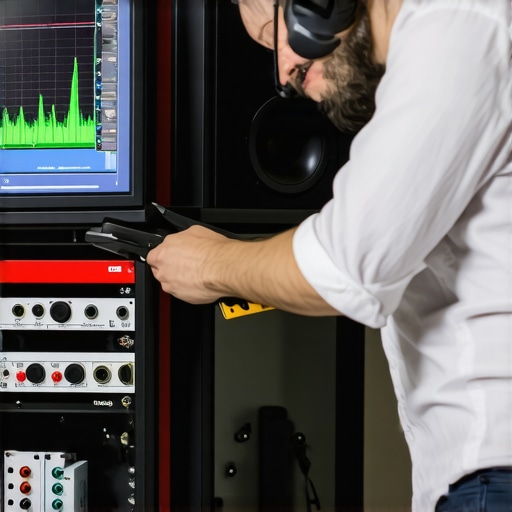
Apps like spectrum analyzers can visually reveal when your amp is clipping. These tools display your audio signal in real-time, showing peaks that hit the maximum level—indicators of potential clipping. I downloaded a free app, and during a test, saw sudden spikes at high volumes. That visual cue helped me fine-tune my volume to avoid amp overloads, extending my gear’s lifespan.
Adjust Gain Settings Properly
Gain controls act like the volume booster before the final stage. Set it too high, and clipping becomes imminent. Think of it like water pressure in a hose: increasing gain is akin to turning the tap on full blast—eventually, the pressure overcomes the hose’s limit. Carefully lower your gain knob while listening for distortion, ensuring your amplifier runs clean. When I fixed my car’s amplifier, I started with the gain at half and gradually increased, listening closely until I heard distortion, then backed off just enough to keep it clean.
Test Different Frequencies to Confirm Clean Signal
Use test tones—available in various smartphone apps—to check your system’s response across frequencies. Play a pure sine wave at 1kHz, then move to bass and treble frequencies. Clipping often manifests first at high volumes in certain ranges. I once set up my home speakers and used a tone generator, noticing the distortion only in the high-frequency tests. This pinpointed the issue, prompting me to lower my gain or adjust crossover points for cleaner sound.
Don’t Rely Solely on Equipment Meters
Many amplifiers have built-in clip indicators, but these aren’t foolproof. They are akin to a speedometer that might not register every subtle change in speed. My experience confirmed that trusting your ears and visual analysis with a spectrum app yields better results. The key is to observe both the device’s signals and your listening experience.
Implement a Protective Limiter or Compressor
Adding a limiter or compressor can automatically prevent your amp from hitting clipping levels. Think of these as safety valves that release excess pressure—protecting your speakers from voltage spikes. I installed a simple compressor in my home setup, which slightly reduced the overall volume peaks, ensuring I could listen loud without risking distortion or damage.
Stay Mindful of Your Speaker’s Limits
Every speaker has a maximum power rating. Pushing beyond it, even without clipping, can cause damage. For example, if your tweeter’s rated for 50 watts, don’t feed it more than that—clipping isn’t the only hazard. Properly matching your amplifier’s power output and your speaker’s capacity is vital. For help creating compatible setups, check out guides like this article.
Many enthusiasts dive into home audio shopping expecting straightforward bargains and proven upgrades, but beneath the surface lie misconceptions that can cost you. A prevalent myth is that more expensive gear always outperforms budget options—however, careful matching and understanding your unique space often trump price tags. For instance, choosing the right **subwoofer enclosure** can dramatically influence sound clarity, regardless of budget.
One common oversight is underestimating the significance of speaker placement and room acoustics. Many assume tweeters or soundbars alone determine audio quality, but improper positioning—like placing speakers too close to walls—can lead to muddiness or lack of dynamics. Understanding the nuances of **tweeter material effects** on sound quality highlights that the choice isn’t just about brand or price.
A crucial trap many fall into is relying solely on manufacturer specifications or built-in meters to judge system performance. *This can be misleading*, as these tools are often not calibrated for your unique environment. Instead, performing real-world tests with **stereo imaging techniques** and verifying with live listening remains essential. Remember, a speaker’s rated sensitivity doesn’t guarantee it will sound better in your room.
Let’s also clear up a popular misconception: that all high-end headphones or soundbars automatically deliver superior sound. In many cases, carefully selecting based on **driver technology** and how they integrate into your environment is more productive than chasing the latest trend or highest price point.
One advanced tip is to consider the impact of **room interactions and resonance** that aren’t immediately obvious. For example, a seemingly minor placement tweak can eliminate bass rattles caused by structural vibrations, improving clarity without any expenditure.
Be cautious of the ‘bigger and louder’ illusion. More volume or bigger speakers aren’t always better if your component synergy isn’t optimized. For instance, pairing an underpowered amplifier with large speakers can cause distortion, an overlooked issue I once encountered. Proper impedance matching, as explained in **matching speaker impedance**, can prevent this.
Finally, don’t assume that high price equals durability or long-term performance. Some premium gear may be highly overrated, especially if not matched properly or suited to your specific needs. Be wary of flashy marketing; instead, focus on the **technological nuances and real-world testing**.
Have you ever fallen into this trap? Let me know in the comments! Remember, the best audio setups are those tailored carefully to your space and preferences, not just the ones with the highest sticker prices.
How do I maintain my home audio gear over time?
Sustaining optimal performance from your audio setup requires more than just initial setup; it involves routine maintenance and the right tools. I personally rely on a few specialized pieces of equipment and software that have become invaluable in my ongoing quest for pristine sound quality.
First, a high-quality digital audio analyzer like the SoundTools PPM6000 helps me monitor signal levels and detect clipping or distortion early on. This device provides precise visual feedback, allowing me to fine-tune gains and crossovers without guesswork. Regularly checking the Room EQ Wizard software also helps me analyze room acoustics and identify problematic nulls or peaks, guiding speaker placement adjustments that improve long-term sound clarity.
For cleaning and maintaining connectors, I swear by Canare’s contact cleaner. It evaporates quickly and ensures that connections stay free of oxidation, which can cause subtle signal degradation over time. Additionally, I keep a set of small brushes and compressed air to gently clean vents, grills, and internal components—preventing dust buildup that can impair performance.
Investing in ground loops isolators has also helped prevent hum and noise issues, especially in complex multi-component systems. And of course, a reliable surge protector is non-negotiable for protecting sensitive electronics from power surges and outages.
Looking ahead, I predict that integration with smart home systems and AI-driven diagnostics will make maintenance even more proactive. Devices will one day alert you automatically when system parameters drift or components need attention, simplifying upkeep.
What specific steps can you take today to keep your system performing at its best? Consider starting with one advanced tip—like using a spectrum analyzer to visualize your audio signal—and see how it elevates your gear’s performance. Incorporate these tools into your routine, and your home sound system will reward you with consistent, top-tier audio for years to come.
Lessons No One Tells You AboutTube Amplifiers,Headphones,Speakers,Soundbars,And How They Fail Quietly
One of the most eye-opening realizations I’ve had is that even high-end equipment isn’t immune to silent threats like clipping, which often fly under the radar until it’s too late. I once ignored subtle signs of distortion during a movie night, only to wake up to a blown tweeter. That experience hammered home that early warning signs are your best allies in preventing costly repairs or replacements, and sometimes, the hardest lessons lead to the most valuable insights. Being attentive and learning the quirks of your audio gear can save you hundreds in the long run.
The Gear You Never Knew Could Save Your Soundscape
After experimenting with spectrum analyzers like the Room EQ Wizard, I discovered that visual tools provide a level of precision that ears alone can’t match. These tools reveal the peaks and valleys in your sound signal, guiding you to set gains and crossover points effectively. Investing in a good audio analyzer or learning how to use free software can be a game-changer, turning guesswork into confident adjustments. Trust me, once you see the real-time data, you’ll never settle for guesswork again.
Embrace a Routine: Protecting Your Audiophile Sanctuary
Creating a quick maintenance routine—checking connections, cleaning your drivers and grills, and verifying your settings—becomes second nature with consistency. I schedule monthly checks, and this proactive approach has preserved my gear’s clarity and extended its lifespan. It’s not just about fixing problems; it’s about cultivating a mindset that values your equipment and the music it delivers, ensuring long-term listening pleasures. Remember, good habits today prevent regrets tomorrow.