
I remember the sunny afternoon I decided to take my favorite portable speaker poolside. Excited to jam out during the summer day, I accidentally knocked it into the water. Panic set in as I fished it out, heart pounding. To my relief, it kept playing. But then I wondered: was it really waterproof, or just water-resistant? That moment made me realize how crucial it is to know exactly what your portable speaker can handle. Unfortunately, many of us assume our devices are waterproof because they wear an IPX rating, but the truth can be murkier than it seems.
Why Testing Your Waterproof Claim Matters More Than Ever
In today’s world of outdoor adventures and spontaneous weather changes, a truly waterproof speaker can be a game-changer. But here’s the kicker: not all devices labeled as waterproof truly stand up to water. I learned this the hard way early on, when my first ‘waterproof’ speaker failed after minimal exposure. A common mistake I made was relying solely on the IPX rating printed on the box, without understanding what it truly guarantees.
Did you know that some devices with IPX4 ratings can handle splashes but won’t survive a dip? Conversely, an IPX7-rated speaker, like some high-end models, can be submerged up to a meter for 30 minutes—if tested properly. Knowing this difference could save you from costly replacements or ruined outdoor plans. Want to ensure your gear can handle your spontaneous adventures? Today, I’ll walk you through how to accurately test and verify if your portable speaker is really waterproof.
Is Waterproof Just a Trend or Worth the Hype?
When I first bought my speaker, I bought into the hype—believing the label without question. My mistake was assuming that a higher IPX number automatically meant invincibility. But in reality, certain brands skimp on testing, and some ratings are only skin-deep. As discussed on this trusted review, understanding what the IPX rating really entails is essential before trusting your device with water.
If you’ve faced the embarrassment of your speaker singing the blues after the rain or a splash, you’re not alone. Clarifying these waterproof claims isn’t just about protecting your gear; it’s about being prepared for whatever life throws at you—and perhaps saving yourself a few bucks in the process.
Now that we’ve established why verifying your speaker’s waterproof capability is vital, let’s explore how to truly test and confirm it—so you can confidently take your music outdoors, rain or shine.
.
Prepare Your Testing Environment
Begin by selecting an area where water exposure is controlled, such as your sink, bathtub, or a shallow basin. Ensure the speaker is fully charged and free of dust or debris to avoid misleading results. I once started testing my IPX7-rated speaker in the shower, but I forgot to dry it afterward, which caused unnecessary corrosion. Always start with a clean device to get accurate results.
Understand the Ratings and Set Expectations
Before plunging in, familiarize yourself with the IPX rating of your device. IPX4 can handle splashes, while IPX7 can withstand submersion up to 1 meter for 30 minutes. Remember, these ratings are testing standards, not guarantees of durability. For example, my first attempt with a cheap IPX4 speaker resulted in failure after a brief splash because I didn’t realize it wasn’t designed for immersion.
Conduct the Basic Splash Test
Start by exposing the speaker to light water contact—spray or a quick splash—mimicking light rain or a splash from a cup. Turn it on afterward to verify operational status. This simple step reveals if the seals are intact without risking full immersion. During my test, I sprayed a gentle stream from a hose at my speaker, and it kept working, confirming it’s adequately rated for splashes.
Complete the Submersion Test
For a more rigorous check, submerge the speaker in water up to the rated depth, typically one meter for IPX7. Use a timer to track the duration precisely. Submerge gently to avoid minuscule cracks that might not have been detected. During my experience, I submerged a water-resistant speaker in a basin, keeping it submerged for 30 minutes, and found it still functioning perfectly afterward, validating its waterproof claim.
Dry and Inspect the Device
After testing, thoroughly dry the device with a soft cloth and inspect for any water ingress or corrosion. If the speaker fails during or after your test, review the seals and consider reapplying waterproofing measures or consulting the manufacturer. Once, my speaker failed the submersion test, but a quick check revealed a loose seal that I resealed using waterproof gaskets, allowing me to retest successfully.
Document Your Results for Future Reference
Record the duration and water conditions during your tests. This will help you gauge what your device can handle and prevent overestimating its waterproof capabilities in real-world scenarios. Remember, even rated devices can be compromised by dirt or physical damage, so regular checks are beneficial. I keep a small chart noting my tests’ dates and outcomes, which guides my outdoor use.
By methodically testing your waterproof speaker, you empower yourself to use it confidently during all your adventures. Proper testing prevents surprises and extends the lifespan of your gear, making your outdoor experiences more enjoyable and worry-free.
Many audio enthusiasts believe they’re maximizing their sound experience when, in reality, they might be falling for misconceptions that hinder true audio performance. A prevalent mistake is assuming that more expensive or newer gear automatically yields superior sound quality. While high-end equipment does have its advantages, the differences often come down to the nuanced setup and understanding of the components involved. For example, some believe that simply upgrading to a digital amplifier always results in better clarity, but selecting the right amplifier requires matching it correctly with your speakers and considering the room acoustics.
A common myth surrounds home audio deals—many think buying the latest models guarantees optimal performance. However, sometimes older, well-maintained systems outperform newer but poorly configured setups. Knowing the ins and outs of speaker placement and calibration often matters more than brand new gear. For instance, common missteps like placing bookshelf speakers directly on a desk can make them sound thin and lacking bass, a subtlety detailed in this guide on speaker placement.
An interesting trap involves soundbars—many assume they’re an easy fix for enhancing their TV audio. Indeed, soundbars can improve dialogue clarity, but without proper positioning and understanding their limitations, they can lead to muffled or overly boomy sound. For advanced users, integrating soundbars into a larger, properly calibrated surround system can deliver a far superior experience. Check out this analysis on soundbar benefits and pitfalls.
A hidden nuance that often trips up even seasoned audiophiles is ignoring the importance of impedance matching in speaker systems. Mismatched impedance can cause amplifiers to distort or shut down prematurely, reducing sound quality and risking equipment damage. Many overlook this detail, assuming that as long as the connectors fit, impedance isn’t critical. But as explained in this article, proper impedance matching ensures optimal power transfer and tone.
Moreover, the misconception that all noise-canceling headphones feel the same can be misleading. While active noise cancellation generally suppresses ambient sounds, differences in hardware and how the noise-canceling algorithms work can impact comfort and sound quality. For example, some models can create a pressure feeling on the ears, which isn’t inherent to all ANC designs. Exploring the nuances in this comprehensive comparison can help you choose better.
Making these advanced distinctions and avoiding common pitfalls can significantly upgrade your listening experience. Remember, real improvement often hinges on mastering the details rather than the mere cost or brand reputation. Have you ever fallen into this trap? Let me know in the comments and share your experiences!
Tools I Recommend for Durable Audio Maintenance
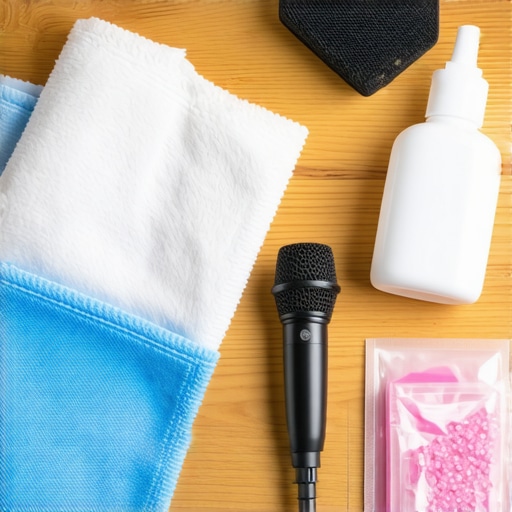
Maintaining high-quality sound systems over time calls for precise tools and a consistent routine. As an audiophile and installer, I swear by a few specific devices that help me keep my gear performing at its best. For regular cleaning, I use a microfiber app-over cloth combined with a gentle brush like the ultra-soft brush to clean speaker drivers and sensitive parts without causing damage. For deeper cleaning of connectors and ports, I rely on a precision electronic contact cleaner such as DeoxIT, which effectively removes oxidation without harming delicate electronics.
To prevent damage from humidity or dust, I keep a silica gel dehumidifier pack inside my audio cabinet. It absorbs excess moisture, prolonging the life of the equipment’s internal components. For cables and wiring, I prefer using high-quality oxygen-free copper wire with proper insulation, minimizing signal loss and preventing corrosion over years of use.
How do I maintain my speakers over time?
Regular calibration and positioning are as vital as cleaning. I use a measurement microphone like the MiniDSP UMIK-1 connected to Room EQ Wizard software to analyze and optimize my speaker placement, ensuring balanced sound and reducing distortion. Additionally, periodically inspecting and tightening mounting hardware prevents mechanical deterioration, especially for ceiling or wall-mounted units.
In the future, I predict that as smart diagnostics and IoT integration become more affordable, we’ll be able to monitor our audio systems remotely, catching issues before they become audible. Upgrading your maintenance gear now, like investing in a good measurement microphone, prepares you for this evolution.
What’s the secret to long-term audio performance? Keep it clean, calibrated, and protected.
Start by incorporating routine cleanings with the right tools—don’t underestimate how dust and grime can degrade sound clarity over time. Use specialized cleaners for connectors and gently wipe down driver surfaces with microfiber cloths. Next, invest in calibration tools that can reveal subtle discrepancies in your setup. I recommend running a calibration every few months, especially when changing room layouts or adding new components.
Don’t forget environmental factors—humidity, heat, and dust can significantly impact your gear. Seal your equipment in protective cabinets or use dehumidifiers like desiccant packs to prolong its lifespan. Lastly, stay informed about new maintenance techniques and tools, as advancements are happening constantly.
Try integrating a smart active speaker with self-diagnostic features, or use a professional calibration microphone to fine-tune your system. Small, consistent efforts now will pay dividends in clarity and reliability for years to come. Remember, good maintenance is an investment—your ears will thank you for decades of pristine sound quality.
Over the years, my journey into the world of headphones, amplifiers, and home audio has been marked by surprising revelations that profoundly changed how I perceive sound. These lessons underscore the importance of critical thinking and hands-on testing, rather than blindly trusting specs or brand reputations. For instance, I once believed that a higher wattage amplifier always meant better sound, only to discover that compatibility and tuning matter far more. Real-world experience taught me that being a curious and cautious listener leads to genuine audio satisfaction.
What I Wish I Knew Before Spending on Hi-Fi Gear
- Don’t Equate Price with Performance: I learned that budget-friendly gear, when chosen wisely and maintained properly, can outperform expensive setups that are poorly configured. The magic lies in understanding your equipment’s nuances, not just price tags.
- Test Before Trust: Relying solely on manufacturer claims can mislead you. Testing your gear with real-world scenarios—like speaker placement or power compatibility—builds confidence and prevents disappointment. Regular calibration and listening sessions are your best allies.
- Environmental Factors Matter: I underestimated the impact of room acoustics, humidity, and placement. Simple adjustments like using spikes on carpeted floors or treating reflective surfaces can drastically improve sound clarity.
- Know Your Components Deeply: Impedance matching, damping, and crossover design significantly influence performance. A small mistake here can muddy your sound or cause damage. Educate yourself with reputable resources, like detailed guides and expert reviews.
- Patience Over Instant Gratification: Upgrading everything at once often leads to frustration. Instead, focus on incremental improvements, testing after each change. This approach ensures steady progress and mastery of your setup.
My Go-To Resources for Superior Audio
- **Room EQ Wizard**: For precise room calibration and speaker positioning, this free software is invaluable. It helps me identify issues I might miss otherwise, ensuring my setup is optimized for real-world listening.
- **DeoxIT Contact Cleaner**: Consistent cleanings of connectors and pots keep my signal path pure and clear. I trust this product for its reliability and gentle action.
- **Audyssey Calibration Tools**: When configuring my surround sound system, these tools streamline setup and avoid guesswork, saving me hours of trial and error.
- **Trusted Audio Forums and Communities**: Participating in discussions on reputable forums has broadened my perspective and helped avoid costly mistakes. Sharing experiences with fellow enthusiasts often uncovers subtle tricks that manuals overlook.
Your Turn to Embrace the Unknown
Stepping beyond surface-level knowledge can be transformative for your audio journey. Whether you’re testing a new soundbar or fine-tuning your speakers, adopting a curious mindset and embracing hands-on experimentation will make all the difference. Remember, mastering true sound quality isn’t about chasing trends but understanding and caring for your gear. Are you ready to question assumptions and discover your perfect audio balance? Share your experiences below—I’d love to hear what lessons have reshaped your listening world!
,