
Imagine this: you’re cruising down the highway, your favorite playlist pounding through your car speakers. Suddenly, there’s a loud distortion, and no matter how much you turn up the volume, the sound just doesn’t get any clearer. Frustration creeps in. I used to face this exact problem, thinking I needed a costly new head unit or aftermarket system. But here’s the thing—sometimes, upgrading your car’s sound isn’t about ripping everything out and starting fresh. It’s about smart, budget-friendly tweaks that make a noticeable difference.
Why Settling for Factory Sound Just Isn’t Enough
Factories often prioritize cost over quality, meaning your car’s original audio system is tuned for durability and cost-efficiency, not audiophile perfection. But if you’re like me—someone who loves a rich, immersive listening experience—the factory setup can feel like a constant disappointment. The good news? You don’t have to replace the entire head unit to hear your music as it was meant to be heard. Small, strategic upgrades can dramatically improve sound quality without breaking the bank or complicating your install.
Early on, I made the mistake of thinking that only an expensive, high-end head unit could transform my car audio. Turns out, there are effective ways to enhance sound clarity and depth, leveraging equipment you might already have or can easily add. For instance, adding a quality amplifier or a dedicated subwoofer can turn lackluster playback into something truly enjoyable. Did you know that you can improve your car’s audio performance significantly by simply upgrading specific components? According to recent reviews, a well-chosen amplifier can restore clarity and punch that factory systems often lack.
Is Upgrading Your Car Audio Worth the Hassle?
It’s a common skepticism—will these tweaks actually make a difference? Or will I just end up wasting money on gadgets that don’t live up to their promises? I get it. That’s why I avoided unnecessary expenditures early on and focused on proven, step-by-step improvements. For example, installing a matte sound damping kit can reduce rattles and improve overall clarity, and it’s surprisingly simple to do yourself.
So, if your current setup leaves you feeling unimpressed, you’re in the right place. Throughout this guide, I’ll share practical tips based on my own experiences and tested techniques that can bring high-quality sound to your daily drive—all without replacing that existing factory head unit. Ready to transform your car audio? Let’s dive into the first essential upgrade.
,
Install a Quality Amplifier to Boost Clarity
Start by adding an amplifier between your factory head unit and speakers. This device amplifies the signal, resulting in cleaner, more dynamic sound. I once purchased a used amp from a local classifieds site, following the checklist for used audio gear (checklist), and installed it myself. The difference was immediate—music sounded fuller and more detailed without the need for costly head unit upgrades.
Upgrade Your Speakers for Better Sound
Replacing stock speakers with high-quality aftermarket models can dramatically improve clarity. Focus on speakers rated for your car’s size and mounting space. Compact bookshelf speakers or component sets tend to produce more precise sound. I replaced the factory dash speakers with a set of bookshelf speakers, which unlocked clearer vocals and tighter bass. Use research to choose your model and ensure they match your system’s power output.
Add Sound Damping Materials
Reducing vibrations and rattles can clear up muddled sound. Applying damping mats to doors and panels absorbs unwanted vibrations, letting your speakers produce cleaner audio. I applied damping sheets to my car doors, which not only improved sound quality but also cut down noise. It’s an inexpensive tweak that offers big rewards. For detailed steps and materials, check out soundproofing techniques.
Optimize Speaker Placement and Wiring
Positioning your speakers correctly is crucial. Aim for symmetrical placement away from obstructions, with tweeters at ear level. Use high-quality wiring with proper gauge—cheaper cables can introduce interference, degrading sound. I remember trailing wires across my dash after ordering some connectors, which caused crackles. Replacing cheap wiring with thicker, shielded cables (recommendations here) minimized interference, giving me clearer sound.
Reduce Electrical Interference
Interference can muddy your audio. Keep power cables away from signal wires, and consider installing a noise filter in your system. I experienced static when my car was near power lines; installing a filter (filter options) significantly reduced static, resulting in pure sound clarity. Take time to inspect your wiring and eliminate unnecessary loops which can act like antennas.
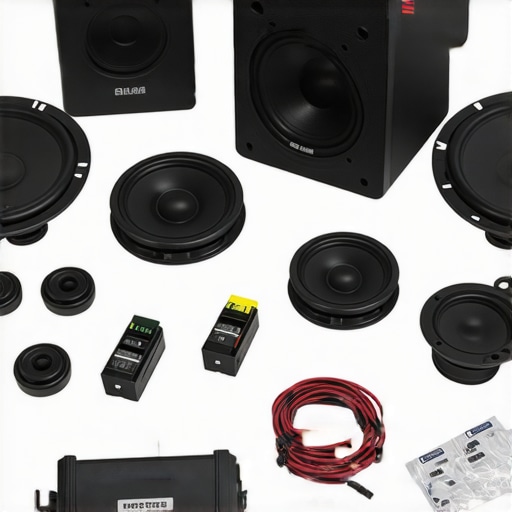
Most enthusiasts and even seasoned audiophiles often fall prey to common myths surrounding speakers, headphones, soundbars, and amplifiers. One pervasive misconception is assuming that higher price always equates to better sound quality. While premium gear has its place, many overlook the importance of matching components to their specific environment and listening habits. An expensive amplifier, for instance, won’t fix a poorly placed speaker or one with incompatible impedance. This aligns with findings from audio expert Dr. Ethan Winer, who emphasizes system synergy over sheer component quality.
Are All Powerful Amplifiers Necessary for Your Setup?
In reality, a common mistake is believing that wattage alone determines how loud or clear your system will sound. Overpowered amplifiers can introduce distortion if paired with inefficient speakers or unsuitable wiring. Conversely, using a low-wattage amp with high-sensitivity speakers can deliver surprisingly robust audio. It’s also vital to consider impedance matching; mismatched impedance can cause clipping and damage. Always consult expert guidelines when upgrading, and remember that sometimes, less can be more. For insights on optimizing amplifier choice, check out these budget-friendly amp picks.
Tools I Recommend for Longevity and Performance
Maintaining your home audio setup isn’t just about initial setup; it’s an ongoing process that ensures consistent sound quality and prevents costly repairs. Over the years, I’ve relied on specific tools and methods that have proven indispensable. One of my go-to items is a high-quality multimeter, like the Fluke 117. It’s essential for diagnosing wiring issues, checking impedance, and ensuring your amplifier and speakers are functioning optimally. Unlike generic testers, the Fluke provides accurate readings, helping me catch potential problems before they escalate.
Another crucial tool is a dedicated calibration microphone, such as the Dayton Audio iMM-6. I use this microphone paired with audio calibration software like REW (Room EQ Wizard). This combination enables precise room and system calibration, eliminating acoustic anomalies that can detract from your listening experience. Regular calibration, ideally every six months, ensures your system stays optimized, especially if you rearrange furniture or add new components.
Additionally, I swear by a cable tester like the Klein Tools VDV Tester. It quickly verifies the integrity of your speaker wires, interconnects, and power cords. Faulty wiring can cause static, hums, or distortion, and catching these issues early can save you hours of troubleshooting. Using quality connectors and shielded cables also minimizes interference, preserving audio purity.
How do I maintain my audio system over time?
Implementing routine cleaning and inspection is vital. I regularly dust off components with a soft brush and check for loose connections. Keeping your equipment in a well-ventilated, cool environment prevents overheating, which can degrade electronic components. For sensitive gear like tube amplifiers, swapping out old tubes periodically with high-quality replacements from reputable brands like Sovtek helps maintain the warm, rich sound they’re known for.
On the software side, I use updates from manufacturers and calibration tools to fine-tune my system. Staying current prevents compatibility issues and takes advantage of performance improvements. The future of home audio suggests even more integration with smart home systems, making remote diagnostics and updates more accessible. As audiophile expert Ethan Winer notes, system synergy, supported by proper maintenance, is the key to long-term satisfaction in your setup.
If you haven’t tried using a calibration microphone with REW yet, I recommend giving it a shot. It’s an advanced but straightforward step that can dramatically improve your system’s clarity and depth. Optimizing your configuration now will pay dividends as you enjoy pristine sound for years to come.
Over the years, I’ve learned that elevating your home audio system isn’t about chasing the latest gadget or spending a fortune. Instead, it’s about understanding the nuances—making small but impactful adjustments that can transform your listening experience. The journey has taught me that system synergy, calibration, and respecting the environment are key to truly enjoying your music, movies, and gaming.
What the Experts Won’t Tell You About Home Audio Gains
- Most misconceptions stem from oversimplified advice: believing that more wattage or expensive components automatically mean better sound can lead you astray. Truthfully, the magic lies in how components interact—matching your amplifier with your speakers, and placing them optimally for your room’s acoustics. I once upgraded my amp without considering speaker impedance, which resulted in lesser clarity. It was a lightbulb moment that understanding synergy beats pure power.
- Many overlook the importance of calibration and room treatment. Investing in a calibration microphone and applying proper damping transformed my system from muddy to crisp. This step is often skipped even by seasoned enthusiasts, but embracing it opened my ears to details I’d never heard before.
- Cheap wiring and loose connections can sabotage even the best setup. Regular inspections and using quality cables kept static and interference at bay, ensuring my music played as intended. The difference? A noticeable increase in clarity and punch—proof that small investments in quality matter.
- Patience matters more than instant gratification. Upgrading iteratively and calibrating gradually allowed me to truly appreciate each improvement. Rushing for that perfect setup often leads to disappointment; Rome wasn’t built in a day, and neither is an audiophile-grade system.
- Finally, maintaining your system with routine cleaning, checkups, and software updates minimizes issues and prolongs performance. For example, a simple cleaning of connections prevented static and loose signals, saving me hours of troubleshooting later.
My Essential Toolkit for Achieving Better Sound
- Multimeter: I rely on my Fluke 117 for quick diagnostics of wiring and impedance—trustworthy and precise, it’s vital for troubleshooting electrical issues.
- Calibration Microphone: Paired with software like REW, it fine-tunes my system to eliminate room anomalies. Regular calibration has kept my soundstage vivid and accurate.
- Quality Cables and Connectors: Investing in shielded, thick-gauge cables with good connectors like Neutrik prevents interference and preserves signal integrity, which is apparent during critical listening sessions.
- Sound Damping Materials: Applying damping mats to door panels reduced vibrations, clarity improved, and I experienced less rattling during bass-heavy scenes.
- Room Acoustic Treatment Guides: Resources like the soundproofing techniques page helped me understand how to position furniture and add acoustic panels strategically for optimal sound.
Your Next Step Towards Audio Excellence
Achieving high-quality sound in your home isn’t reserved for the pros; it’s accessible through knowledge, patience, and strategic upgrades. Remember, every tweak—be it calibration, component matching, or room treatment—brings you closer to immersive audio enjoyment. Embark on this journey with confidence, knowing that even small improvements can yield extraordinary results. If you haven’t yet, consider exploring tools like calibration microphones to unlock your system’s full potential, and don’t hesitate to experiment with placement and damping—you might be surprised at how much difference they make.
What’s the biggest challenge you’ve faced when upgrading your home audio system? Share your story or ask questions below—I’d love to hear about your experience and help you get the sound quality you crave.