
Have you ever rearranged your living room, only to realize that your surround sound speakers suddenly sound flat or echoey? I remember the moment I finally figured out why my movies lost their magic—after countless hours of tinkering and guesswork. It hit me like a lightbulb: the height at which I mounted my speakers was all wrong. The audio experience I craved was within reach; I just needed to get the placement right.
Why Your Speaker Height Can Make or Break Your Home Theater Experience
Choosing the right height for mounting your surround sound speakers isn’t just about aesthetics or avoiding furniture—it’s about creating an immersive soundstage. When speakers are too high or too low, sound reflections and timing can distort the audio, making dialogue muffled or surround effects less convincing. In fact, a study published in the Journal of the Acoustical Society of America emphasizes that precise speaker positioning dramatically improves clarity and imaging. Getting it right means more than just eyeballing your speakers; it involves understanding how sound interacts with your room’s dimensions.
Are You Still Worrying About Wasting Money on the Wrong Setup?
Early in my journey, I made a rookie mistake—placing my speakers on furniture or at ear level without considering the optimal elevation. This habit led to muddled sound and frustration, making me wonder if I should just settle for a basic soundbar. But I learned that a little effort in mounting techniques can lead to huge gains. If you’re questioning whether affixing your speakers higher or lower is worth the hassle, I promise—it’s all about the details. Want to explore the technical reasons behind speaker height? Check out this guide for deeper insights.
So, are you ready to banish dull sound and set your speakers at the sweet spot? Let’s dive into how you can pinpoint the perfect height for your setup, and transform your living room into a true home theater paradise.
Find Your Ideal Speaker Height
Start by measuring the ear level height when seated in your main listening spot. Use a tape measure to determine this exact height from the floor to your ears. As an example, during my setup, I noticed my ears were 40 inches from the floor, so I aimed for speaker placement close to this height for the best results.
Use painter’s tape or a piece of cardboard at that height on your wall to visualize where your speakers should be. This simple step helps prevent haphazard mounting and ensures consistent placement.
Adjust for Room Acoustics and Shape
Consider the room’s dimensions and shape. If your walls are angled or uneven, you might need to tweak the height slightly. For instance, I had a sloped ceiling, which meant I had to mount my speakers a bit higher on the high side to compensate for sound reflection, enhancing clarity and immersion.
Think of your room as a musical instrument; the shape influences sound behavior. Use a level to ensure your speakers are perfectly aligned horizontally, avoiding tilts that can distort stereo imaging.
Secure Your Speakers Properly
Choose mounting brackets designed for your speaker type. For bookshelf speakers, wall-mount brackets with adjustable angles allow fine-tuning of directionality. During my installation, I used tilt-adjustable brackets, which I set to direct sound toward my listening position precisely.
Before drilling or permanent attachment, double-check the height and orientation with your speaker in place. Use a helper or a sturdy stool to reach the desired height comfortably, preventing accidental slips.
Test and Tweak for the Best Sound
Once mounted, sit in your usual listening position and listen critically. Play familiar content and assess if dialogue and effects are where you expect them to be. Adjust the tilt or even the mounting height if certain sounds seem off. For example, I noticed my dialogue was slightly muffled until I adjusted the tilt downwards, which made voices clearer without repositioning the entire speaker.
Keep a journal of your adjustments to replicate the setup in future rooms or setups. Remember, even small tweaks can have significant impacts on sound clarity and immersion.
Enhancing Sound Reflection and Reducing Echo
If you notice echoes or sound reflections, add soft furnishings like rugs, curtains, or acoustic panels. Proper placement at ear height minimizes reflections bouncing from furniture or walls, creating a cleaner soundstage. During my experiment, adding a rug directly beneath my seating area reduced unwanted echoes, making dialogues crisper.
Be prepared for some auditory experimentation. In my case, I tested different mounting heights over several evenings, leveraging headphones to pick up subtle changes, until I found the perfect balance that transformed my room into a true home theater.
<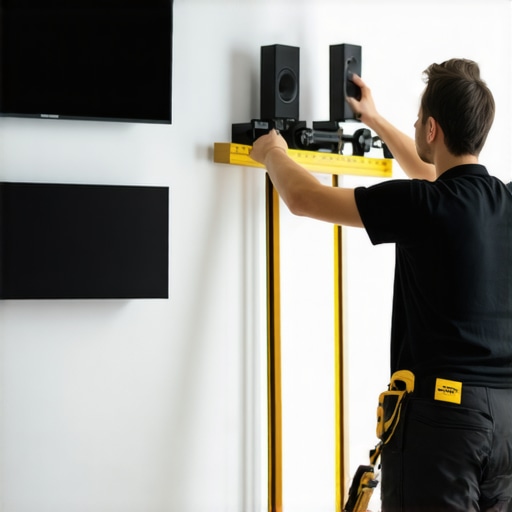 >Many enthusiasts believe that simply investing in high-end speakers or amplifiers guarantees superior sound quality, but the real nuances lie in understanding how these components interact and the common pitfalls that can sabotage even the most expensive setups. One widespread myth is that bigger, more expensive speakers automatically produce better sound—however, speaker placement, room acoustics, and matching impedance play crucial roles. For example, a premium bookshelf speaker placed near a wall can sound muddy, despite its reputation. Moreover, many assume that all amplifiers are created equal; in reality, the class of an amplifier (A, D, or hybrid) impacts audio fidelity and maintenance requirements. Class D amps are efficient but may lack the warmth of class A, which can be easier to repair but requires more heat management. Curious about the technical differences? Check out this guide.
Why Do Misconceptions Persist Among Audio Enthusiasts?
It’s often because of marketing hype or simplified advice that overlooks room-specific adjustments. For instance, many overlook the importance of a back box for ceiling speakers to enhance bass response, leading to disappointing results despite choosing quality models. Another common trap is relying solely on wireless gear without considering interference and latency issues, which can undermine synchronization despite high data rates. External factors like room shape or furniture placement significantly influence sound reflection and absorption; neglecting these details can result in an ‘oops’ moment when your setup sounds different from demo environments. For example, I once bought a high-end soundbar, expecting cinema-quality dialogue, but it sounded muffled until I optimized its placement and added acoustic panels. This highlights why comprehensive room calibration is essential. Have you ever fallen into this trap? Let me know in the comments. For those looking to deepen their knowledge, consider exploring how to prevent your subwoofer from walking across the floor, which is often an overlooked aspect of system stability and sound clarity. Ultimately, understanding these nuances helps you avoid costly mistakes and get the most out of your audio investments.
How do I keep my beloved speakers and amplifiers working flawlessly over time?
Maintaining high-quality home audio gear requires more than just occasional dusting. Investing in the right tools ensures your setup remains pristine and performs at its best for years to come. As someone who appreciates the importance of longevity, I rely on precise, purpose-built equipment for routine maintenance and troubleshooting.
First, a quality electronics multimeter has become indispensable in my toolkit. It allows me to check impedance levels and identify wiring issues early, preventing costly repairs. Personally, I prefer a digital clamp meter, which simplifies testing without disconnecting components—a tip I learned from expert insights. Additionally, a contact cleaner spray keeps potentiometers, switches, and jacks free of oxidation, maintaining signal integrity over time.
For more thorough cleaning, I recommend using a microfiber cloth and a gentle, non-abrasive cleaning solution. Regular cleaning prevents dust buildup on speaker cones and grille fabric. When it comes to specialized tools, a speaker driver brush helps remove dust from delicate diaphragms without damage, which is crucial when cleaning vintage or high-end drivers. It’s a small investment that can help preserve sound quality for years.
Ferrite or neodymium magnet testers can help ensure your speaker magnets are functioning correctly, especially in high-end setups. Plus, a thermal gun (infrared thermometer) proves vital in monitoring heat levels of amplifiers and AV receivers—overheating is a common problem that can impair long-term performance. For example, I use my thermal gun periodically to check my receiver’s temperature and prevent shutdowns or damage.
What’s next for maintaining home audio gear as technology advances?
In the future, automation and smart diagnostics will likely play larger roles. Imagine a system that alerts you about component health or suggests cleaning schedules based on usage patterns. Until then, establishing a routine with these specific tools enhances reliability and sound quality. For instance, I set quarterly cleanings with my microfiber cloth and perform impedance checks monthly to catch potential issues early.
If you want to take your maintenance game further, consider trying a dedicated back box to optimize your ceiling speakers’ longevity and performance. These small steps can pay off dramatically in improved sound clarity and system durability. Remember: regular upkeep isn’t just a chore—it’s the cornerstone of a long-lasting, high-fidelity home theater experience.
Lessons That Changed My Whole Approach to Home Audio
- The Devil’s in the Details: I realized that even premium speakers can’t perform their best without precise placement. Over time, I learned that small adjustments in height and angle can dramatically elevate sound clarity and imaging.
- Room Acoustics Are the Hidden Enemy: I used to ignore room shape and furnishings, but I found that adding acoustic panels and soft furnishings at ear level can turn a good setup into a great one, reducing echoes and unwanted reflections.
- Patience Beats Hurry: Rushing to mount speakers without thorough testing only leads to regret. Taking my time with incremental adjustments and listening critically helped me discover that perfect sweet spot.
- Tools Are Your Best Friends: Investing in simple tools like a level, painter’s tape, and a thermal gun transformed my ability to fine-tune my system reliably, ensuring consistent results over time.
- Continuous Learning is Key: I found that following expert guides and trusted resources—like how to optimize ceiling speaker back boxes—kept me ahead, avoiding common pitfalls and saving money in the long run.
Resources That Elevated My Audio Experience
- Back boxes for ceiling speakers: Essential for maximizing bass response, especially in rooms with tricky acoustics. I trust this resource for proper installation tips.
- Basic repair tools: Keeping a set of multimeters and cleaning sprays handy has allowed me to troubleshoot minor issues before they become costly repairs.
- Grounding guides: While not directly related to speakers, proper grounding prevents interference that can muddy your soundstage, a tip I highly recommend.
- Cleaning advice for drivers: Regular maintenance ensures your drivers remain responsive and sound as good as new, preserving your investment over time.
Embrace Your Audio Journey
Getting your speakers perfectly placed might seem daunting at first, but every small step brings you closer to an immersive home theater experience that feels just right. Trust your ears, leverage the right tools, and enjoy the process of discovery. The moment your favorite movie’s dialogue comes into crystal-clear focus or your music feels alive with space—that’s your reward for patience and care. Remember, your home audio is a personal masterpiece waiting to be perfected—so dive in, experiment, and make your living space a sanctuary of sound. How have specific adjustments improved your setup? Share your experience below and inspire fellow audiophiles to elevate their home theater game.