
I’ll admit it: I once spent hours rearranging my living room, trying to hide that hulking subwoofer behind a curtain or tucked away in a corner, only to find that the sound quality suffered or the aesthetics looked worse. That frustrating lightbulb moment hit me hard—why is it so tough to balance great sound with a clean look? If you’ve ever wrestled with whether your subwoofer should be on display or hidden, you’re not alone. Today, I promise to share some straightforward, effective ideas based on personal trial and error about how to hide your subwoofer without sacrificing sound performance.
Discovering the Hidden Power of Your Subwoofer
Is Concealing Your Subwoofer Really Worth the Effort?
When I first set up my home theater, I assumed that hiding the subwoofer would be a minor challenge, maybe just placing it behind a sofa or under a table. But I quickly learned that improper placement and concealment could lead to muffled bass or uneven sound distribution—a real bummer when you’re trying to enjoy movies or music at their best. Interestingly, a study by Sound & Vision highlights that bass frequencies can be surprisingly directional, meaning where you hide your sub can make or break your listening experience. Early on, I made the mistake of trying to hide my sub behind a thick curtain, thinking I was protecting the aesthetics, but that actually dampened its punch and muddled the bass. It was a classic case of sacrificing sound quality on the altar of looks, something I now advise against.
If you’re facing a similar dilemma—wanting your setup to look sleek without compromising sound—stick around. We’ll explore practical tips and clever tricks so you can keep that bass booming and your living room looking tidy. From using furniture strategically to choosing the right placement, you’ll learn how to get the best of both worlds. Ready to transform your space into a harmonious blend of style and sound? Let’s dive in!
Choose the Right Placement for Optimal Sound
Start by positioning your subwoofer away from walls and corners, which can muffle bass when improperly placed. Place it on a stable, elevation-free surface to prevent vibrations. During my setup, I initially tucked mine under a console, but I noticed a significant bass loss. Moving it to the center of the room, away from reflective surfaces, instantly improved sound clarity without revealing it blatantly.
Use Furniture and Decor Strategically
Think of your furniture as a sound cloak. A large sofa or bookshelf can block the subwoofer visually and improve acoustics by diffusing sound waves. I once hidden my sub behind a tall bookshelf, which not only concealed it but also enhanced bass distribution, making the setup both sleek and sonically rich. To prevent unwanted vibrations, consider adding isolation pads beneath your sub—these dampen movement and reduce rattle.
Implement Effective Acoustic Treatments
Rugs, curtains, and wall panels can absorb or scatter sound, making your subwoofer less noticeable acoustically. For example, I used a thick area rug under my sub to tame harsh high frequencies, which also prevented the sub from standing out visually. If your room has problematic echo, adding a rug or wall-mounted panels will help control sound and hide the hardware behind decor.
Optimize Subwoofer Enclosure and Coverings
Invest in custom cabinets or furniture that can conceal your sub without muffling the sound. I repurposed an unused storage ottoman with a removable top, letting me hide the sub completely while still delivering punchy bass. When choosing a covering, ensure it has ventilation to prevent overheating and avoid dense materials that block low frequencies.
Smart Cable Management for a Tidy Look
Neatly run cables along baseboards or under rugs to hide wiring. Use split conduit or cable channels painted to match your walls for a seamless appearance. I tucked most of my cables under a cable raceway, which kept everything concealed and prevented tripping hazards. For a rental or delicate environment, consider adhesive-backed cable clips that secure wires discreetly without damaging walls.
Consider Using Acoustic Panels and Decorative Screens
Decorative fabric-covered panels can serve as visual screens while absorbing sound waves. Position them strategically around the room to divert sound away from areas where the sub might be visible. I placed a fabric room divider behind my seating area, which masked the subwoofer’s position while enhancing room acoustics, demonstrating a solution that’s both functional and stylish.
Experiment with Wireless Subwoofers
If wiring or placement is a hurdle, a wireless subwoofer offers flexible placement options. I once upgraded to a model that connected via Wi-Fi, allowing me to position it centrally without cable clutter. Remember, wireless doesn’t mean sacrificing performance—many units deliver deep, powerful bass while blending seamlessly into your decor.
Leverage Hidden Compartments and Custom Furniture
Some furniture pieces, like coffee tables or storage units, can be adapted to conceal your sub. I modified a hollowed-out coffee table with a vented top to hide my subwoofer, maintaining aesthetic appeal without sacrificing sound quality. Ensure that any enclosure allows sound to project freely to prevent muffling or distortion.
In the world of home audio, many enthusiasts and newcomers alike hold misconceptions that can hinder their setup’s performance. While it might be tempting to believe that bigger, more expensive gear automatically equates to better sound, the reality is far more nuanced. Let’s dig deeper into some prevalent myths and uncover the truths that can elevate your listening experience.
Myth: Higher wattage always means louder and better sound
Many assume that amplifiers with higher wattage ratings will deliver superior volume and clarity. However, this isn’t necessarily true. An amplifier’s power needs to match the speaker’s impedance and efficiency; otherwise, it can lead to distortion or even damage. Overestimating wattage can also cause one to overlook factors like headroom, which is crucial for clean dynamics, especially during peaks. Experienced audiophiles know that a well-matched, lower-wattage amp can outperform a mismatched, high-wattage one.
TheTools That Keep Your Equipment Running Smoothly
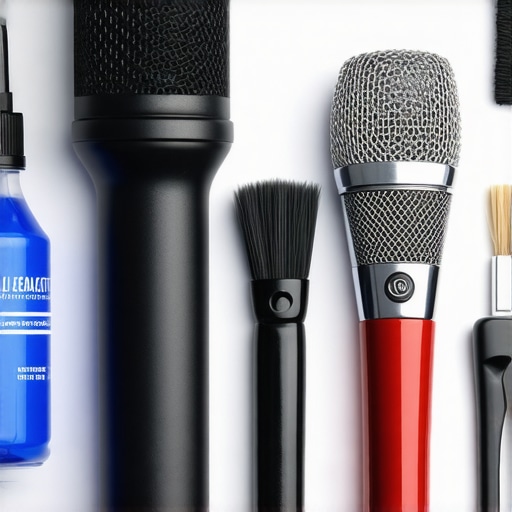
Maintaining your audio equipment isn’t just about cleaning once in a while; it requires specific tools designed for precision and safety. Personally, I swear by a pair of anti-static brushes to gently remove dust from delicate speaker cones without risking damage. These brushes prevent static buildup, which can interfere with analog parts and degrade sound quality over time. For electronic connections, a quality contact cleaner, like DeoxIT, is invaluable for restoring optimal conductivity without leaving harmful residues. I use it regularly on input jacks and switches to prevent crackles and dropout issues.
When it comes to extracting dust from tight spaces inside amps or receivers, I rely on a compressed air canister with a fine nozzle. This method is safer than vacuums, which can generate static or cause unintended displacements. Remember, avoiding vacuum cleaning for speaker drivers protects your gear from damage.
Software Tools for Long-Term Sound Preservation
For digital components and ensuring your software stays optimized, I recommend using audio calibration software like Room EQ Wizard (REW). It’s free and allows you to measure and correct room resonances, giving your system a consistent sound signature over time. With REW, I periodically check my listening environment, adjusting equalization and delays to keep sound quality aligned with my preferences. Regular calibration with a measurement microphone can prevent long-term deterioration caused by acoustical imbalances.
Additionally, firmware updates provided by manufacturers are crucial for fixing bugs, improving stability, and sometimes adding new features. Subscribing to your device’s support page ensures your hardware remains current, prolonging its lifespan and performance.
Routine Maintenance That Pays Off
Performing routine checks—like inspecting cables for wear, cleaning connectors, and keeping vents dust-free—can prevent costly repairs. I schedule a bi-annual maintenance session where I unplug everything, clean all connections with contact cleaner, and check for corrosion or loose fittings. These small steps regularly prevent gradual performance issues that can be hard to diagnose later.
Preparing for Future Upgrades and Scaling
If you’re planning to scale your system or upgrade components, consider tools that facilitate compatibility tests. For instance, a digital multimeter helps verify impedance and continuity, ensuring your new amp or speakers will work seamlessly. Investing in quality cable testers and impedance meters now saves headaches when expanding or replacing gear later.
How do I maintain my home audio setup over time?
Consistent maintenance with the right tools—like specialized brushes, contact cleaners, and calibration software—is key to preserving optimal performance. I suggest scheduling regular inspections and calibration sessions to catch issues early, avoiding a long-term decline in sound quality. As the trend in home audio advances, expect more integrated diagnostic tools, possibly utilizing smartphone apps to streamline maintenance tasks. In the meantime, I recommend trying out the calibration process with REW, which offers a step-by-step guide to ensure your setup remains as vibrant as the day you first set it up.
By investing in these targeted tools and routines, you’ll ensure your audio gear continues to deliver immersive sound for years. Remember, a little proactive care today can prevent major repairs tomorrow—so gear up with the right equipment and keep your home audio performing at its best.
< >
>
What No One Tells You About Hidden Sound Systems
Over the years, I learned that the secret to a sleek home theater isn’t just about buying the right gear but also understanding the nuanced dance of placement and concealment. My biggest revelation? That concealment isn’t a trade-off—it’s an art form that, when executed thoughtfully, enhances both aesthetics and acoustics. Trust me, mastering this balance can elevate your listening experience beyond expectations.
The Hidden Lessons That Changed My Setup
- Concealing isn’t just about hiding: I realized that well-chosen furniture or decor can turn a bulky subwoofer into a visual feature that complements the room’s style.
- Placement impacts perception: Moving my sub closer to the center of the room, even behind a decorative screen, made a big difference in sound clarity—proving that strategic positioning can be both discreet and effective.
- Acoustic treatments matter: Adding soft furnishings like rugs or wall panels not only improved sound quality but also created opportunities to hide hardware naturally within the room’s design.
My Favorite Tools for a Discreet Audio Setup
- Acoustic panels: These are perfect for masking speakers while absorbing unwanted echoes, making your setup both quiet and stylish.
- Cable management accessories: From cable raceways to under-rug tubing, these keep wires out of sight and prevent clutter.
- Strategic furniture placement: Using bookshelves or couches to shield the subwoofer not only hides it but also enhances sound diffusion.
Empower Your Space, Elevate Your Sound
Designing a discreet yet powerful audio environment is less about hiding and more about harmonizing your gear with your decor. With patience and the right tools, you’ll discover that your room can be both breathtakingly beautiful and sonically immersive. Remember, a well-concealed subwoofer doesn’t mean you have to compromise on bass—it’s about clever integration.