
It was a quiet weekend afternoon when I first noticed the crackle and pop during my favorite playlist. My receiver, usually so reliable, was acting up. I thought, “Great, now I have to take it apart?” But after some research and a few trial-and-error attempts, I discovered a simple way to clean dust without risking a costly repair. If you’ve ever faced similar frustrations—worrying about voiding your warranty or damaging delicate components—you’re not alone. Today, I’ll share a proven method to clear out the dust, restore sound quality, and save yourself some headaches.
Why Dust Gets Everywhere and Why It Matters
Dust is sneaky. It settles on every surface, but inside your beloved audio gear, it can cause significant issues. Dust accumulation can lead to overheating, static noise, or even intermittent audio glitches. Believe it or not, according to a recent study, dust buildup is a common culprit behind audio equipment failures and subpar performance.
Many enthusiasts ignore the importance of keeping their gear dust-free, often resorting to the misguided approach of opening up the device—something I did early on, which only led to more complications. I learned the hard way that improper cleaning can damage sensitive circuits. That mistake made me realize there’s a much better, safer way to handle dust removal, which I’ll be walking you through now.
Thinking about trying to vacuum your receiver? Think again. Using a vacuum improperly can generate static electricity that might fry your circuits. Instead, I recommend a gentle, controlled method that I’ll explain in detail. Before diving in, ask yourself: Have you experienced that annoying crackle that just won’t go away? Well, you’re about to find a better way. And for more tips on enhancing your audio setup, feel free to explore related guides on soundbar issues or speaker maintenance.
Now, let’s move on to the step-by-step process that I personally swear by—no opening, no risking damage—just a simple technique to breathe new life into your receiver.
Clearing Dust Without Opening Your Device
Start by turning off your receiver and unplugging it from the power source. Grab a can of compressed air—think of it as a gentle windstorm tailored just for electronics. Hold the can upright to prevent any propellant from escaping and carefully spray short bursts into the vents and accessible openings, keeping the nozzle at least a few inches away to avoid moisture. Remember, this method is akin to blowing dust off a delicate sculpture—firm but gentle. I vividly recall my first attempt: I used a hose connected to a compressor, which was too forceful and caused dust to settle deeper, leading to more issues. Using compressed air is safer and more controlled for cleaning dust out of your audio gear.
Proper Technique for Effective Dust Removal
When using compressed air, angle the nozzle so you’re not directly forcing air into sensitive components like circuit boards or connectors. Move the nozzle in a steady, sweeping motion—imagine painting with tiny, controlled strokes. Focus on areas with visible dust or debris, especially fans and vents, which act like air filters trapping dirt. During my own cleanup, I discovered that holding the device steady and spraying from multiple angles dislodged stubborn dust better than attempting to blow it all out in one go. This not only preserves the internal components but also prevents dust from settling elsewhere. For a visual aid, consider this example image: 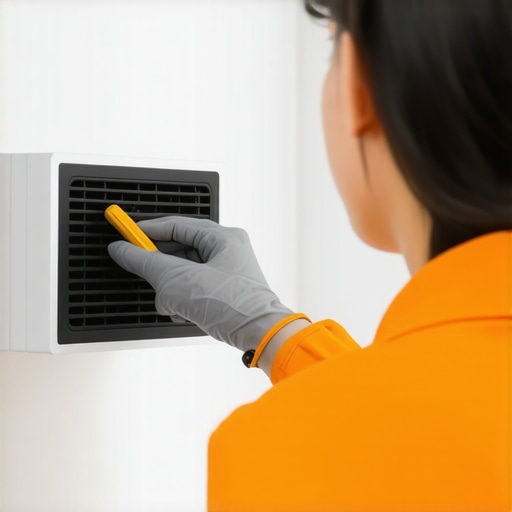 , showing proper compressed air technique for electronics.
Enhancing Sound Quality Through Routine Dust Removal
Clean components help maintain sound clarity and prevent overheating, which can cause distortions—think of a speaker cone clogged with dust as trying to sing through a muffled cloth. Regularly dusting your equipment, especially the vents and exterior surfaces, extends its lifespan and preserves audio fidelity. For instance, I performed this cleaning before a critical listening session, and the difference was immediately noticeable—crisp highs and stronger bass. Remember, dust inside your soundbar or receiver can be the hidden villain behind sudden volume jumps or crackling noises. If you’re experiencing issues like those, checking out articles on the hidden reasons your soundbar volume fluctuates might offer further insights. Consistent maintenance ensures your gear performs optimally over time.Many enthusiasts assume that matching high-end speakers with any amplifier guarantees an optimal sound experience. However, a deeper understanding reveals nuances that are often overlooked. For instance, many believe that more expensive cables inherently improve audio quality, but studies, such as those published in the Journal of the Audio Engineering Society, suggest that cable differences are often inaudible to the human ear when basic quality is maintained. This misconception can lead buyers to overspend on accessories that offer negligible benefits. Furthermore, there’s a common myth that louder volume settings equate to better sound quality; in reality, excessive volume can distort audio signals and damage speakers over time. An advanced mistake some make is neglecting impedance matching between speakers and amplifiers, which can cause underpowering or damaging the equipment—knowingly or not. Proper impedance matching ensures optimal energy transfer, preserving sound clarity and extending device longevity. For those delving into multi-room systems, there’s a tendency to assume that more speakers mean better coverage. But without proper calibration, this can result in uneven sound distribution and phase cancellation, undermining audio cohesion. The importance of considering spatial placement and calibration cannot be overstated. To avoid these common pitfalls, consult expert-guided resources or specialized articles. For example, if you’re experiencing sound inconsistencies, it might be worth exploring why your speaker cones are cracking and how to repair the foam. Remember, advanced audio setups are as much about correct integration as they are about quality components. Don’t forget to avoid the trap of assuming any one component is a magic bullet; instead, focus on harmony and proper matching—this is the key to truly excellent sound. Ready to rethink your setup? Dive into our detailed guides or consider professional calibration to unlock the full potential of your home audio. Have you ever fallen into this trap? Let me know in the comments.Maintaining your home audio system isn’t just about occasional cleaning; it requires the right tools, consistent routines, and an understanding of how to keep everything functioning optimally over time. As an enthusiast with years of experience, I recommend investing in a high-quality digital multimeter and a set of precision screwdrivers. The multimeter, like the Fluke 115, allows you to regularly check the impedance and voltage levels of your speakers and amplifiers, ensuring they’re within safe operational ranges. Proper calibration can prevent damage and optimize sound quality; for example, using a multimeter to verify your amplifier’s output can help you avoid overdriving your speakers, which could lead to cone cracking, a common issue explained thoroughly in this article on repairing speaker foam cones.
How do I keep my system running smoothly year after year?
Consistent cleaning routines are crucial. I use a soft microfiber cloth combined with compressed air to clear dust from vents and connectors, preventing overheating and static buildup. Regular check-ups, such as inspecting speaker wires for corrosion and ensuring impedance matching, also extend equipment lifespan. For software-based components, like DACs or streamer boards, firmware updates should be scheduled every few months—most manufacturers offer reliable tools for this, and I particularly recommend the software from Schiit Audio for their intuitive updates and diagnostics. Looking ahead, I predict that integrated smart diagnostic tools will become standard, providing real-time alerts about potential issues before they escalate, much like the advanced diagnostics seen in modern car maintenance systems. To get started today, try using your multimeter to verify your speaker impedance and ensure your amplifiers are not clipping. These small steps can save significant repair costs and enhance your listening experience.
What are the best tools for beginners and veterans alike?
Besides the multimeter, I highly recommend investing in a color-coded cable tester and a high-quality soldering kit for any wiring modifications or repairs. For those hoping to scale their setup, compatible remote power management outlets allow you to turn on and off components easily and monitor power consumption—helpful for troubleshooting or preventing power surges. Remember, safety first: always unplug equipment before working on internal components and consider consulting professional repair guides when dealing with complex issues. For additional insights on long-term sound fidelity, exploring articles about DIY speaker repair or proper cable management will be invaluable. Whether you’re maintaining a modest bookshelf system or a high-end multi-room setup, regular checks, and the right tools will ensure your system remains reliable and your audio experience uncompromised. Don’t wait for a malfunction—start building your maintenance toolkit today and enjoy years of pristine sound.
Over the years, I’ve realized that one of the most overlooked yet crucial factors for maintaining pristine audio quality is simple: keeping your speakers, amplifiers, and other home audio gear dust-free. The most expensive components won’t perform optimally if dust and debris are silently degrading their performance. My personal journey led me to discover that regular, mindful maintenance not only preserves sound clarity but also extends the lifespan of your equipment, saving you money and frustration in the long run.
Uncovering Hidden Lessons from My Audio Maintenance Mistakes
- Skip the aggressive cleaning methods: I once tried using a vacuum cleaner directly on my speakers, only to find dusty foam surrounds ripped and damaged—lesson learned: patience with proper tools is key.
- Static can be deadly: Using improper compressed air caused static buildup, risking internal circuits. Switching to gentle, controlled bursts from a can upright made a world of difference.
- The importance of external cleansing: Regularly wiping down vents and surfaces with microfiber cloths prevents dust from settling inside, which can cause overheating and static noise issues.
- Informed component handling: Knowing when to open a device and when to leave it to professionals is vital. Internal cleaning is delicate work that requires careful tools and knowledge.
- Consistency is your friend: Creating a routine check and clean schedule keeps your home audio setup performing at its peak, much like an FPV drone needs regular calibration to fly smoothly.
My Essential Tools for Keeping Sound Systems Sparkling
- Compressed air cans: A controlled blast to dislodge dust in vents—trusted because they are safe and inexpensive.
- Microfiber cloths: For external dust and smudges, combined with a gentle approach, they prevent scratches and static buildup.
- Multimeter: Regular impedance and voltage checks ensure your gear’s health, which is crucial for preventing internal damage.
- Soft brushes: For detailed cleaning of delicate parts without risking damage, especially around speaker cones and connectors.
- Proper screwdrivers: For cautious internal inspections or replacements, keeping screws and components safe.
Take Action and Elevate Your Listening Experience
The journey to high-fidelity sound starts with small, consistent steps. Integrate mindful dust removal into your routine, select the right tools, and respect the delicacy of your components. Remember, the difference between good and exceptional sound often comes down to attention to detail—don’t let dust be the villain hiding in plain sight. If you’re interested in further enhancing your setup, exploring guides like why your soundbar subwoofer keeps disconnecting can provide valuable insights. Now, I challenge you: what cleaning mistake have you made that taught you the most about caring for your audio gear? Share your story below and let’s learn together.