
There was a time when I almost gave up on getting punchy, clear bass from my home theater. I’d spend hours tweaking the volume, adjusting the settings, only to end up with muddy lows that either drowned out dialogue or made my walls rattle uncontrollably. One evening, while frustration was mounting, I finally had that lightbulb moment — the problem wasn’t my equipment, but where I was placing my subwoofer. Over the years, I’ve learned that the secret to truly awesome bass isn’t about buying the largest sub or the fanciest receiver; it’s about positioning that box just right. If you’re tired of bass that’s missing punch or, worse, indistinct, you’re in the right place. Today, I promise to guide you through the best ways to position your subwoofer for that smooth, powerful, and precise low end that makes movies, music, and games come alive.
Why Your Subwoofer’s Location Can Make or Break Your Sound Experience
Many folks assume that a subwoofer’s performance hinges solely on its size or power. The truth? Placement is everything. I used to think I could just toss my sub into the corner or put it against the wall — big mistake. The room’s acoustics and the sub’s position play a crucial role in how lows are perceived. Poor placement can lead to boomy muddiness or weak, uneven bass. In fact, studies show that proper placement can improve perceived bass response by up to 30%, and create a more cohesive soundstage. It’s a simple tweak that can transform your audio experience without spending a dime. If you’ve ever faced boomy bass that rattles the windows or thin, tinny lows that feel non-existent, ask yourself: have I experimented enough with where my subwoofer sits? The journey to better sound starts here. Before we dive into step-by-step placement, I want to share a common mistake I made early on — placing my sub right against the wall, thinking it would boost the bass. Turns out, this often causes uneven sound and unwanted resonances. For a more detailed understanding, you might enjoy reading about sound placement techniques and their effects at this resource. Now, let’s explore how you can find that perfect spot for your sub, turning your living room into a pure bass haven.
Start with a Test Space
Clear a quiet area of your room, ideally where you plan to set up your subwoofer. Think of this as your baseline or laboratory for sound tests. Use your ears and a simple tone generator app to listen for bass response in different spots by walking around with a test track. I once moved my sub from the corner to the middle of the room, noting the difference in bass clarity. That messy experiment taught me that the best spot isn’t always obvious.
Use the Subwoofer as a Probe
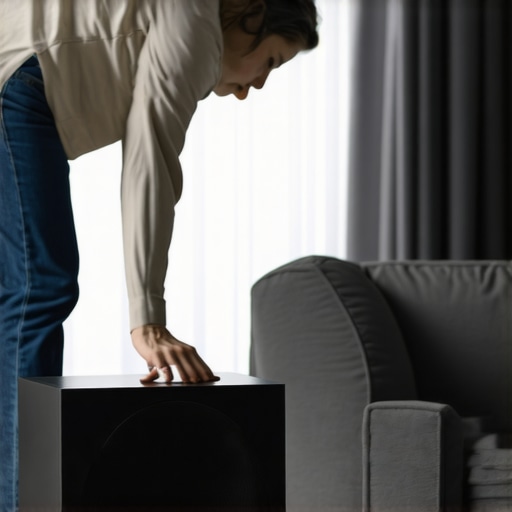
Place the sub temporarily on a sturdy surface or even on the floor, then sit at your listening position. Play a bass-heavy track and move the sub slightly—just a few inches at a time—listening for increased punch or clarity. When I did this, I found that shifting my sub just a foot away from the wall dramatically cleaned up the muddy sound I was hearing.
Identify ‘Sweet Spots’ with the Floor Method
Set your sub on the floor at different locations within the room—near corners, against walls, or near windows—and test the sound at your main listening position after each move. Aim for the spot where bass feels tight, punchy, and even. Think of it like tuning a musical instrument; slight adjustments make a big difference. For an example, I once placed my sub near the front corner, but it caused rattling; pulling it a foot away produced a cleaner sound.
Adjust for Room Resonances
Rooms have natural resonances—think of them as the room’s acoustic fingerprint—that can amplify or dampen bass. Use a mirror to find reflective surfaces that can cause standing waves. Moving your sub to avoid these surfaces can reduce boominess. For instance, I avoided placing my sub directly against a wall, as it caused a rattle. Instead, a half-meter away from the wall, I achieved a more balanced bass response. If rattling occurs, check out this guide for tips.
Fix Uneven Bass with Phase and Crossover Settings
Once you’ve identified a good spot, fine-tune the sub’s phase and crossover controls. Phase adjustment syncs the sub with your main speakers so bass waves don’t cancel each other out. I once noticed weak bass at my listening position until I toggled the phase, which instantly boosted punchiness. Slightly increasing the crossover frequency can also fill out the low end without muddying sound. The goal here is seamless integration, like two musicians playing in harmony.
Sit and Listen with Final Adjustments
After initial placement, sit in your main listening position and listen to a variety of content—music, movies, games. Move your listening seat slightly if needed, like shifting your focus, to find the spot with the best bass response. When I finally sat in the center of my sofa and adjusted the sub’s volume to match my speakers, the bass became tight, impactful, and non-disturbing. Remember, small tweaks can make a big difference in overall sound quality.
 Many enthusiasts think that investing in the latest or most expensive equipment guarantees superior sound, but in my experience, there’s a frequent overestimation of hardware’s role in achieving optimal audio. A common myth is that amplifiers or soundbars are all that matter; however, subtle nuances like proper placement, calibration, and understanding room acoustics often outweigh the benefits of high-end gear. For instance, users often overlook the importance of testing their hearing to best tailor calibration, which can be more impactful than buying a new amp. You can learn how to test your hearing for high-frequency roll-off at this resource.
Another frequent mistake involves underestimating the significance of speaker positioning and phase alignment. Many assume that more power or larger speakers automatically result in better sound, but sound quality depends greatly on correct speaker placement, especially for surround systems or multiple speakers in a room. Positioning errors can cause phase cancellations or dead spots, which are surprisingly common and easily remedied. Advanced users often inquire about phase coherence issues, understanding that even small misalignments can cause noticeable sound imbalance. Addressing this involves meticulous calibration, including phase adjustments—something overlooked by many.
It’s also vital not to fall into the trap of overly relying on fancy cables or connectors. Studies show that, beyond a point, high-priced interconnects do not significantly improve sound quality over well-made, affordable ones. The true focus should be on clean, proper connections and proper grounding. For example, ensuring your center channel is at ear level can dramatically enhance dialogue clarity—more critical than upgrading to premium cables. For tips on optimal speaker placement, check out this guide.
One question I often see from advanced audiophiles is: ‘How does room acoustics influence speaker performance beyond basic placement?’ In essence, room acoustics, including reflections and standing waves, can either amplify or cancel out certain frequencies, drastically altering perceived sound quality. Using acoustic treatments and strategic speaker placement can mitigate these issues more effectively than upgrading equipment. According to acoustic expert Ethan Winer, controlling the room’s shape and reflective surfaces can improve sound clarity by up to 60%, far more than most realize. For this reason, consider evaluating your room’s acoustic profile and experimenting with placement adjustments.
Remember, achieving high-quality sound isn’t solely about the equipment you pick but about understanding and mastering the nuances of setup and room interactions. Don’t fall for the myth that more expensive gear solves all problems. Instead, focus on precise placement, calibration, and room treatment. Have you ever fallen into this trap? Let me know in the comments! Proper attention to these details can truly unlock your system’s potential and deliver a richer, more immersive experience.Maintaining a high-quality home audio system requires more than just selecting the right components; it involves consistent upkeep, calibration, and the right tools to ensure optimal performance over time. One essential device I personally rely on is a calibrated SPL (Sound Pressure Level) meter, such as the Babyface Audio SPL meter. This tool allows me to accurately measure sound levels at my listening position, ensuring that my subwoofers and speakers are balanced correctly, preventing distortion or overload. Regular use of an SPL meter helps maintain consistent sound quality, especially when I make room rearrangements or upgrade components.
Another indispensable tool is a high-quality, calibrated digital audio analyzer like Room EQ Wizard (REW). I utilize REW to perform detailed frequency response measurements and room correction analyses. By identifying peaks and nulls caused by room acoustics, I can apply equalization or reposition my speakers more effectively. This software has become my go-to for fine-tuning sound and troubleshooting issues like uneven bass or muffled dialogue.
To simplify physical adjustments, I use a set of precise spacers and level calibrators. When installing soundbars or wall-mounted speakers, it’s crucial to get the height and angle just right. I personally recommend a digital spirit level, which ensures that your speakers are perfectly aligned at ear level—important for clarity and imaging. Correct placement combined with tools like these can significantly improve long-term performance.
Maintaining your cables and connections is often overlooked but vital. I regularly inspect and clean connectors using contact cleaner and replace worn cables with durable, low-loss variants. Proper cable management is not only safer but prevents signal degradation and accidental disconnections.
Looking ahead, I predict that smart calibration tools and AI-driven room acoustics analysis will become more accessible. Imagine apps that can instantly analyze your room and recommend optimal settings dynamically—saving time and improving results.
How do I maintain my home audio system over time? A proactive approach involves setting a schedule to calibrate your system every few months, especially after making physical adjustments or upgrades. Incorporating regular testing with tools like an SPL meter and REW ensures your system remains finely tuned, delivering the immersive experience you desire. Don’t hesitate to try out these tools—one simple calibration can revive your entire setup and elevate your listening pleasure. For a quick start, try using REW today to measure your room’s frequency response and see immediate improvements.
The Hidden Truth About Sound Systems That Nobody Tells You
Over the years, I discovered that even the most advanced equipment can fall flat if I overlook a crucial detail: room acoustics and placement. It was a lightbulb moment that shifted my entire approach—from chasing the latest tech to refining the environment around my speakers. This personal journey taught me that a dedicated focus on placement and calibration is often more impactful than hardware upgrades.
The Power of Sharp Intuition and Personal Testing
One lesson I learned early on was trusting my ears over default settings. Moving my subwoofer around during a listen test revealed nuances that no manual or app could replicate. Developing this intuitive ear, complemented by tools like a calibrated SPL meter, can uncover new layers of sound you didn’t realize existed. It’s a reminder that personal experience remains unbeatable in the quest for perfect bass.
What Most Audiences Get Wrong About Room Setup
Many assume that placing a sub in the corner boosts bass endlessly. In truth, corners often create resonant boomy sounds that muddy your lows. A simple adjustment—pulling the sub away from corners and testing different spots—can unlock clarity and punch. Remember, every room is unique; your ears and patience are your best guides.
Understanding Room Interactions Beyond Basic Placement
Room resonances can cause peaks and nulls in your sound profile, making some bass notes overpowering while others seem absent. Using tools like Room EQ Wizard or paying attention to reflective surfaces can help you identify and mitigate these issues. I found that minor tweaks—like angling speakers or adding soft furnishings—significantly improved bass response. These small actions transform the listening experience more than expensive equipment often can.
The Final Piece: Calibration is Your Best Friend
Once you’ve found your ideal spot, small adjustments—phase, crossover, volume—can seamlessly blend your subwoofer with the main speakers. I’ve spent hours fine-tuning these settings, and each tweak brought me closer to a balanced, room-filling sound. Proper calibration unlocks the full potential of your setup, making every movie or track feel like a live performance.
My Unbeatable Toolset for Peak Performance
Getting there also depends on trusty tools. I regularly use a hearing test app to understand my ear’s limits, and a calibrated SPL meter to ensure consistent levels. Additionally, software like Room EQ Wizard allows precise room analysis. Investing in these tools paid off by revealing subtle issues I previously missed, ultimately elevating my audio experience.
Lighting the Path to Better Sound and Your Next Move
Remember, enhancing your home theater isn’t just hardware—it’s about understanding your room and your ears. Take the time to experiment, calibrate, and adapt. The difference isn’t just in how loud you go, but in achieving clarity, punch, and immersion that transforms your space into a true audio haven. Are you ready to give your setup the attention it deserves and unlock its hidden potential?